

Soft, golden, and irresistibly mellow - Oven Roasted Garlic Cloves add a rich, savory-sweet flavor to everything they touch. Here's how to make a batch in the oven (and why you'll want to do it all the time).

If you've never roasted garlic before, you're in for a treat. It turns harsh, pungent cloves into golden, buttery-soft bites with mellow, sweet depth-perfect for everything from mashed potatoes to compound butter.
Roasted garlic is one of the most versatile cooking ingredients you can have in your kitchen. Throw it into casseroles or pizza or vegetables, mash it into potatoes, spread it onto a roll or baguette, massage it onto a roasting chicken, or blend it into a salad dressing. Oh, and roasted garlic compound butter? Total game-changer! The list of ways to use oven-roasted garlic cloves is almost endless.
Jump to:
Whole Bulb vs. Sheet Pan: Which Roasting Method Is Best?
There are a couple ways to roast garlic, but over the years we've shifted away from the traditional whole-bulb method in favor of a simpler, less wasteful sheet pan approach.
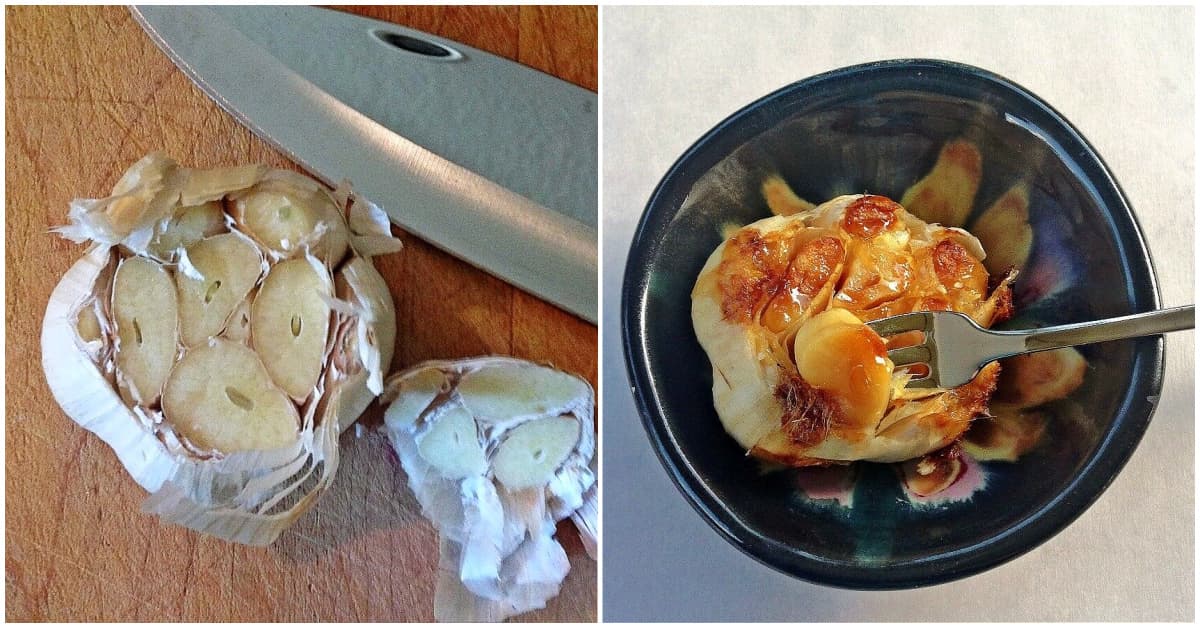
Traditional Whole Bulb Roasting
This is the method most people are familiar with. You slice the top off a whole bulb of garlic, drizzle it with olive oil, sprinkle it with salt, wrap it in foil (or pop it under a clay cloche), and roast it for about an hour. Once it cools, you squeeze the roasted cloves out of the papery skins.
This method works just fine, but it can be messy, and you end up throwing away quite a bit of garlic in the process. We also try to minimize cooking with aluminum foil when possible.
Sheet Pan Roasted Garlic (Our Preferred Method)
These days, we roast individual garlic cloves on a parchment-lined baking sheet-and honestly, we're never going back. It's quicker, neater, and you can roast a big ol' batch all at once. Plus, no foil required.
Sheet pan roasting gives you more control over browning, makes batch cooking easier, and helps avoid that frustrating 'half-stuck-in-the-skin' situation-when you've roasted a whole bulb, only to find the cloves clinging stubbornly to their papery wrappers, forcing you to squeeze or dig them out one by one.
How to Roast Garlic Cloves in the Oven
Ingredients
The ingredients for roast garlic are as simple as it gets: garlic, avocado oil or olive oil, and kosher salt.
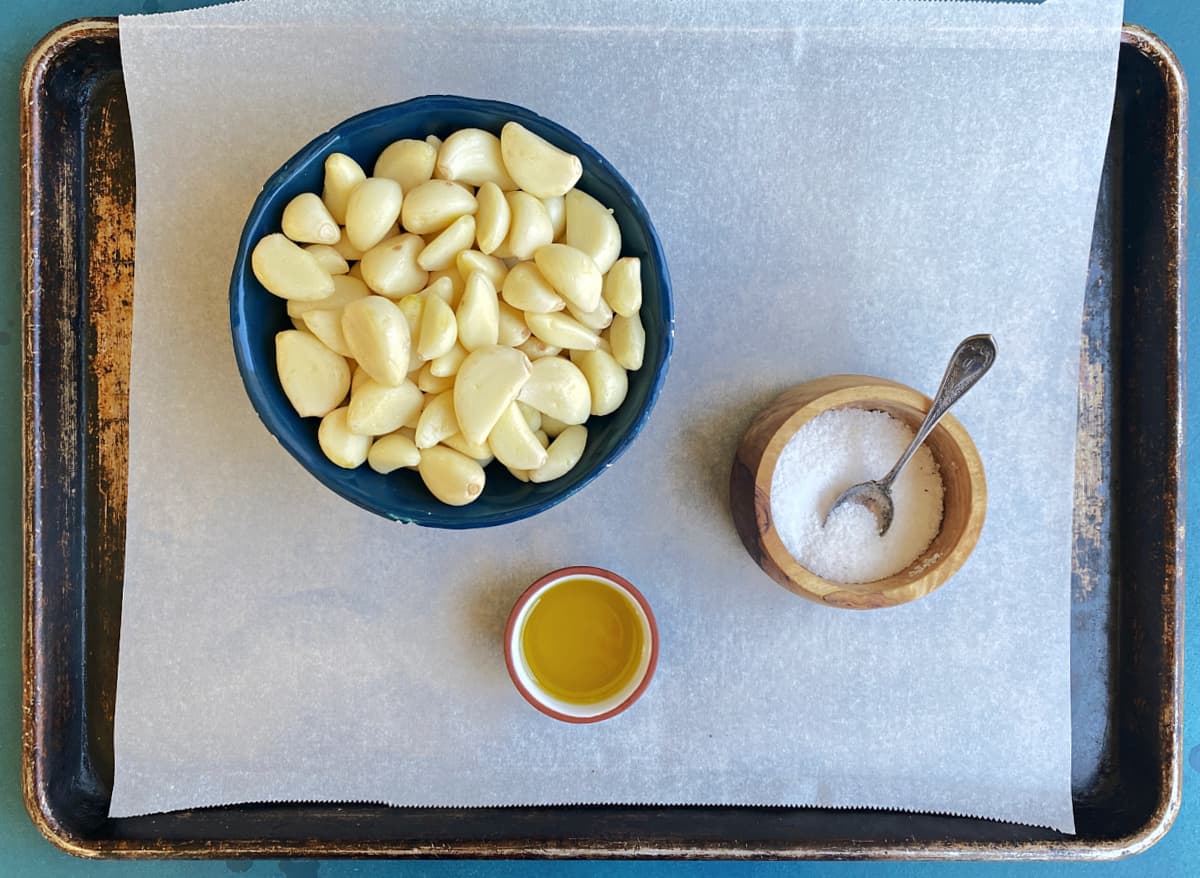
A sheet pan of garlic is a lot of garlic.
PEEL IT AT HOME: Peeling a lot of garlic? Use a silicone garlic peeler tube if you've got one handy.
BUY PRE-PEELED GARLIC: You can usually find prepeeled garlic cloves in bags from Whole foods or Costco. (We've found them in bags as small as 6 ounces, and up to 3 pounds.) You can also buy bags of peeled garlic on Amazon.
Sheet Pan Roasted Garlic Recipe
Preheat oven to 250°F (120°C).
Line a heavy sheet pan with parchment paper or a silicone baking mat. (We slightly prefer parchment, but either works fine.)
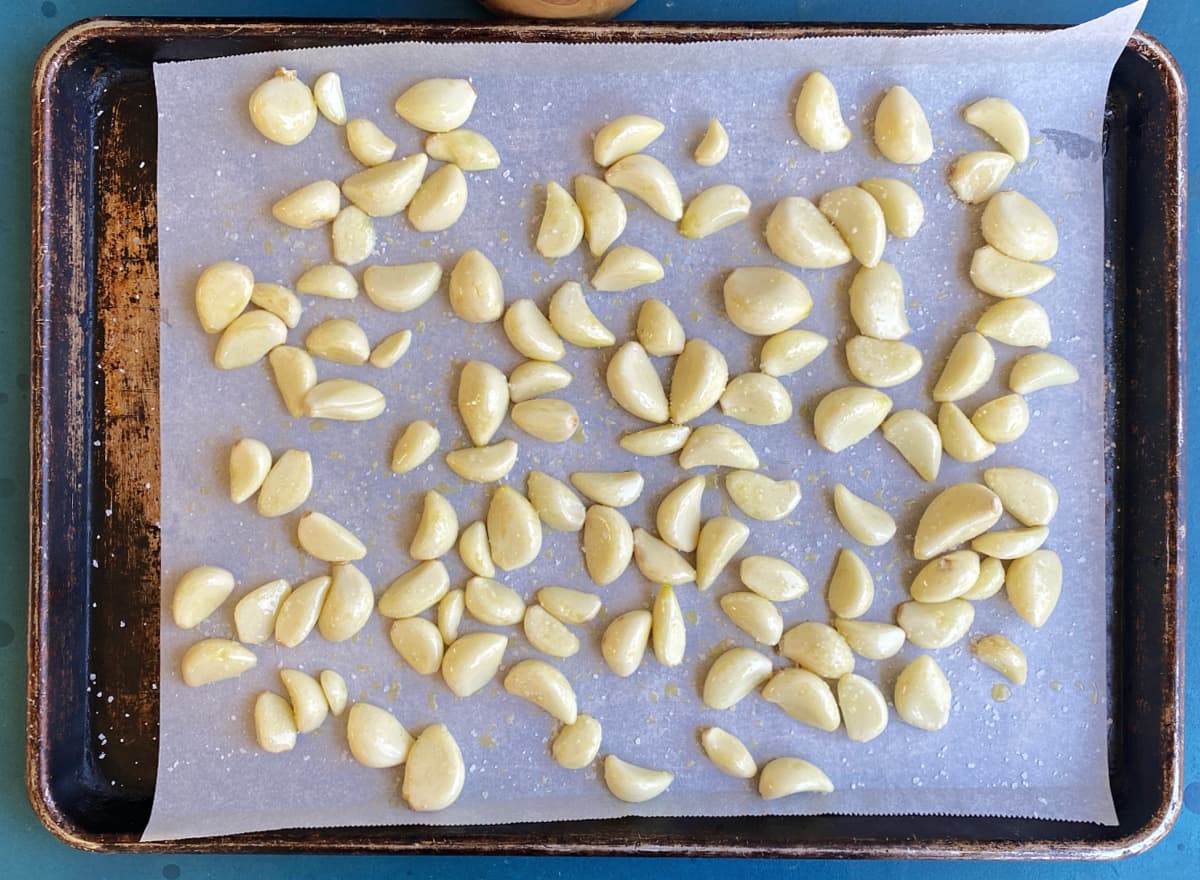
In a small bowl, toss the garlic cloves in avocado or olive oil to completely coat, and then spread the oiled garlic cloves evenly across the prepared baking tray. Sprinkle lightly with kosher salt.
Roast for about 1½ hours or more, tossing every 30 minutes or so, until cloves are golden brown and fork-tender. (Cooking times can vary depending on clove size and variety.)
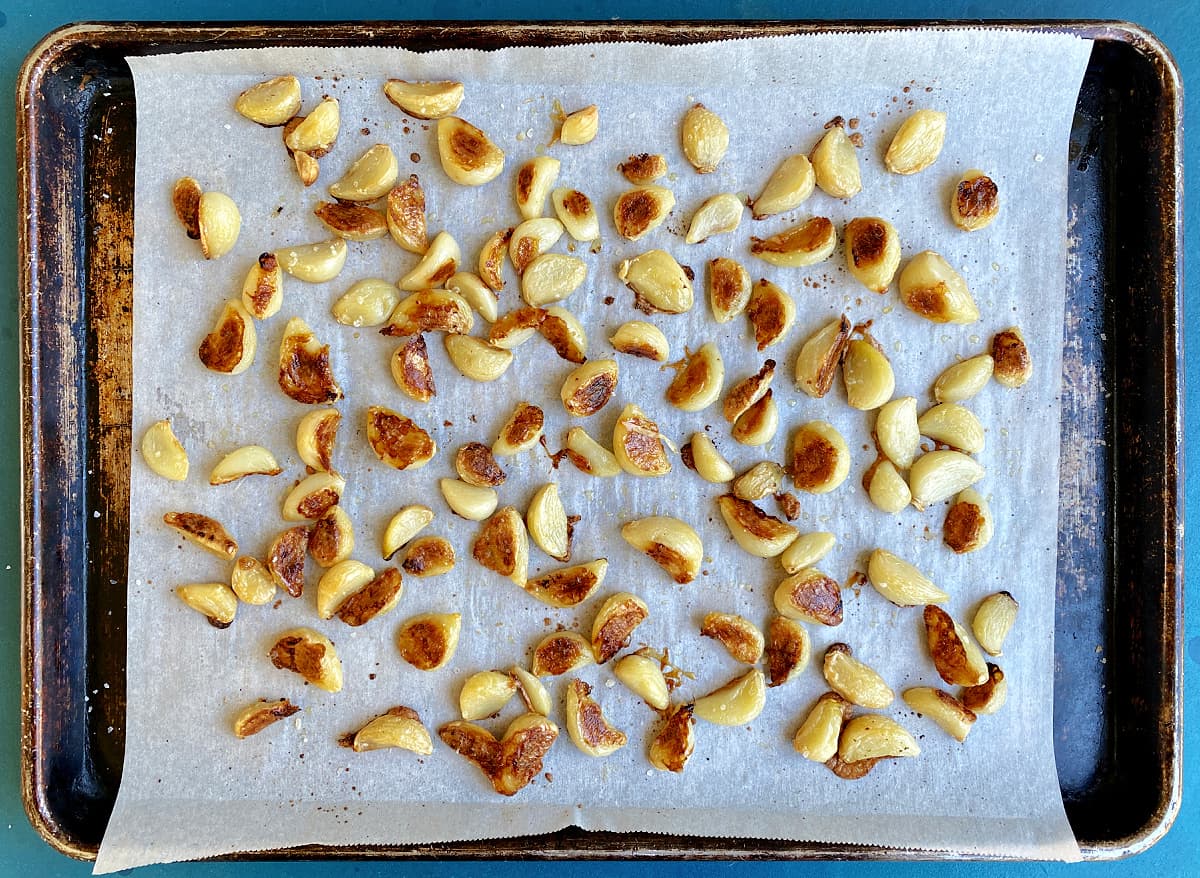
When the garlic cloves are done, remove them from oven and allow to cool completely.
Store roasted garlic in an airtight container.
COOKING NOTES:
- Prepeeled cloves (like the kind you can buy in bulk at Costco) seem to be more prone to browning more easily. The skins do not break down as easily either.
- Want deeper caramelization and a shorter roast time? Bump the oven to 300°F-but keep an eye on those cloves so they don't go too far.
How to Store Roasted Garlic
REFRIGERATOR: Once cooled, roasted garlic can be stored in an airtight container in the fridge for up to one week. If you'd like it to last longer:
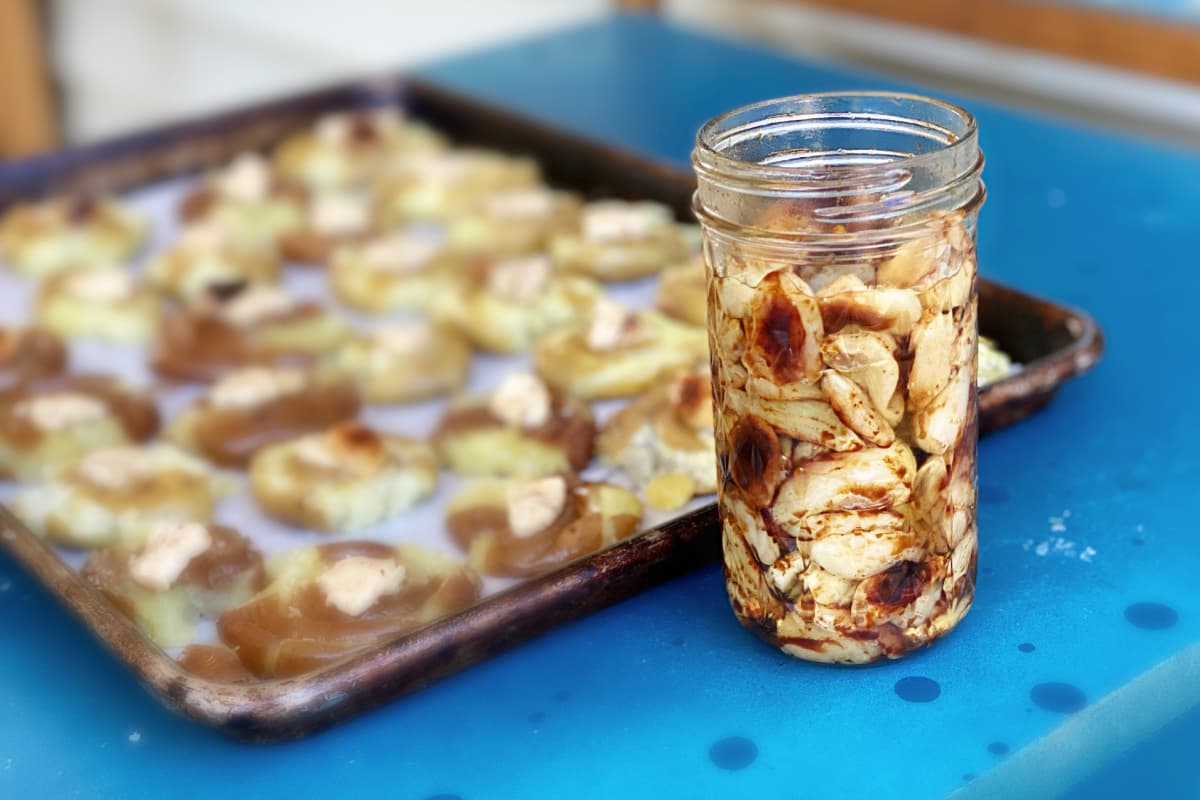
JARRED IN OIL: Roasted garlic cloves can be jarred in olive oil and stored in the refrigerator for up to three weeks.
To do this, place cooled roasted cloves in a clean glass jar and pour in olive oil until the cloves are fully submerged. Use a chopstick or small spoon to release air bubbles. Store in the refrigerator for up to three weeks.
⚠️ Note: Never store garlic in oil at room temperature. Refrigeration is key for food safety.
FREEZER: Roasted garlic freezes beautifully!
To freeze roasted garlic, spread cloves evenly on a sheet pan and place in the freezer for up to one hour.
Place individual frozen garlic cloves in a jar or other airtight container and freeze. Frozen cloves will keep up to three months in the freezer.
You can also mash roasted garlic cloves, portion them into ice cube trays, and freeze them that way. This allows you to use only as much as you need at one time, without exposing the rest.
Garlic-infused Oil
The olive oil you use to store roasted garlic doesn't go to waste; it can be used to sauté vegetables, drizzle over warm bread or pasta, or whisk into salad dressings for an extra layer of garlicky goodness.
Favorite Ways to Use Roasted Garlic Cloves
We add roasted garlic to just about everything-
- Hummus
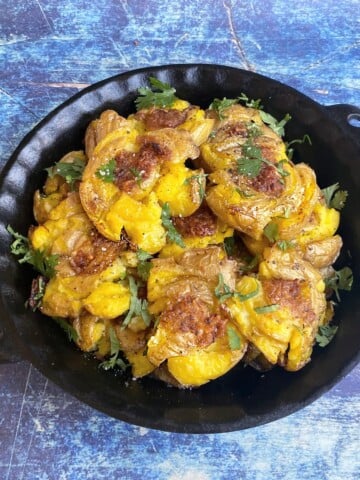
- Mac & cheese
- Rice pilaf
- Casseroles
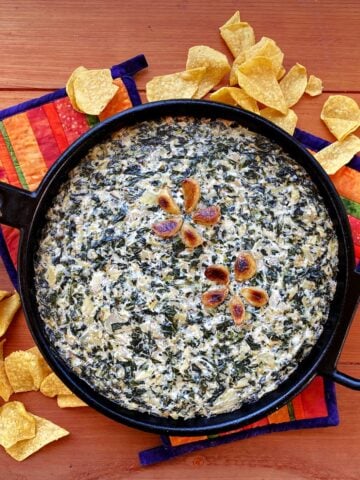
- Artichoke-spinach dip
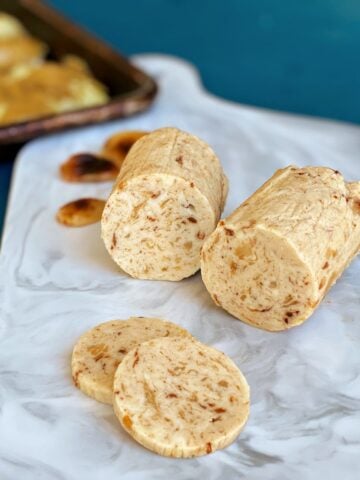
- Compound butter
- Scrambled eggs
- And of course, any dish that needs a quiet hit of garlic without the edge.

Want More Free Recipes?
Subscribe to our newsletter to get family-friendly recipes and cozy living ideas in your inbox each week!
Find us on Instagram, Pinterest, and Facebook, too.

Oven Roasted Garlic Cloves
Equipment
- 1 Heavy Sheet Pan
Ingredients
- 1 pound peeled garlic cloves * estimate only
- ½ tablespoon avocado oil or olive oil
- ½ teaspoon kosher salt
Instructions
- Ingredient Amounts: Using this method, you may roast as few or as many cloves of garlic as you want. The only limitation is that there must be a little space between the cloves on the sheet pan. (We usually roast them about a pound at a time.)
- Preheat oven to 250°F (120°C).Line a heavy baking sheet with parchment or a silicone baking mat. We find that we like the outcome better on parchment; however, any practical difference is negligible.
- In a small bowl, toss the garlic cloves in the avocado oil (or olive oil) to completely coat them.Spread the oiled garlic cloves evenly across the prepared baking tray.Lightly sprinkle garlic cloves with kosher salt.
- Roast garlic cloves for 45-50 minutes, or until garlic cloves are golden brown.Note that cooking times may vary, depending upon the size and variety of your garlic. Start checking after about 35 minutes. Cloves should be caramel in colored and have a soft, creamy texture.
- When the garlic cloves are done, remove them from oven and allow to cool completely.Store roasted garlic in an airtight container.
Notes
Storage
REFRIGERATOR: Once cooled, roasted garlic can be stored in an airtight container in the fridge for up to one week. If you'd like it to last longer: JARRED IN OIL: Roasted garlic cloves can be jarred in olive oil and stored in the refrigerator for up to three weeks. To do this, place the prepared roasted garlic cloves in a jar. Pour in olive oil, and then use a chopstick to nudge the cloves around and allow the oil to flow to the bottom of the jar. Place cooled roasted cloves in a clean glass jar and pour in olive oil until the cloves are fully submerged. Use a chopstick or small spoon to release air bubbles. Store in the refrigerator for up to three weeks. ⚠️ Note: Never store garlic in oil at room temperature. Refrigeration is key for food safety. FREEZER: To freeze roasted garlic, spread cloves evenly on a sheet pan and place in the freezer for up to one hour. Place individual frozen garlic cloves in a jar or other airtight container and freeze. Frozen cloves will keep up to three months in the freezer. You can also mash roasted garlic cloves, portion them into ice cube trays, and freeze them that way. This allows you to use only as much as you need at one time, without exposing the rest.Nutrition
This website provides approximate nutrition information for convenience and as a courtesy only. You are solely responsible for ensuring that any nutritional information provided is accurate, complete, and useful.
Thank you for visiting the Good Hearted Woman. Remember to bookmark this site, and come back soon!
Post Updated July 20, 2021 (Originally published September 13, 2021


Leave a Reply