
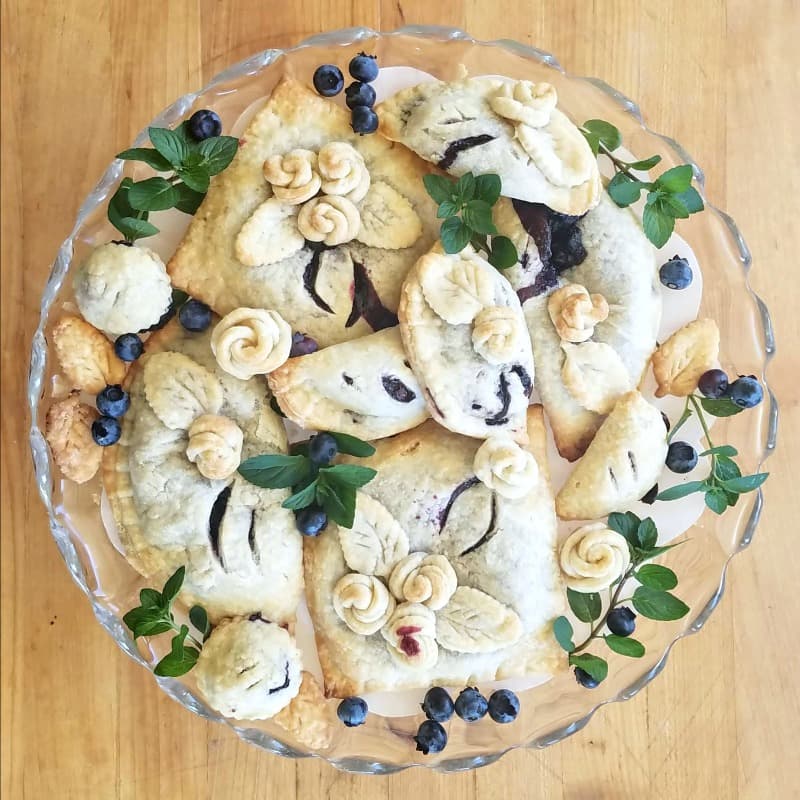
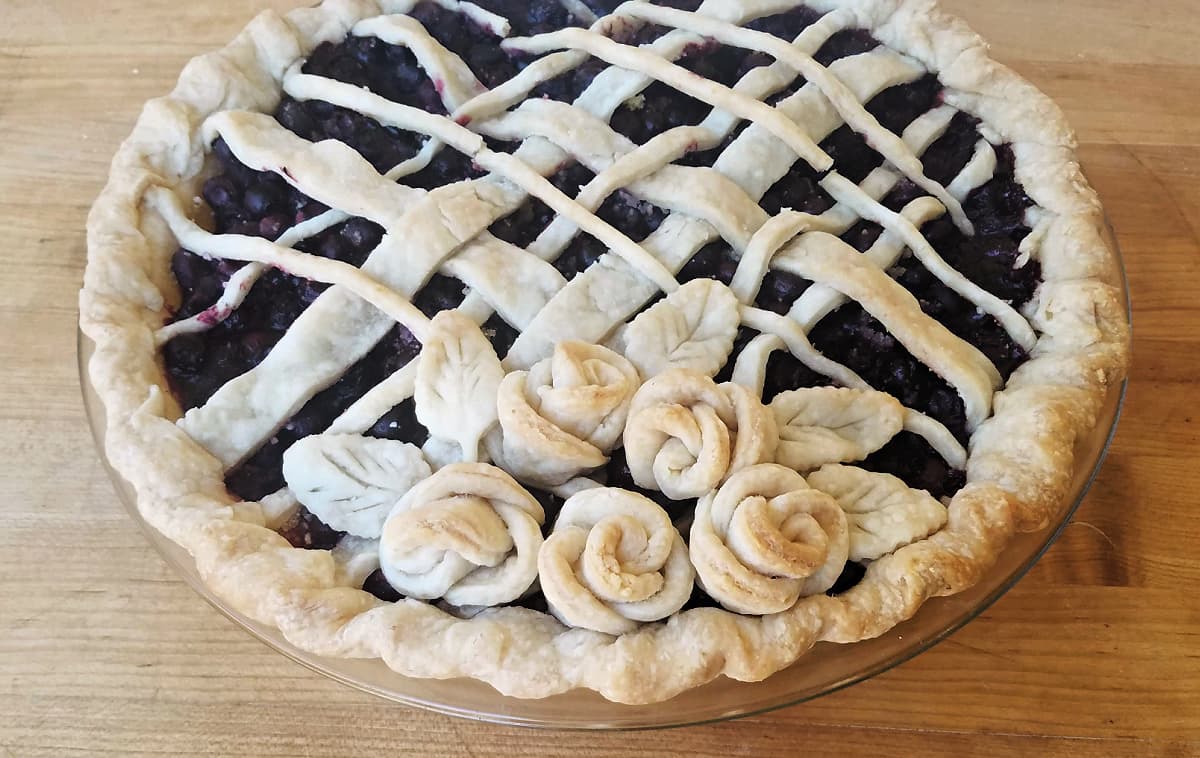
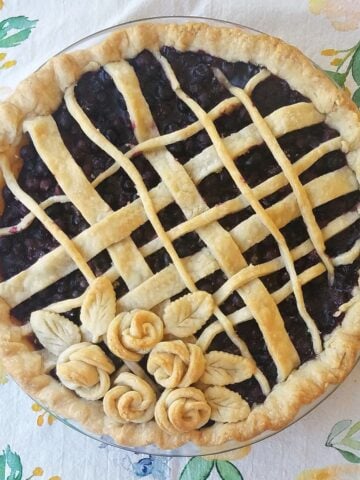
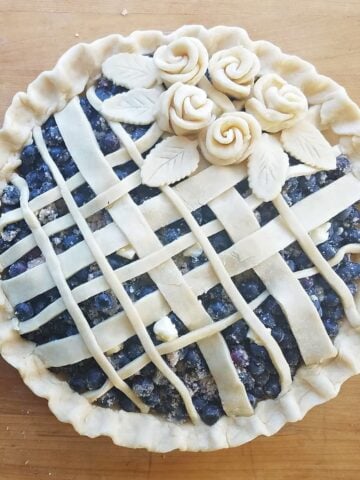
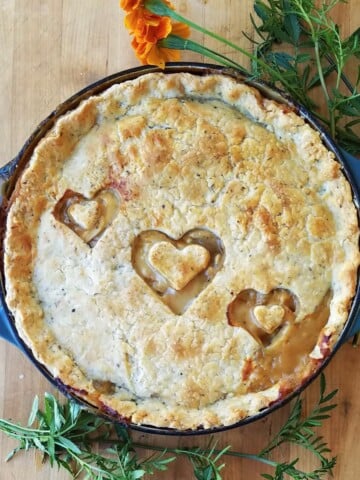
These lovely little pie dough roses are ridiculously easy to make, and will immediately up your pie-making game!
Jump to:
These sweet little pie dough roses are so easy to make that, until an eleventh hour change of heart, this entire post was just another paragraph in my Sweet & Easy Pie Crust recipe.
Made from leftover dough, you can make two of these easy pastry roses in less than a minute. (Really!)
What's the Story on Pie Crust Flowers?
I've always been a little intimidated by people who can make fancy, ornate pies; the kind most of us see only in the front windows of fine European-style bakeries.
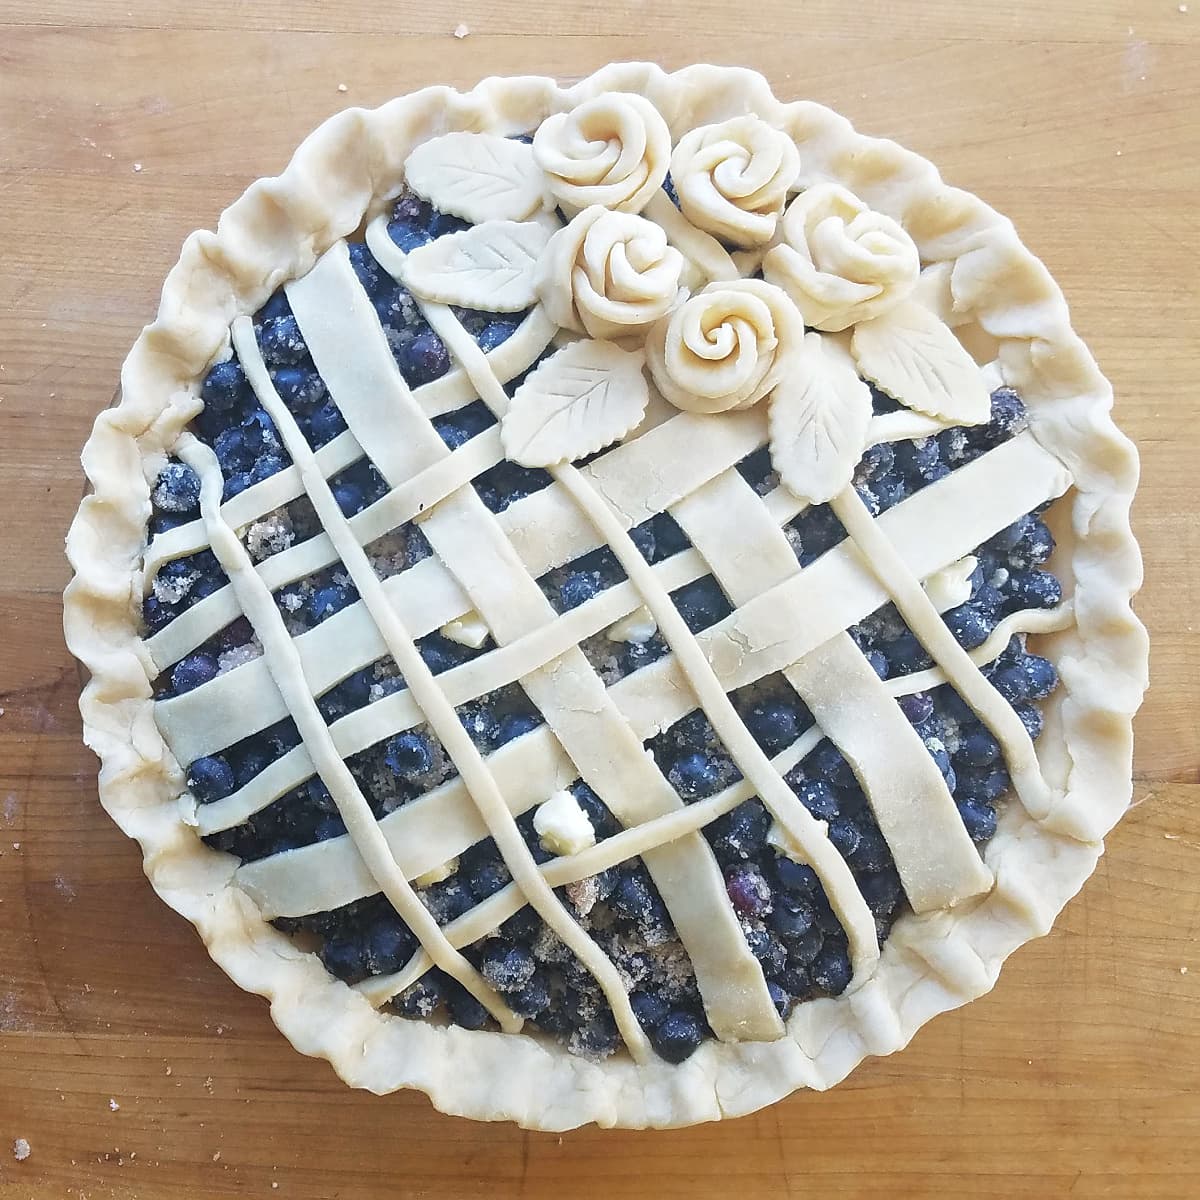
One pie artist whom I particularly admire, Helen Nugent, elevates pie decorating to fine art; festooning her pastries with delicate, carefully braided strands of pastry dough, interwoven and laced with intricate, winding organic details. (If you're looking for some next-level pie-decorating inspiration, check out her amazing work on on Instagram at BatterednBaked.)
While I don't think I'll ever even walk in the same pie-decorating neighborhood as Helen, these simple pie crust flowers have measurably upped my pastry embellishment game.
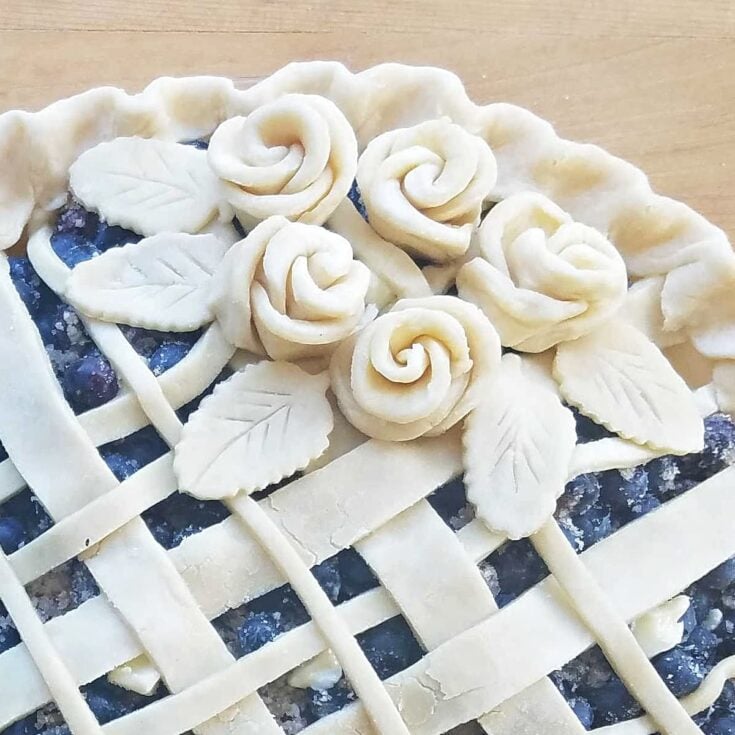
Simple 4-Circle Pastry Rose (Step-by-Step)
Four-circle pie dough roses are so easy to make; it's almost embarrassing. They each take just seconds to form, and immediately raise your pastry aesthetic to a whole new level!
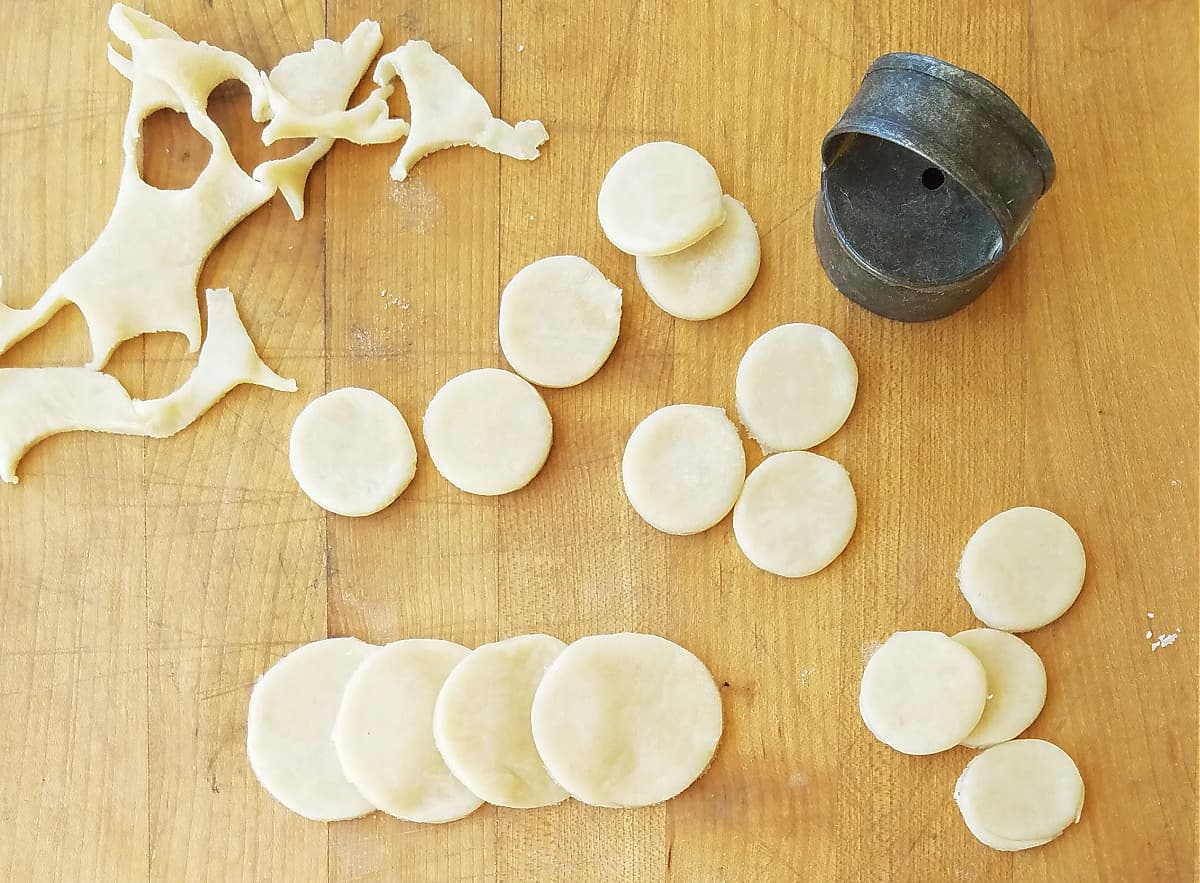
For each pair of pastry roses, roll pastry to about ⅛-inch thick, and cut four pie dough circles of the same size.
Line four pie dough circles up, overlapping each one about ⅓. Gently press the overlap together with your fingertip as shown.
You can add a drop of water between the layers to help them adhere better if you want to, but it isn't necessary.
Beginning with the circle on the bottom, begin carefully rolling up the line of dough circles.
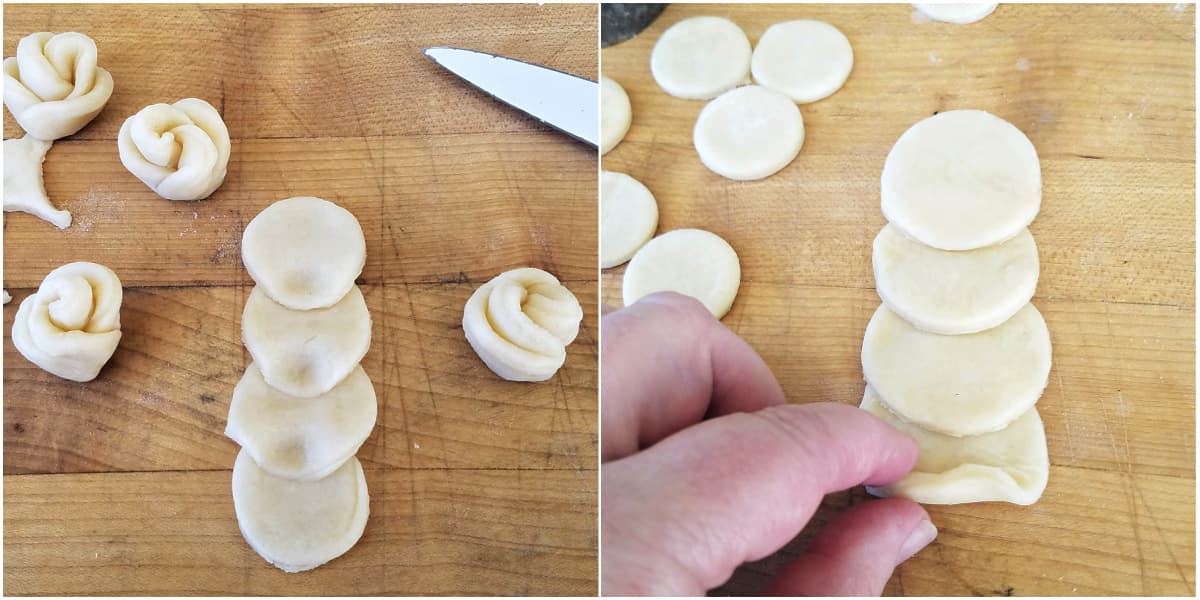
Pinch the center together slightly as you roll the circles together.
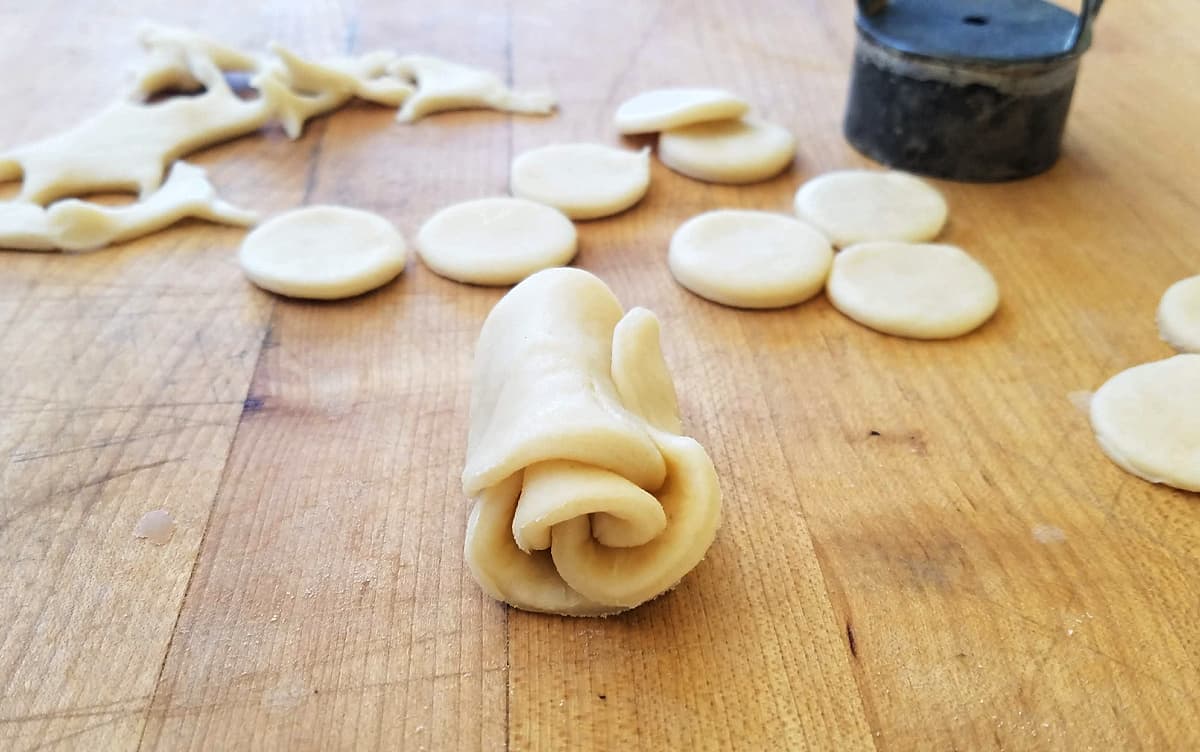
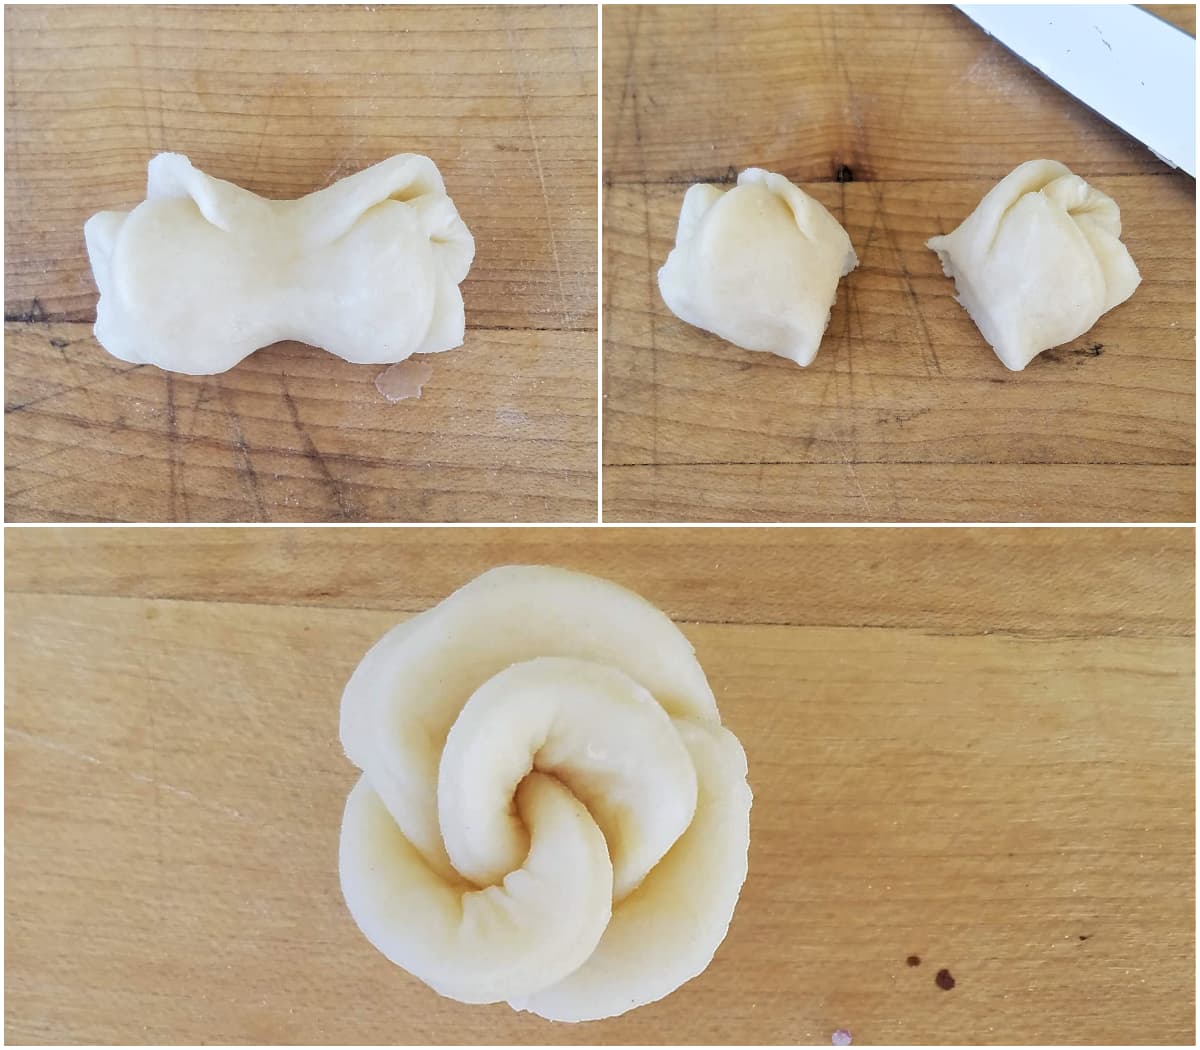
This will result in a barbell-shape that is slightly fanned on the ends.
Using a sharp knife, cut the barbell in half. To complete, gently fan out the rose petals.
I did not invent this wheel: the "4-circle rose" technique one employed by bakers around the world. Fast and easy, bakers use this method to shape and adorn all types of doughs; from beautiful rose-shaped soft rolls (like these drool-worthy Cinnamon Roses!) to the simple pastry decorations shared here.
See! I told you pie dough flowers were super easy to make!
Sizing Pastry Roses
Sizing pastry roses is as easy as changing the size of the dough circles you use: which is to say, smaller circles will yield smaller roses. (I used a biscuit cutter to make the larger circles below, and a melon baller for the smaller ones.)
FAQs & Expert Tips
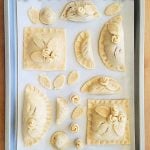
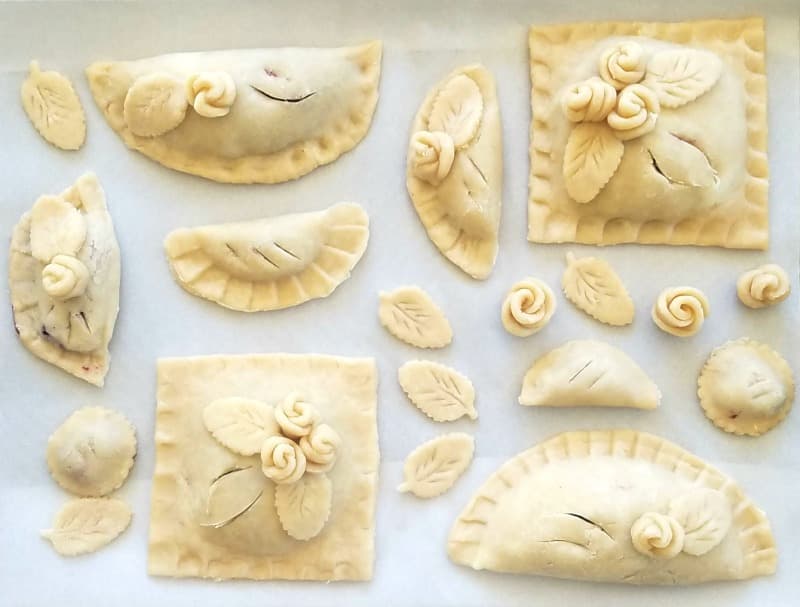
To decorate the pastries shown here, I used a one of the cutters from my Mini Autumn Leaf Cookie Cutter Set. I've had this little set of pastry cutters for over 15 years, and find that it comes in handy for all kinds of projects.
Pastry leaves can also easily be cut freehand, using a sharp paring knife.
Every successful pie starts with great pie dough: be sure to check out my Sweet & Easy Pie Crust recipe! If you're looking for more ideas, here are a few more easy ways to decorate pies (BBC Good Food).
More Pie Recipes
Want More Free Recipes?
Subscribe to our newsletter to get family-friendly recipes and cozy living ideas in your inbox each week!
Find us on Instagram, Pinterest, and Facebook, too.
Easy Pie Dough Roses
These lovely little pie dough roses are ridiculously easy to make, and will immediately up your pie-making game!
Materials
- Fresh pie dough
Tools
- Biscuit cutter or other round cutting tool
- Rolling pin
Instructions
- For each pair of pastry roses, roll pastry to about ⅛-inch thick, and cut four pie dough circles of the same size.
- Line four pie dough circles up, overlapping each one about ⅓. Gently press the overlap together with your fingertip as shown. You can add a drop of water between the layers to help them adhere better if you want to, but it isn't necessary.
- Beginning with the circle on the bottom, begin carefully rolling up the line of dough circles.
- Pinch the center together slightly as you roll the circles together.
- This will result in a barbell-shape that is slightly fanned on the ends.
- Using a sharp knife, cut the barbell in half. Now you have two roses!
- To complete, gently fan out the rose petals.
Notes
You can cut out the pastry circles with just about anything. Bottle caps or a melon baller work particularly well.
Recommended Products
This post may contain affiliate links, including Amazon affiliate links, which means we may receive a commission if you click a link and purchase something that we have recommended. While clicking these links won't cost you any extra money, they do help keep this site up and running.


Thank you for visiting the Good Hearted Woman. Remember to bookmark this site, and come back soon!

Scarlet says
You are a real food artist! Those pie dough roses came out so beautifully! I hope to one day be able to do them as nicley! Thanks for the tutorial.
Jeannette says
Oh, my. That was the BEST set of instructions I have ever seen for making pie dough roses. Anyone who hasn't made it before can definitely visualise how to before doing so! Thanks for such a wonderful technique!
Jennifer West says
You have seriously just ROCKED MY WORLD with this! Who knew that was so simple!? Thank you for sharing!
Renée says
Thank you, Jennifer! I felt the same way the when I first learned how to make them!
Pris says
These roses are beyond cute! You are really very skilled. I will try someday, for sure! Thanks for the idea.
Renée says
Thank you for the kind words!
Cookilicious says
Thanks for teaching this technique..will try
Bintu | Recipes From A Pantry says
These look like so much fun to make and make any pie look so beautiful! I'm definitely going to try making them!