

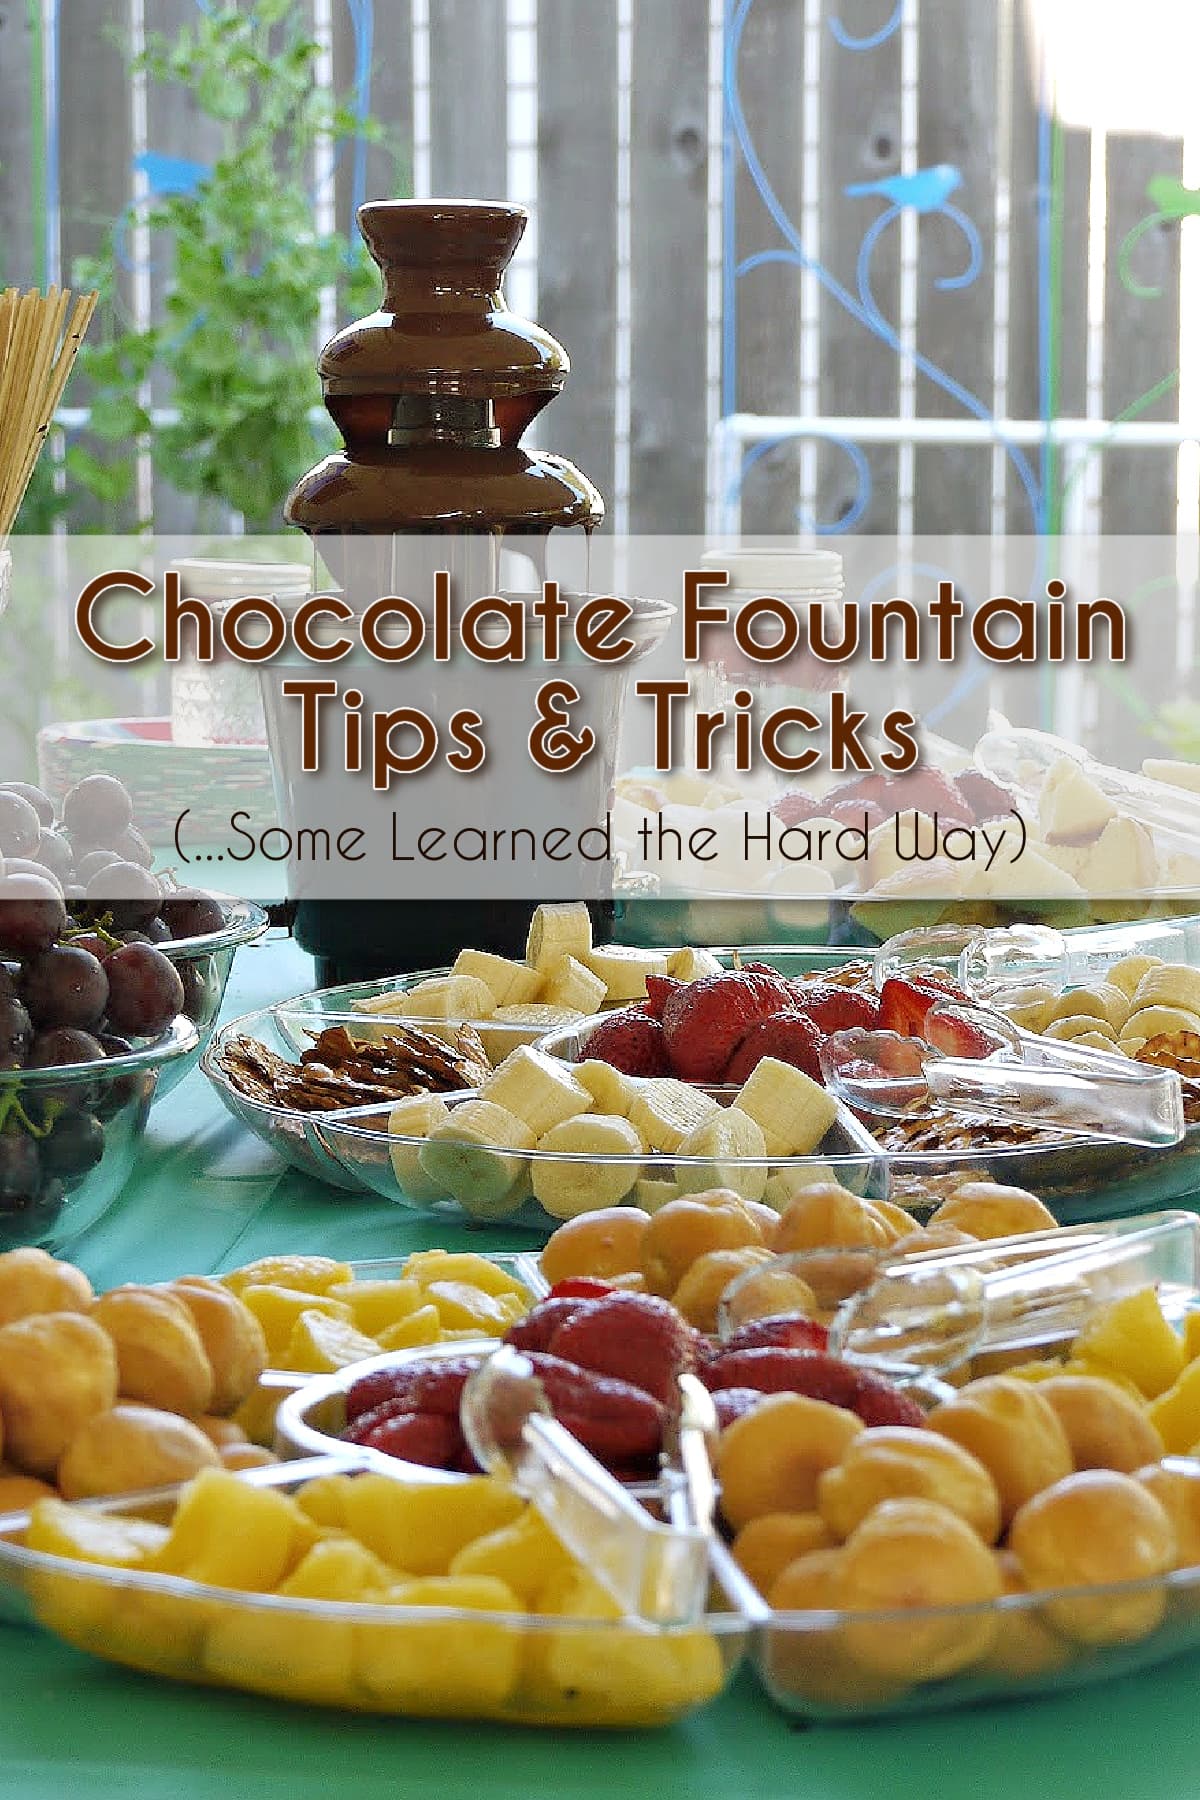
Chocolate fountains are always a hit at parties! They bring a little drama, a lot of fun, and (of course) plenty of delicious chocolate. Here are my best chocolate fountain tips - from setup to cleanup - plus our easy 2-ingredient Chocolate for a Fountain recipe.
Jump to:
- A Sweet Chocolate Fountain Story
- Fountain Setup Tips for a Perfect Flow
- Choosing the Right Chocolate for Your Fountain
- Easy 2-Ingredient Chocolate Recipe for Fountains
- How to Preheat & Prime Your Chocolate Fountain
- Fountain Dipper Ideas Your Guests Will Love
- Choosing the Right Chocolate Fountain for Your Party
- After the Party: Fountain Cleanup Tips
- Leftover Chocolate Ideas & Storage Tips
- Troubleshooting Your Chocolate Fountain
- Chocolate Fountain FAQ: Tips & Answers
- Final Thoughts on Chocolate Fountains
A Sweet Chocolate Fountain Story
Some time ago, we hosted a little celebratory gathering for our graduating senior. Usually when I host a get-together, I get totally carried away making all kinds of party food, but life has been throwing us a few curves lately, and so I decided to keep things simple - and pulled out the chocolate fountain.
Simple, right? Well, yes… but only after a few lessons learned the hard way. Let's just say chocolate fountains are magical, but they're also particular.
Fountain Setup Tips for a Perfect Flow
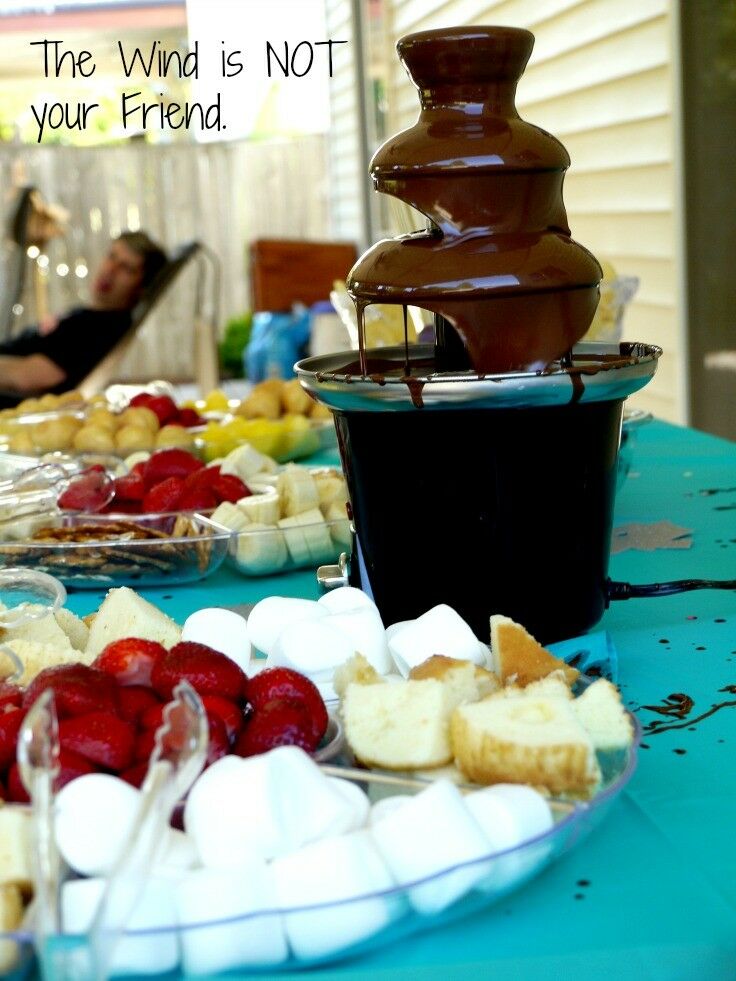
The Wind is Not Your Friend
We did a lot of things right. I'll share those tips in a minute, but this is the most important thing I can tell you about using a chocolate fountain, so if you don't read anything else, read this:
The Wind is not your Friend. Ever.
Even when you think it is only a little wind, and no one will notice. Because guess what? You're wrong! The chocolate will notice. And so will the laws of physics.
Location, Location, Location
Besides the actual chocolate recipe itself, location is the single most important factor in the success or failure of your chocolate fountain. Beyond wind, think about:
- Heating or A/C vents
- Foot traffic and kids' reach
- Curious pets
- Easy access to power (without cords becoming trip hazards)
Once we moved everything inside, everything flowed like Willy Wonka's chocolate river.
Fountain Parts 101
Most chocolate fountains have three main parts: the tower, the auger, and the base. If you're new to your fountain, check the manual (or YouTube!) before the party so assembly isn't stressful.
Level Ground is a Must
Before you ever pour a drop of chocolate into your fountain, make sure it is level. As in, plumb bubble-up level. Chocolate obeys the laws of physics-if it isn't level, the flow will be uneven.
Choosing the Right Chocolate for Your Fountain
Although fancy chocolate is tempting, I've had great success with Tollhouse Semi-sweet Morsels. They're affordable (hello, Costco bulk bags), low in milk solids, and delicious once melted. For a darker option, use Tollhouse dark chocolate morsels.
👉 We haven't tried white chocolate in a fountain yet - if you do, let me know how it goes!
What about candy melts? Skip them. Wilton (the candy melt people themselves!) advise against it - the texture isn't right for fountains, and it can damage your machine.
Easy 2-Ingredient Chocolate Recipe for Fountains
The recipe for chocolate for a fountain is as easy as it gets: chocolate + oil.
That's right: in order to get the chocolate to flow properly, you need to mix it with oil. (I know - you just squinched up your nose and said Eww.) But I stumbled onto the perfect solution: unrefined coconut oil.
→ A ratio of one tablespoon of coconut oil per cup of semi-sweet morsels works perfectly and tastes delicious.
How Much Chocolate Do You Need?
- Most home fountains need at least 3 pounds to run smoothly
- They can usually hold up to 5 pounds at a time
- Always have a second batch prepped for refilling
Heating the Chocolate
Never melt chocolate directly in the fountain! Use one of these methods instead:
- Microwave: Heat the chocolate together with the coconut oil for 40 seconds at a time in the microwave, stirring after each interval and repeating until completely smooth.
- Fondue Pot: You can also prepare the chocolate mixture in an electric fondue pot set on Low, stirring frequently. (This is my preferred method for heating all things chocolate.)
- No Oil Option: If you don't want to hassle with using oil, you can use Wilton Chocolate Pro Fountain Fondue Chocolate. They are no prep, no-fail. They are also mad-expensive, but sometimes the convenience is worth it.
🚫 Important: Never let water touch the chocolate. Even a drop will make it seize.
How to Preheat & Prime Your Chocolate Fountain
- Preheat fountain on "Keep Warm" (or the lowest setting) for at least 5 minutes.
- Pour the melted chocolate mixture into the center of the bowl at the base of the fountain. Set the fountain to flow. The spiral augur inside the tower will draw the chocolate to the top.
- Turn the fountain off briefly, then back on - this clears out air bubbles for smoother flow.
If the flow looks uneven, check:
- Is the fountain level?
- Do you have enough chocolate?
- Try turning it off and back on (like resetting Wi-Fi!).
Every machine is a little different: adjust the fountain speed and temperature so that the chocolate flows smoothly and freely, but it still remains rich and thick. Test out a few dippers (in the name of science!) to make sure everything is working the way you want.
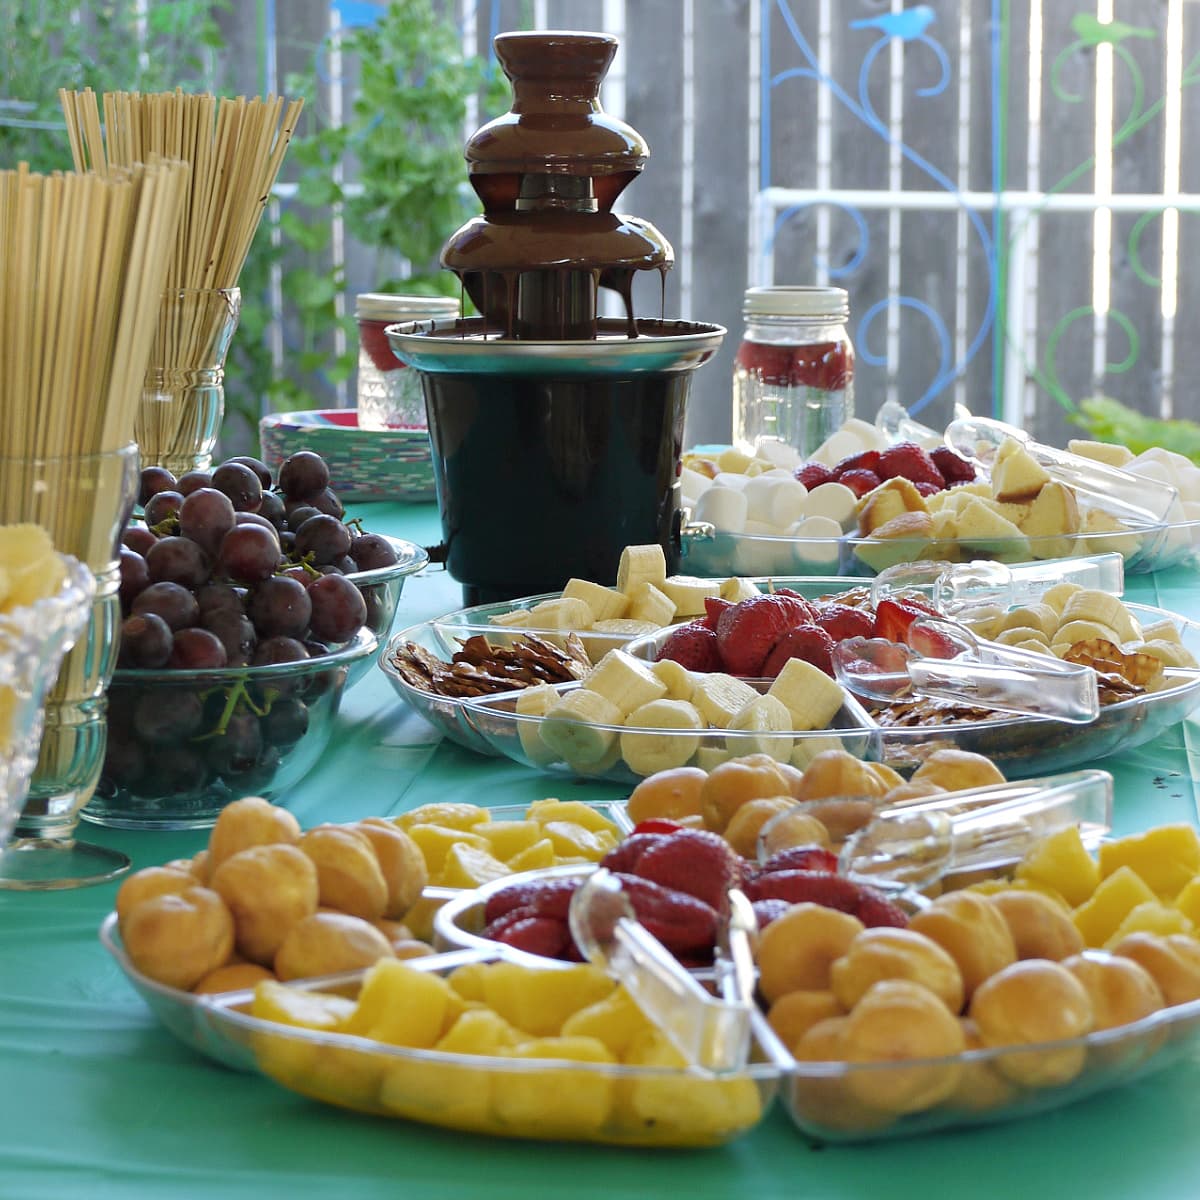
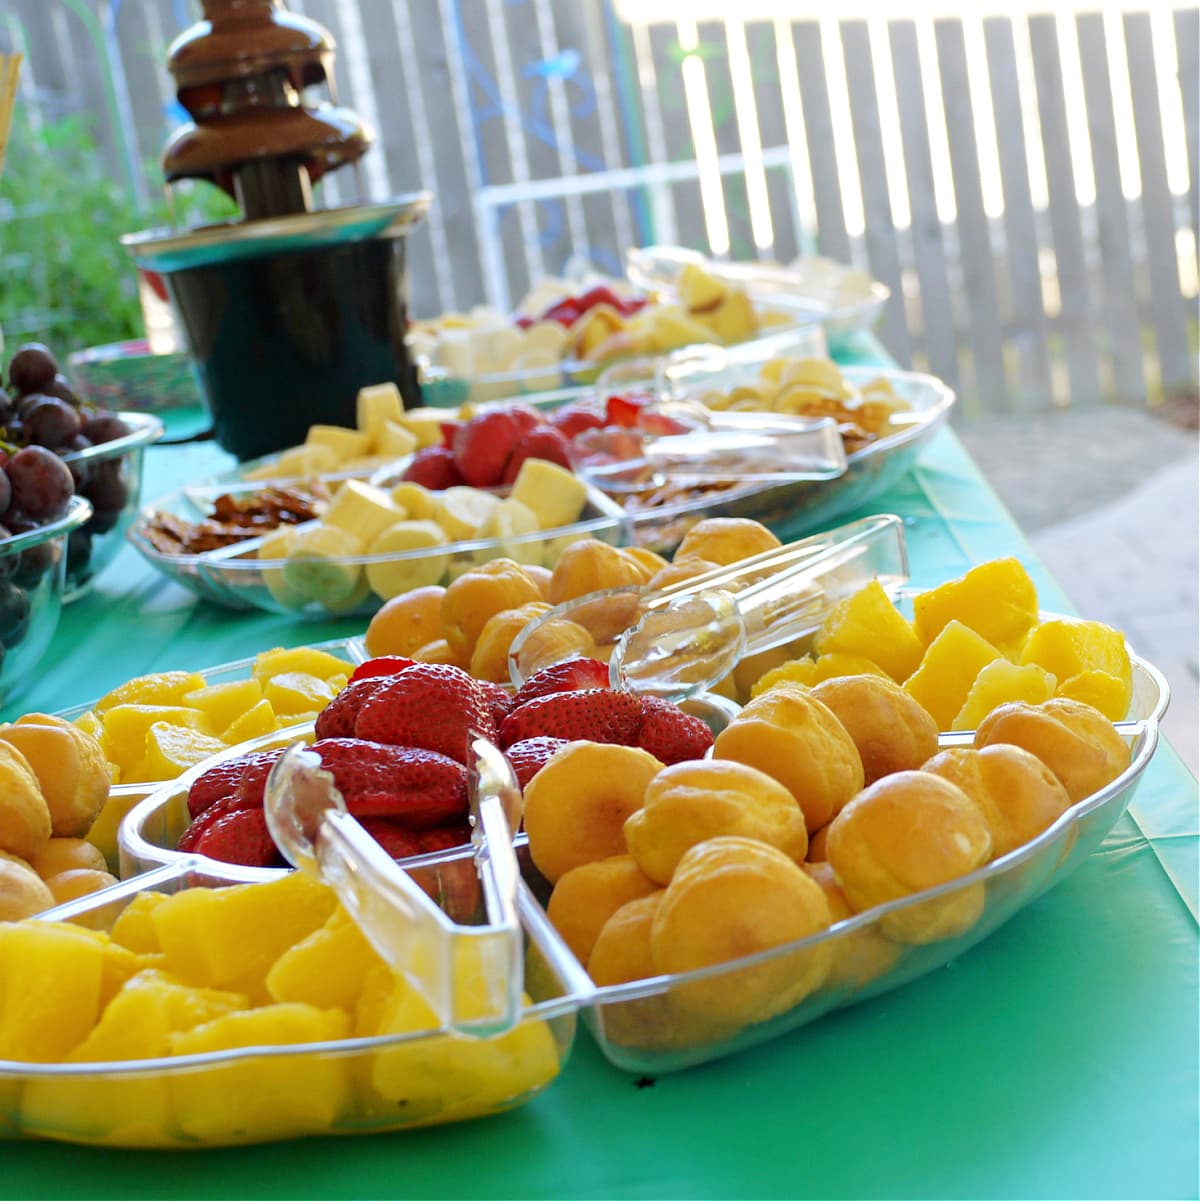
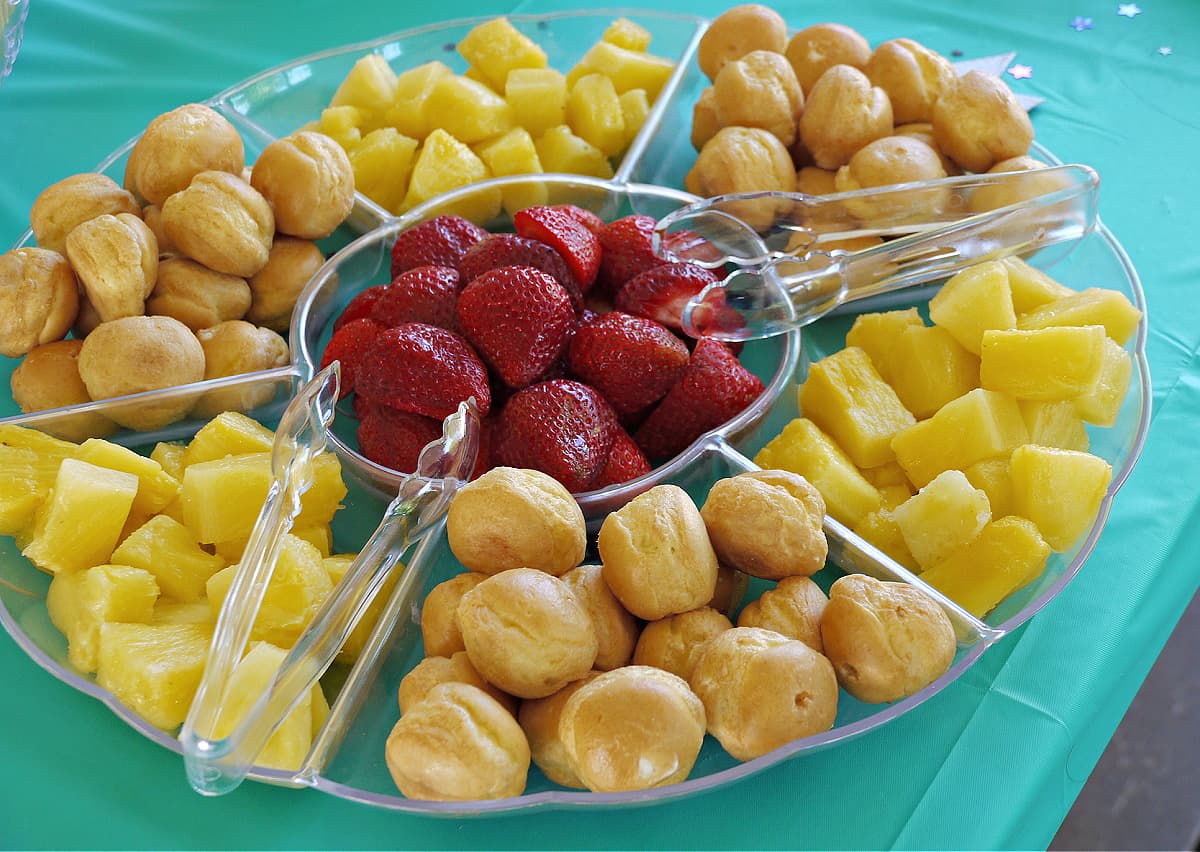
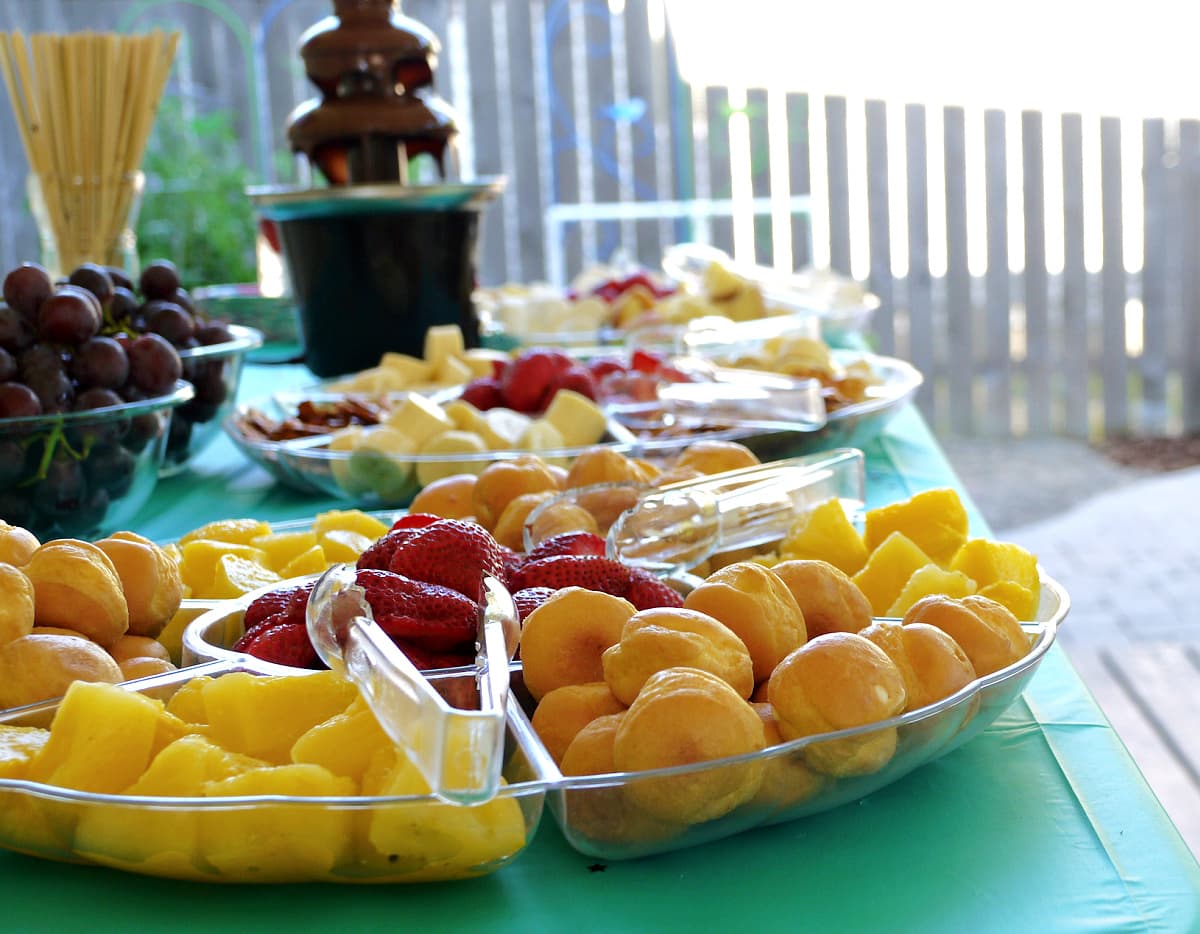
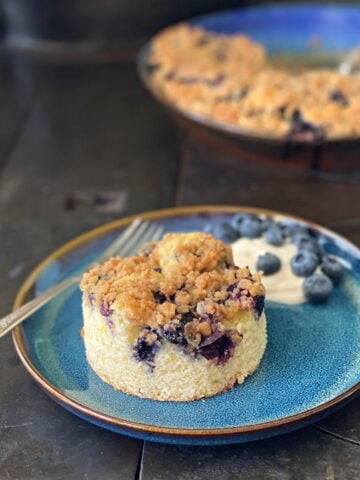
Fountain Dipper Ideas Your Guests Will Love
Part of the fun is choosing what to dip! Some favorites:
- Strawberries
- Pineapple chunks
- Banana slices
- Grapes
- Marshmallows
- Cream puffs
- Pound cake cubes
- Pretzels
- Apple slices
👉 Pro tip: If you don't have fondue forks, bamboo skewers work perfectly.
Choosing the Right Chocolate Fountain for Your Party
If you're buying or renting, here's what to think about before you commit:
- Party size matters: 2-3 tiers work for family gatherings. Big weddings or events? Go with 4-5 tiers.
- Easy cleanup: Look for removable, dishwasher-safe parts (stainless steel is easiest).
- Heating & flow: Adjustable temperature controls help prevent scorching.
- Noise & stability: A quiet, sturdy machine keeps the party vibe going. Every chocolate fountain is going to make a little noise: look for one with a smooth, low hum.
- Adjustable feet: Stabilizing feet allow you to compensate for a slightly uneven table or counter. (Bonus: Look for a fountain with a built-in level!)
- Budget vs. frequency: Occasional host? Go budget-friendly. Frequent entertainer? Invest in quality.
Our Recommendation
For a reliable, all-around home fountain, we recommend the Nostalgia 3-Tier Chocolate Fountain. It's affordable, versatile, and easy to use, making it a great choice for most home gatherings. Beyond chocolate, this fountain can handle cheese, queso, and even liqueurs, giving you plenty of options for both sweet and savory parties. Its compact 3-tier design is perfect for small to medium-sized groups, and it's generally dependable for repeat use without the hassle of larger commercial models.
After the Party: Fountain Cleanup Tips
This is the second most important tip after "the wind is not your friend":
Clean the fountain right away.
Do not, under any circumstances, "leave it for tomorrow."
If you wait until the next day, the chocolate will harden up and it will take you ten times as long to clean.
- Turn off the machine and let it cool slightly (chocolate still soft, not hardened).
- Scrape down tower and auger with a silicone spatula.
- Wash all removable parts in warm, soapy water.
- Dry thoroughly before reassembling.
Never submerge the base unless your manual says it's safe.
Emergency Clean-up Tip: If somehow you accidentally let the chocolate harden in the fountain, you can use a blow dryer to melt it before cleaning.
Leftover Chocolate Ideas & Storage Tips
Seal any leftover chocolate in an air-tight container. Leftovers can be refrigerated for up to 3 weeks and frozen for up to a year.
You can use leftover chocolate for many things. Some of our favorites are to swirl it onto waffles, dip strawberries, or shave for sweet garnishes.
Reader Tip: For leftovers, you can add 2 tablespoons more coconut oil per cup of chocolate and you have made your own magic shell ice cream topping!
We hope you have great success with your party planning, and if you learn some new chocolate fountain tips, please be sure to come back and share them with us all in the comments!
Troubleshooting Your Chocolate Fountain
Even with the best setup, chocolate fountains can be a little finicky. Here are a few quick fixes for common problems:
The chocolate isn't flowing smoothly
- Check if it's level. Even a slight tilt can throw off the flow.
- Make sure there's enough chocolate. Home fountains usually need at least 3 pounds.
- Thin it out. If the chocolate looks too thick, stir in a little more oil (or use fountain-ready chocolate).
The fountain is noisy or shaking
- Make sure all parts are assembled correctly and locked in place.
- Double-check that it's on a sturdy, flat surface.
- Some noise is normal, but loud rattling may mean the auger isn't seated right.
Guests are double-dipping (oops!)
- Offer skewers, napkins, and plenty of dippers so people aren't tempted.
- Set out a small side bowl of melted chocolate for those who just want "one more bite."
The chocolate seized (turned grainy or lumpy)
- Water is the culprit - just a drop can ruin a batch.
- If it happens, scoop out what you can and melt a fresh batch.
Tip: Always have extra chocolate and coconut oil on hand - you'll thank yourself later!
Chocolate Fountain FAQ: Tips & Answers
A good rule of thumb is about ½ cup of chocolate per guest. Most home fountains need at least 3 pounds to get started and will serve 20-25 people.
Most home models can run for 2-3 hours without trouble. For longer parties, plan to give it a break, clean it out, and refill with fresh chocolate.
Yes - but not in the same one you use for chocolate! Cheese has a different consistency and can be tough on the machine. If you want to serve nacho cheese or fondue, buy a fountain specifically made for it.
Yes! Just remember white chocolate tends to be thicker, so you'll need to add oil (or buy fountain-ready white chocolate).
Not if you buy specialty fountain chocolate-it's formulated to flow on its own. If you're using regular chocolate chips, add oil (I like coconut oil) to keep things moving.
Clean it immediately after the party while the chocolate is still soft. Waiting until the next day is… let's just say a mistake you only make once.
Final Thoughts on Chocolate Fountains
Chocolate fountains aren't just a dessert-they're a centerpiece. With the right setup, chocolate choice, and a little know-how, your fountain will be the highlight of any party.
If you discover new chocolate fountain tips along the way, share them in the comments - I'd love to hear them!
Thank you for visiting the Good Hearted Woman. Remember to bookmark this site, and come back soon!


Tara says
Can you use Hershey chocolate bar? I have some left over from fudge making and wanted to use it up.
Renée B. says
Hershey's chocolate will work, but be sure to thin it with coconut oil - about an ounce per pound. The bars are made to set pretty firm, so when you melt them, they’re too thick to flow well on their own.
AJAY says
Hi.
Great article.
Do you have any advice on chocolate tap machines at all please.
Renée B. says
Thanks so much – I’m glad you liked the post! Great question. I’ll be adding a section with tips for choosing a chocolate fountain since it can make a big difference at a party. Quick tip for now: think about how many people you’ll usually be serving and how easy the fountain will be to clean afterward: those two things matter most!
Jenny says
You can run hot soapy water after you clean it out and it does the hard work for you!
Alexandra Maillis-Lynch says
Thank you for saving me the heartache with these wonderful tips!
Renée B. says
You are so welcome!
Cheryl Weisheit says
Hi, I'm looking for suggestions on what size fountain to use for my daughter's graduation. We will probably have 50-100 people, but over 2-3 hours time. I was trying to decide if I need a 1.5 or 4 lb fountain. What size did you use?
How often did you have to refill it?
Renée B. says
Great question! For our grad's party, we used a small, 24-ounce fountain (specifically, a Nostalgia 3 Tier Electric Chocolate Fondue Fountain), and I just had to refill it once, but our gathering had only about 30-40 people. According to event planners who know more than I do, you will need about 5 pounds of chocolate for 100 guests; however, you can refill a fountain as often as needed, so the size of the fountain is more about how often you want to have to be distracted with that task. For clarity and a more detailed explanation, check out this YouTube video from Sephra (catering equipment supplier), How Much Chocolate Do I Need For My Event.
R. Pastel says
For leftovers, you can add 2 tablespoons more coconut oil per cup of chocolate and you have made your own magic shell ice cream topping
Renée B. says
That is a fabulous tip - thank you for sharing!
Belinda says
Hi! Just wondering if you can actually taste the coconut flavor on the semi sweet chocolate when using that instead of a different oil? Thanks!
Renée B. says
I imagine I can taste, but that could just be because I know it's there. In any case, the flavor is extremely subtle, if at all.
Lin Harris says
Can you do a trial run and then refrigerate and reuse the same choc a couple days later
Renée B. says
I've never reused an entire batch, so I can't say for sure, but I imagine you can. I've reused chocolate, but it's always been mixed at least 50/50 with new chocolate. The important point is that all the chocolate is melted before introducing it to the fountain. If it's smooth and flowing, it should be fine.
Kyle Stone says
Can I put nacho cheese into a chocolate fountain?
Renée B. says
That seems like a brilliant idea, but I have no experience with it. I found this article on cheese in fountains. Good luck!
Vickie Gregory says
I had an even this past weekend and used my chocolate fountain. It was a huge success by the way. It worked well. We used fountain chocolate that did not require oil, which was very helpful. BUT, I noticed that the chocolate was getting thick toward the end of the night. Upon closer inspection, it appears that the chocolate was sticking to the bowl. Is there anything that you know about that would prevent the chocolate from sticking>
Renée B. says
It may be that with the introduction of the dippers in the chocolate, something interacted with the chocolate and caused portions of it to seize and stick; however, I haven't had enough experience with the fountain-ready chocolate to know for sure, so I'm not sure how to mitigate the problem.
Clivethedrivedrive says
Thank you Renee. Forearmed is forewarned; excellent advice on how to prep and use and clean. Learned a lot - so many thanks. The chocolate fountain is going to be the Xmas tea star attraction. 🌟🌟🌟🌟🌟
Jo Ann wilder says
I love my chocolate fountain
I’ve used one for at least 10 years no doubt always a family favorite
Jump in you’ll love it- yes clean it right away very first thing I clean
I use skewers vs toothpicks because much less messy
I’ve used chocolate chips with canola oil anyone added anything to the chocolate like a liqueur???
Renée says
Thanks for the suggestions, Jo Ann.
Skewers are definitely a better choice than toothpicks!
Tina says
I used milk instead of oil. It was delicious.
SHERRY VASQUEZ says
What was the ratio?
Renée says
"A ratio of one tablespoon of coconut oil per cup of semi-sweet morsels works perfectly and tastes delicious."
suzy says
My chocolate started to get grainy. How can I avoid that? I used Guittard Milk Chocolate Baking chips.
Renée says
Melting chocolate can be tricky, for sure, and the process requires upmost patience.
I’m not a fan of the Guittard brand, so don’t have experience melting them for a fountain. I recommend using Nestlé’s semi-sweet chocolate chips, and melting them with the coconut oil, for a more reliable outcome.
No matter what kind of chocolate you use, it is imperative that there is no water in the vessel in which you are melting. Not one drop. If there is, your chocolate will seize. Also, you must melt it slowly - in a double boiler over low heat, or no more than 40 seconds at a time in the microwave, stirring in between each session. Any faster than that and it will granulate.
I hope this all helps.
Snuggles says
Do you have tips on cleaning up the fountain other than get it done after turning off and not the next day.
Thank you.
Renée says
Patience, soap, and HOT water.
Dana says
Are vegetable or canola oils also able to be used instead of coconut oil?
Renée says
I imagine that they would work ok; however, I've never tried them, so I can't say for sure how they would affect the flavor. I believe the coconut oil enhances the chocolate.
Marie says
Is the unrefined coconut oil the one that is like a white paste in a jar? Or is it like vegetable oil just coconut flavor?
Renée ♥ says
It's the one that says "Unrefined Coconut Oil" on the jar. It looks somewhat like white paste.
Marie says
Thank you!
Jennifer says
I have fractionated coconut oil that I use with my essential oils. Will that work?
Renée ♥ says
This is outside my area of expertise, but as I understand it, the answer is "maybe, maybe not." Personally, I would avoid using fractionated coconut oil at all, because not all fractionated CO is food grade; moreover, it is generally formulated to be used topically as a carrier, and not ingested.
Andrea says
Thank you so much for the tip about coconut oil to add to the chocolate chips. I was struggling to justify spending so much on the expensive chocolate designed for fountains. But I saw your tips and it gave me confidence to try it! I started with the ratio you suggested and then added enough for the chocolate to flow through the tester funnel provided with the machine. It worked fabulously, and everyone loved it! Thank you so much!
Renée ♥ says
Thank you so much for checking back. I'm so glad it worked so successfully for you, Andrea!
Joani Heavey says
Great suggestions and comments below. Ur sense of humor makes me want to just jump in and try it.
Anyone know if the Nostalia brand is ok? It’s so inexpensive that it makes me wonder. The reviews were all over the place.
The ad says it does NOT need oil. I’m guessing u would do it anyway?
Thanks for Great info.
GaryODS says
Thank you for this post. I'm about to use coconut oil for the first time and needed the ratio for Nestle semi sweet chips.
Allow me to add two additional suggestions. You mentioned leveling the base, excellent, I suggest this additional step. After the base is level I install the tower (the auger isn't necessary here), my fountain has 3 pins in the base that the tower sits on. With the base lever take the level and check the top of the tower and notice how far out of lever it is, lift the tower up and rotate it clockwise until the pins fit again and check the level again, do this as many times as necessary to check all positions - then go to the position closest to level and relevel the unit to plumb at the top of the tower so the chocolate flows evenly.
Second suggestion - when your unit is heated and level, and the chocolate is melted and you are ready, - fill the base almost to the top. Turn on the auger and run it as was suggested and turn the auger off to drain down to remove bubbles, turn it back on. Here is the suggestion DO NOT TOP OFF THE CHOCOLATE IN THE BASE. It's tempting, you have the extra melted chocolate right there, and there's room in the base - but don't do it. If for any reason that auger stops (there are lots of reasons, power interruption, something falls off the toothpick or fork anything that gets stuck in the auger causing it to stop etc.). When that auger stops all that extra melted chocolate cascades beautifully down the sides of the base, putting an even coating on the counter or table it's set up on and often every nook and cranny in your flooring and grout. While it is beautiful and will once again will make the fountain them main topic of conversation, it's not as much fun as you might think.
GaryODS says
Sorry spell correction changed some of my words "level" to lever
Sallae Smith says
Does it have to be unrefined coconut oil?
Renée ♥ says
I think refined coconut oil should work. I've never used it for this purpose because I kind of like the subtle coconut flavor the unrefined oil imparts, but I can't think of a reason why it wouldn't work. If you use it, I'd love to hear back on how it goes.
Susan says
Can you use refined coconut oil?
(Does it have to be unrefined, and what's the difference?)
Sherry says
Great tips! I also use wood skewers or toothpicks for people to use instead of them getting their fingers directly in the chocolate. Much more sanitary expecially for kids that love to stick their whole hand in the chocolate!
Renée ♥ says
That's a good thing to mention. i kind of took it for granted that everyone just knew to use fondue forks or skewers. No one wants everyone else's fingers in their chocolate!
Marti says
Are regular toothpicks long enough or do I need to get skewers?
Renée ♥ says
Regular toothpicks will work, although if you can find the longer, "cocktail" style picks, that's probably a better way to go. Skewers are nice if you have them.
Renée ♥ says
Toothpicks will work in a pinch, but skewers would probably work better.
Melinda says
I've always been a bit intimidated by chocolate fountains, although your tips make total sense. Knowing me, I probably would have put the fountain right in front of a fan!
Erin says
I like that you provided some tips! I'm sure despite those hardaches with the wind and such that the fountain was a big hit. I mean seriously, how fun!?! Great idea!
Danielle says
My mouth is watering thinking of this chocolate fountain (wind and all!) Great tips! Thanks for sharing, cheers 🙂