

Learning how to cube butternut squash doesn't have to be intimidating. This simple, step-by-step guide shows you how to peel, cut, and cube butternut squash safely, plus tips for choosing and storing it for all your favorite fall recipes.

Jump to:
- The Butternut Squash Dilemma
- What Butternut Squash Tastes Like (and Why It's Worth the Effort)
- How to Pick a Perfect Butternut Squash
- Tool's You'll Need
- How to Cut & Cube Butternut Squash (Step-by-Step)
- How to Store Butternut Squash
- How to Roast Butternut Squash Seeds (Quick Snack Idea)
- Recipes That Use Cubed Butternut Squash
- Frequently Asked Questions
- Final Thoughts: Don't Fear the Squash
- How to Cube Butternut Squash
The Butternut Squash Dilemma
If you've ever stood at the counter staring down a rock-hard butternut squash, knife in hand, wondering how on earth to get inside it - you're not alone. Butternut squash is one of the best flavors of fall, but it can also be one of the most intimidating to prep.
The good news? Once you learn a few simple tricks, cutting and cubing a butternut squash isn't nearly as daunting as it looks. In fact, it can become a kind of fall ritual - one that fills your kitchen with promise for soups, roasts, and cozy casseroles to come.
Let's start at the beginning: how to pick, peel, cut, and cube a butternut squash safely and efficiently.
What Butternut Squash Tastes Like (and Why It's Worth the Effort)
With its sweet, nutty flavor and subtle notes of walnut and butterscotch, butternut squash lands somewhere between pumpkin and sweet potato - only silkier and more complex. It's wonderful roasted, pureed, or stirred into risottos and soups. Once you know how to cube butternut squash, you can use it in everything from savory breakfast hashes to creamy autumn pastas.
How to Pick a Perfect Butternut Squash
A good butternut squash is like a great pumpkin - solid, heavy, and full of promise. When choosing one, look for these signs of ripeness and quality:
- Weight: It should feel heavy for its size, like a ripe orange. Light squash can be dry or underdeveloped.
- Sound: Give the squash a solid rap on the bulb end: it should sound hollow. If you hear a dull thud, move on.
- Stem: A ripe squash will have a firm, dry stem. Avoid soft, green, or moldy stems.
- Skin: Look for smooth, matte skin that's creamy tan to dark beige. Skip any that are shiny or have cuts, bruises, or soft spots.
- Shape: Choose one with a long neck and a smaller bulb for more usable flesh and fewer seeds.
Tool's You'll Need
Having the right tools makes the job far safer (and a lot less frustrating):
- Sharp knife*
- Sturdy cutting board with a damp towel underneath to prevent slipping
- Vegetable peeler or paring knife
- Spoon for scooping seeds
- Microwave (optional, for softening the skin)
* My favorite knife for this task is a short, 7-inch chef's knife (sometimes called a housewife's knife). It is long enough to do the job, but not so large that it is unwieldy in the process.
‼️To safely cut a butternut squash, you must use a sharp knife. If your knife is dull, take the time to sharpen it first.
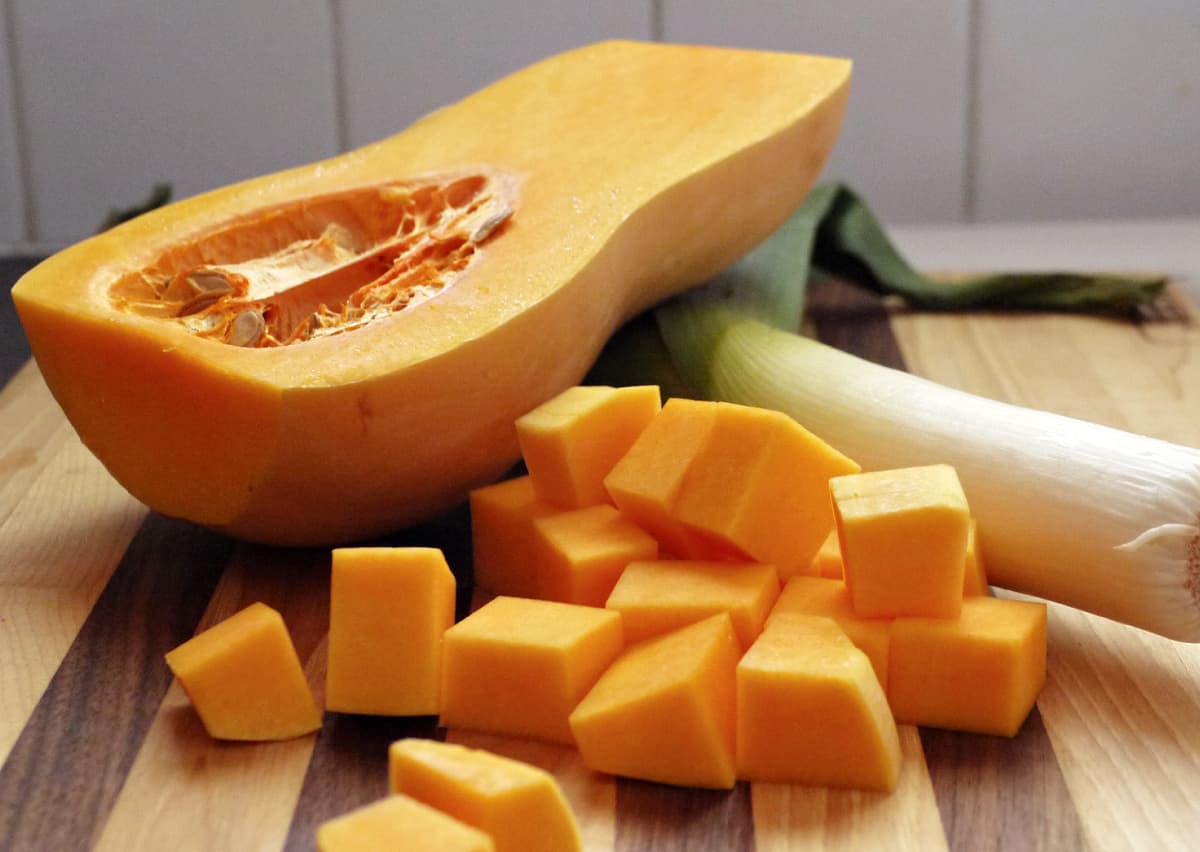
How to Cut & Cube Butternut Squash (Step-by-Step)
Learning how to cube butternut squash comes down to patience and good technique. Here's how to do it safely and efficiently.
Step 1: Soften the Squash (Optional but Helpful)
Before cutting, pierce the squash a few times with the tip of a knife and microwave it for 2-3 minutes. This softens the outer skin just enough to make peeling easier - no wrestling match required.
Step 2: Slice Off the Ends
Place the squash on its side and cut off both ends (the stem and blossom ends) so you have flat, stable surfaces to work with.
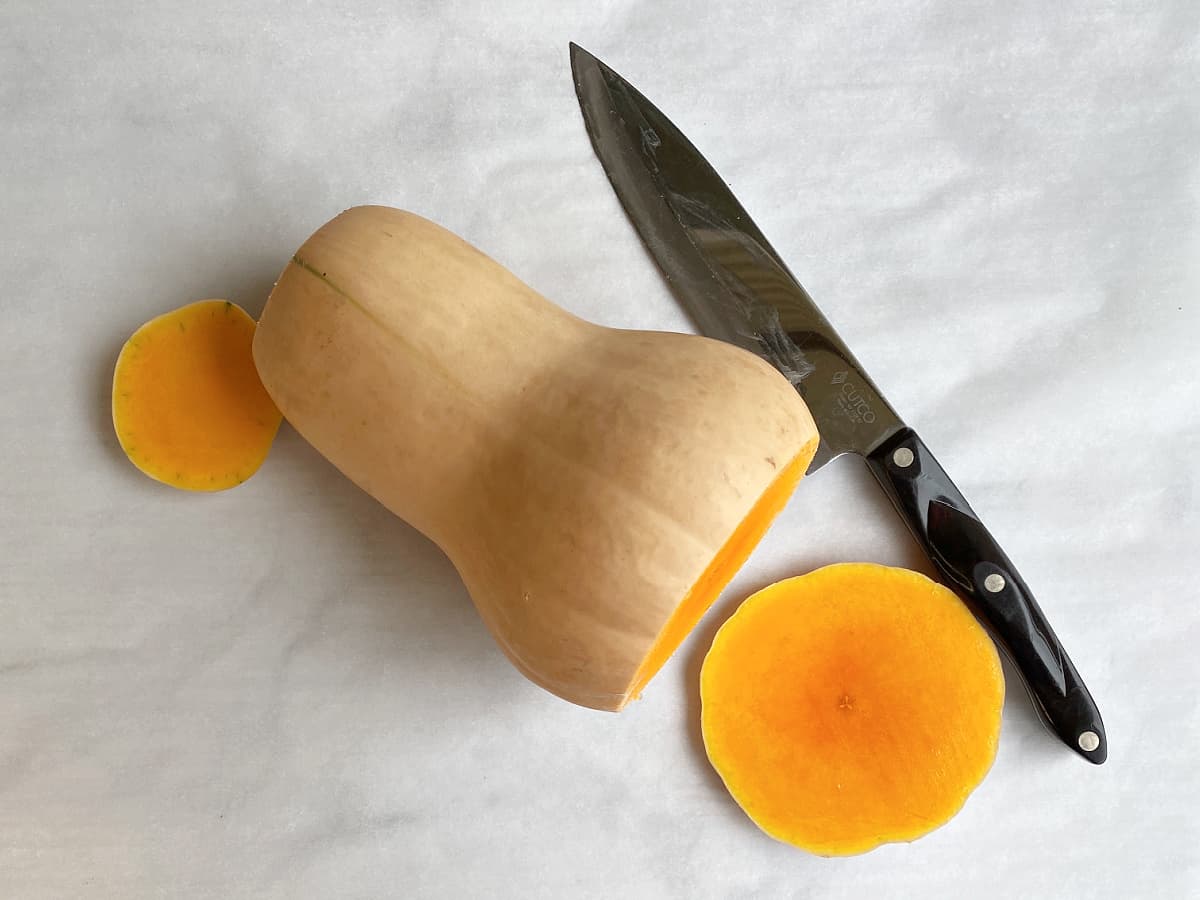
Step 3: Separate the Neck and Bulb
Cut the squash crosswise at the point where the narrow neck meets the round bulb. This gives you two manageable sections.
Tip: We have found that the easiest way to do this is by cutting just slightly into the squash, but instead of trying to cut straight through, hold it steady and apply light pressure while rolling the squash slightly under the knife.

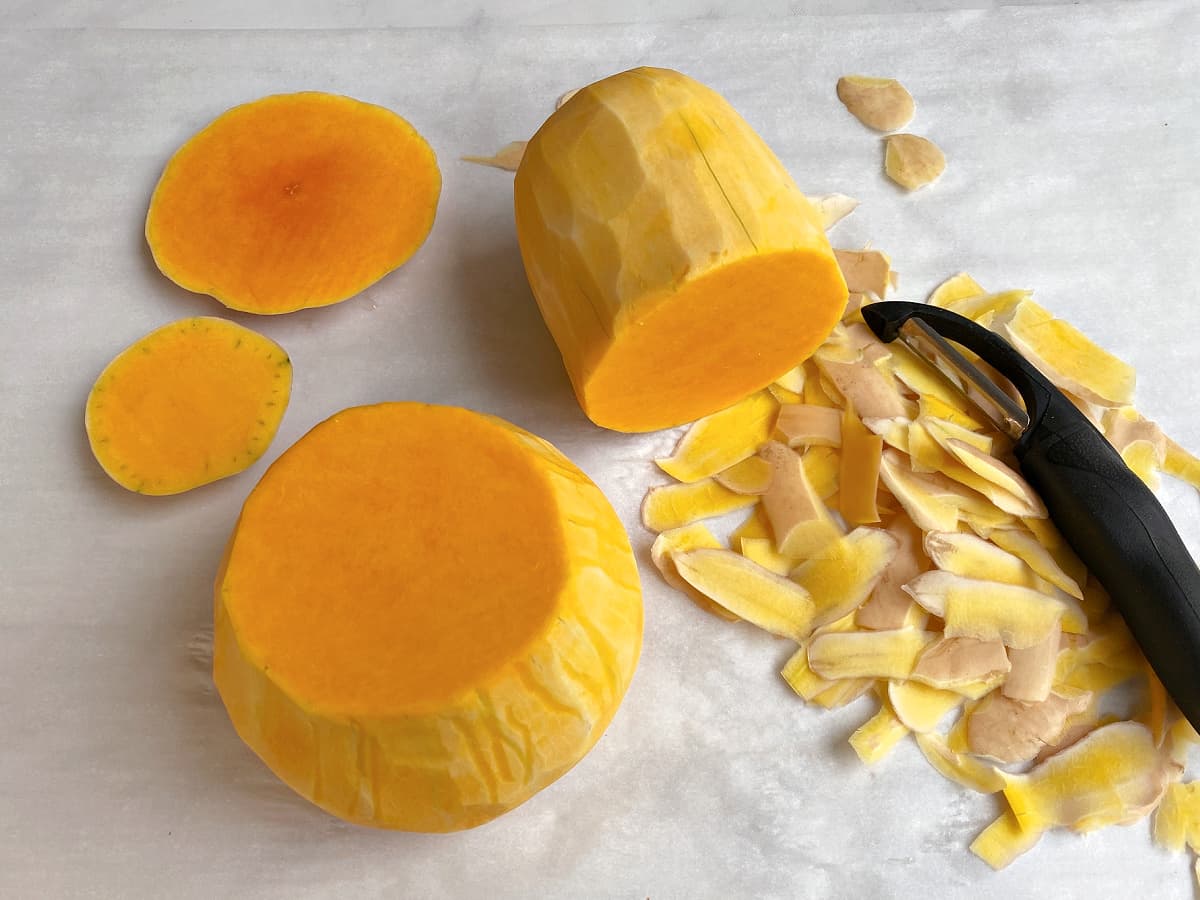
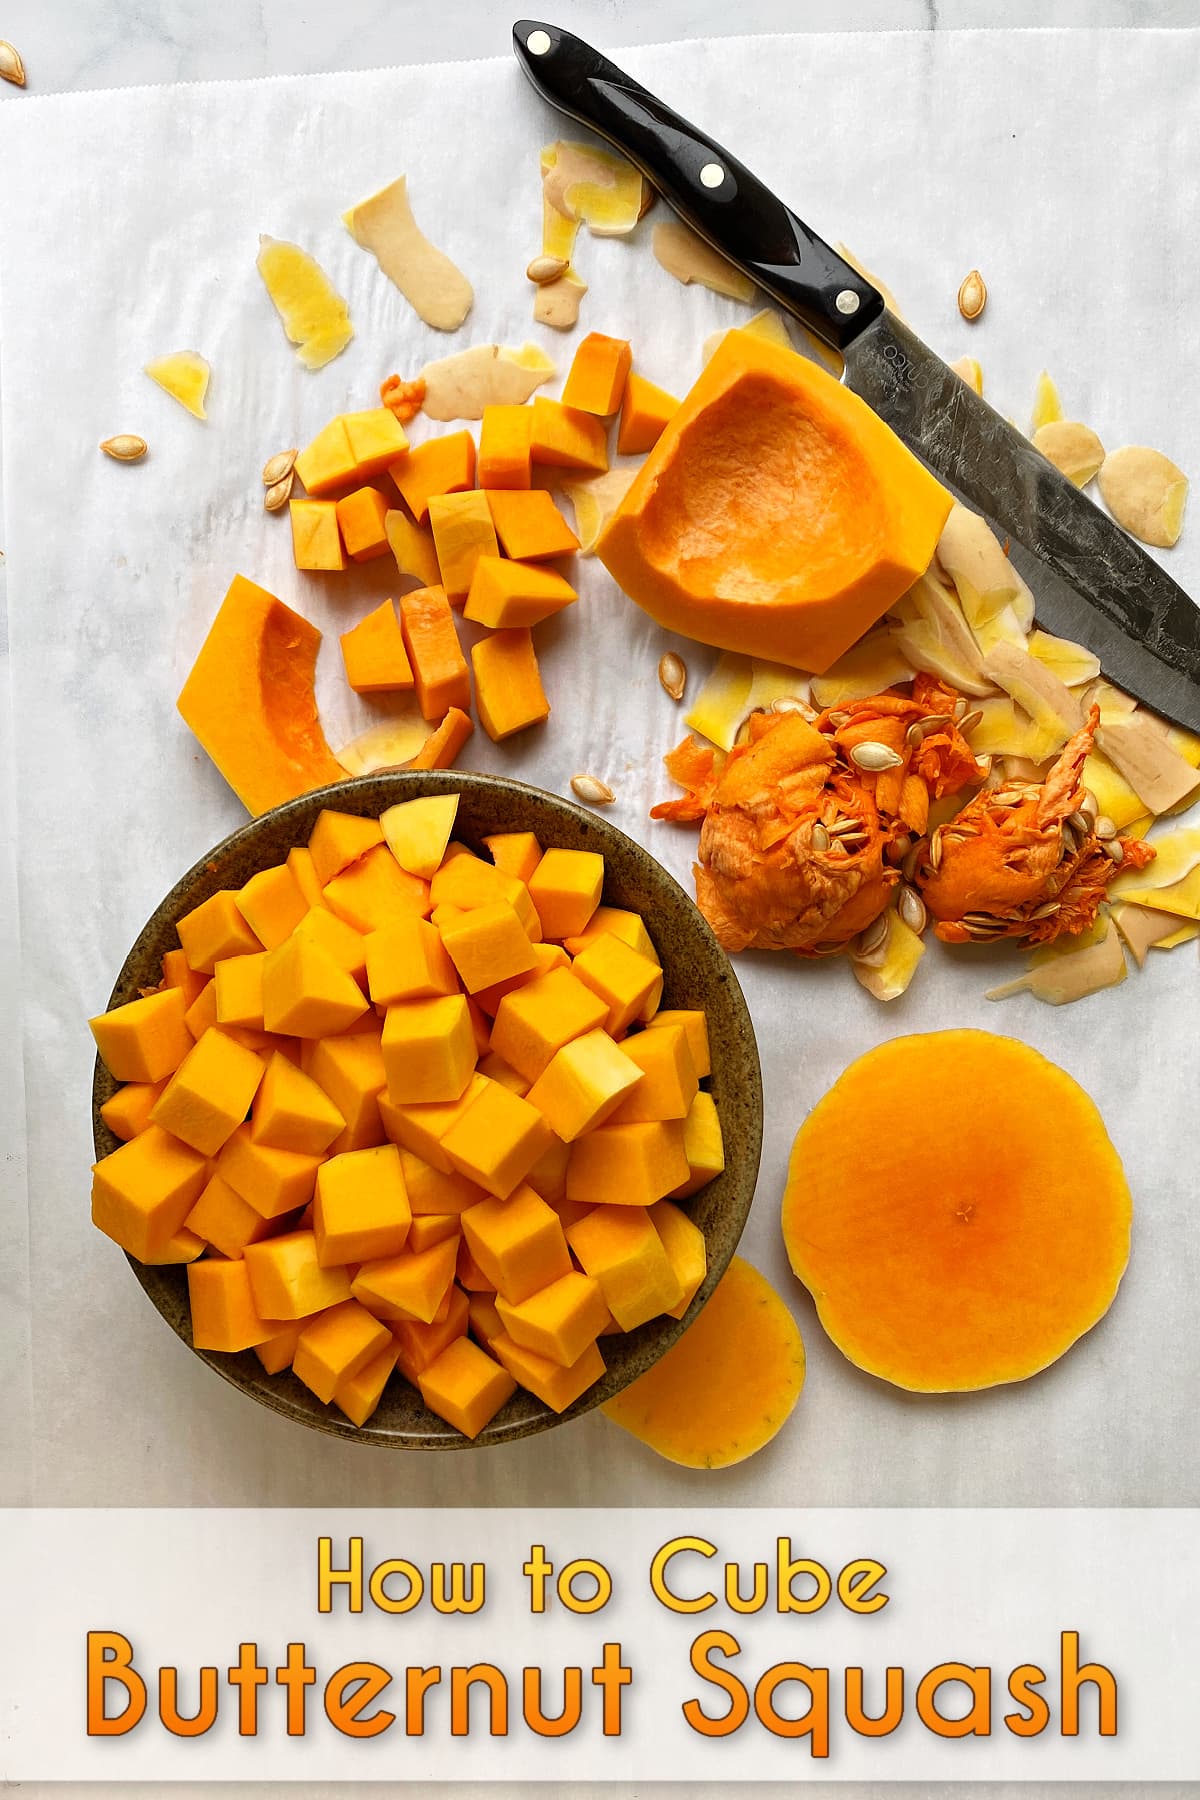
Step 4: Peel the Skin
Using a sharp vegetable peeler or paring knife, peel away the skin. Be sure to remove all the pale green streaks beneath the surface - they can be tough when cooked.
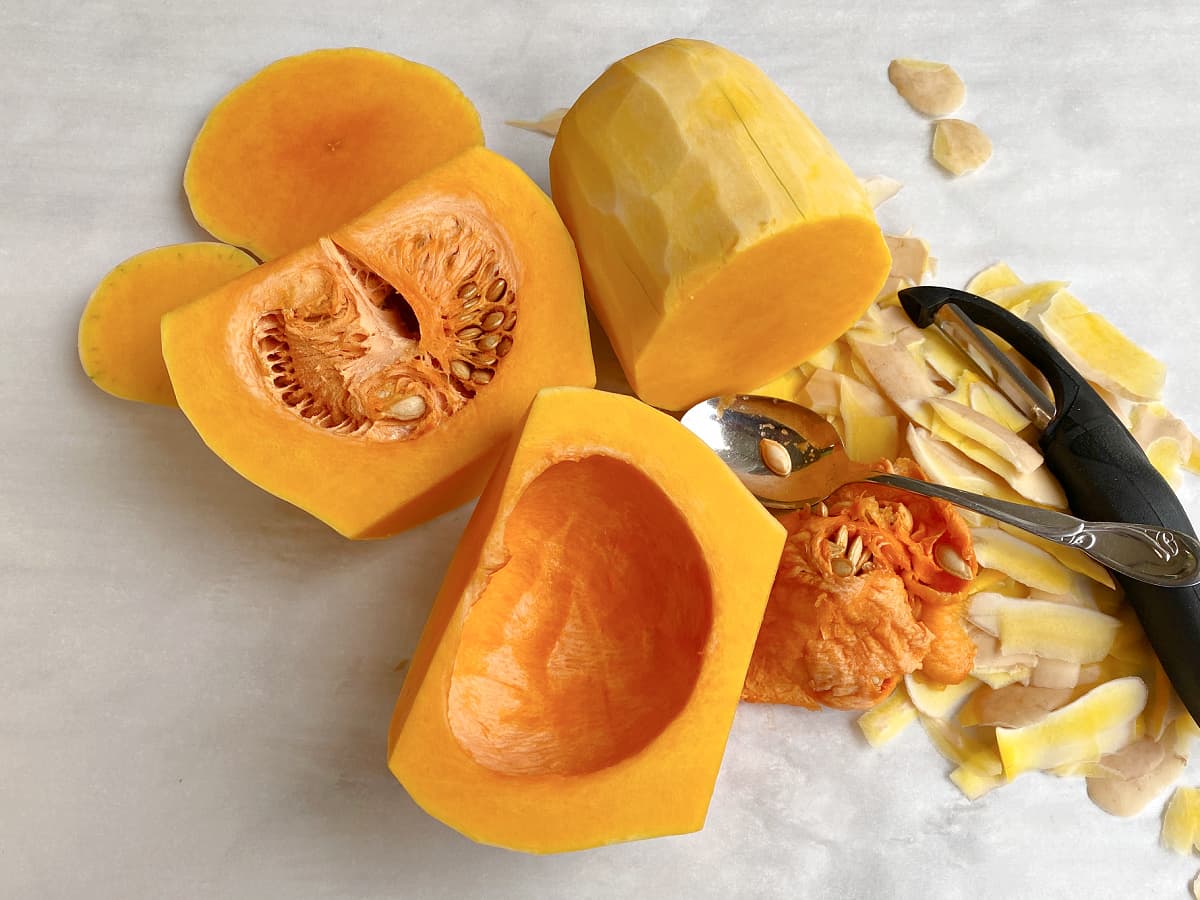
Step 5: Halve and Scoop the Seeds
Slice the bulb end in half lengthwise and use a spoon to scoop out the seeds and stringy pulp.
Step 6: Cube the Squash
Once the squash is cut and cleaned, cut it into cubes.
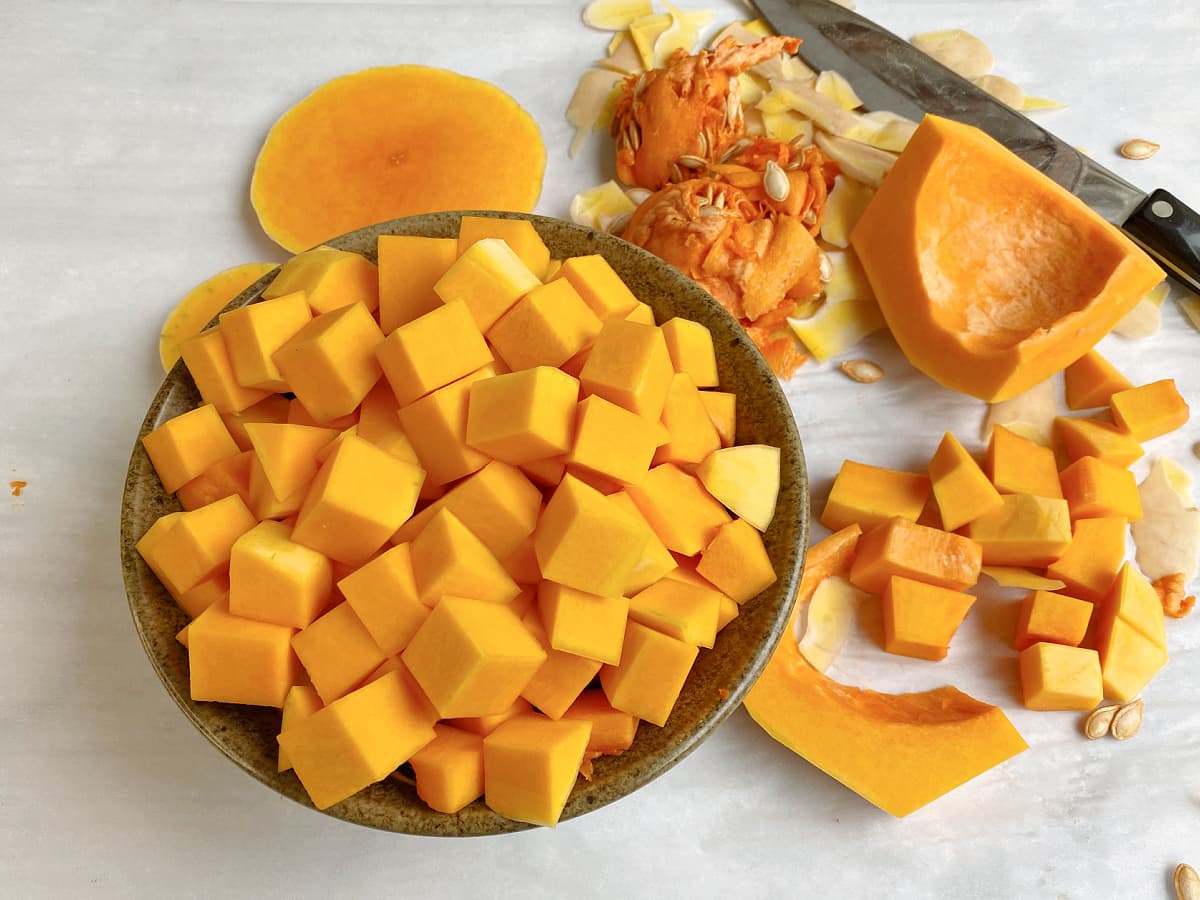
Try to keep your cubes uniform in size so they cook evenly - whether you're roasting, sautéing, or adding them to soup.
How to Store Butternut Squash
Whole (uncut): Store in a cool, dry place (like a pantry or cellar) for up to 6 months. Do not refrigerate whole squash. If it's fresh from the garden, butternut squash should be cured with warm temperatures and good air circulation for 10-14 days before storing. [Source: Iowa State Extention]
Peeled or cubed: Keep in an airtight container in the refrigerator for 5-7 days.
Frozen: Freeze raw or cooked cubes for up to 1 year. Spread cubes on a baking sheet to freeze individually, then transfer to airtight freezer bags or vacuum-seal for best quality.
How to Roast Butternut Squash Seeds (Quick Snack Idea)
Don't toss those seeds! Clean and dry them, toss with a little olive oil, salt, and pepper, and roast at 325°F (165°C) for about 10 minutes - or until golden and crisp. They're nutty, snackable, and a great garnish for soups and salads.
(For more seasoning ideas, check out these Roasted Pumpkin Seed Recipes.)
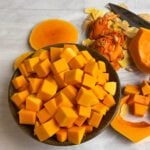
Recipes That Use Cubed Butternut Squash
Once you've mastered how to cube butternut squash, the real fun begins. Try it in:
- Roasted Butternut Squash with Bacon & Leeks
- Cozy Curried Butternut Squash Soup (Panera Copycat with a Twist)
- Sweet Potato & Butternut Samosas
Each recipe makes the most of butternut's sweet, nutty flavor - and now, you've got the perfect cubes to match.
Frequently Asked Questions
You can, but it stays a bit tough even after roasting. For most dishes, it's best to peel it first.
If you microwave it briefly (2-3 minutes), raw squash is easy to peel - no need to pre-cook it fully.
Yes! Just spread them on a tray, freeze until solid, then transfer to freezer bags.
Final Thoughts: Don't Fear the Squash
Learning how to cube butternut squash safely means more confidence in the kitchen - and more fall flavor on your table. From soups to casseroles, you're set for the coziest season ahead.
How to Cube Butternut Squash
Equipment
- 1 7-inch Chefs Knife
- 1 Vegetable Peeler or paring knife
- 1 large spoon for seeds
- 1 microwave optional
Ingredients
- 1 whole butternut squash
Instructions
- Soften (optional): Pierce the squash a few times and microwave 2-3 minutes to soften the skin.
- Trim Ends: Slice off the top and bottom so the squash sits flat.
- Separate: Cut crosswise where the neck meets the bulb.
- Peel: Remove all skin and green streaks with a peeler or knife.
- Scoop: Halve the bulb section and scoop out the seeds.
- Cube: Cut into planks, then sticks, then cubes. Aim for even pieces.
Notes
- Whole: Store in a cool, dry place up to 6 months.
- Cut/Cubed: Refrigerate up to 7 days in an airtight container.
- Frozen: Freeze raw or cooked cubes up to 1 year.
Nutrition
This website provides approximate nutrition information for convenience and as a courtesy only. You are solely responsible for ensuring that any nutritional information provided is accurate, complete, and useful.
Love it? Pin it! If you love these tips for how to cube butternut squash, make sure that you don't lose it! Pin it to your favorite Pinterest recipe board before you go!
Did you like this recipe? Please leave a star ⭐️⭐️⭐️⭐️⭐️ rating below in the comments section! You can also stay in touch with us by following us on Pinterest, Facebook, and Instagram.


Leave a Reply