
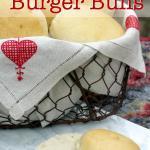
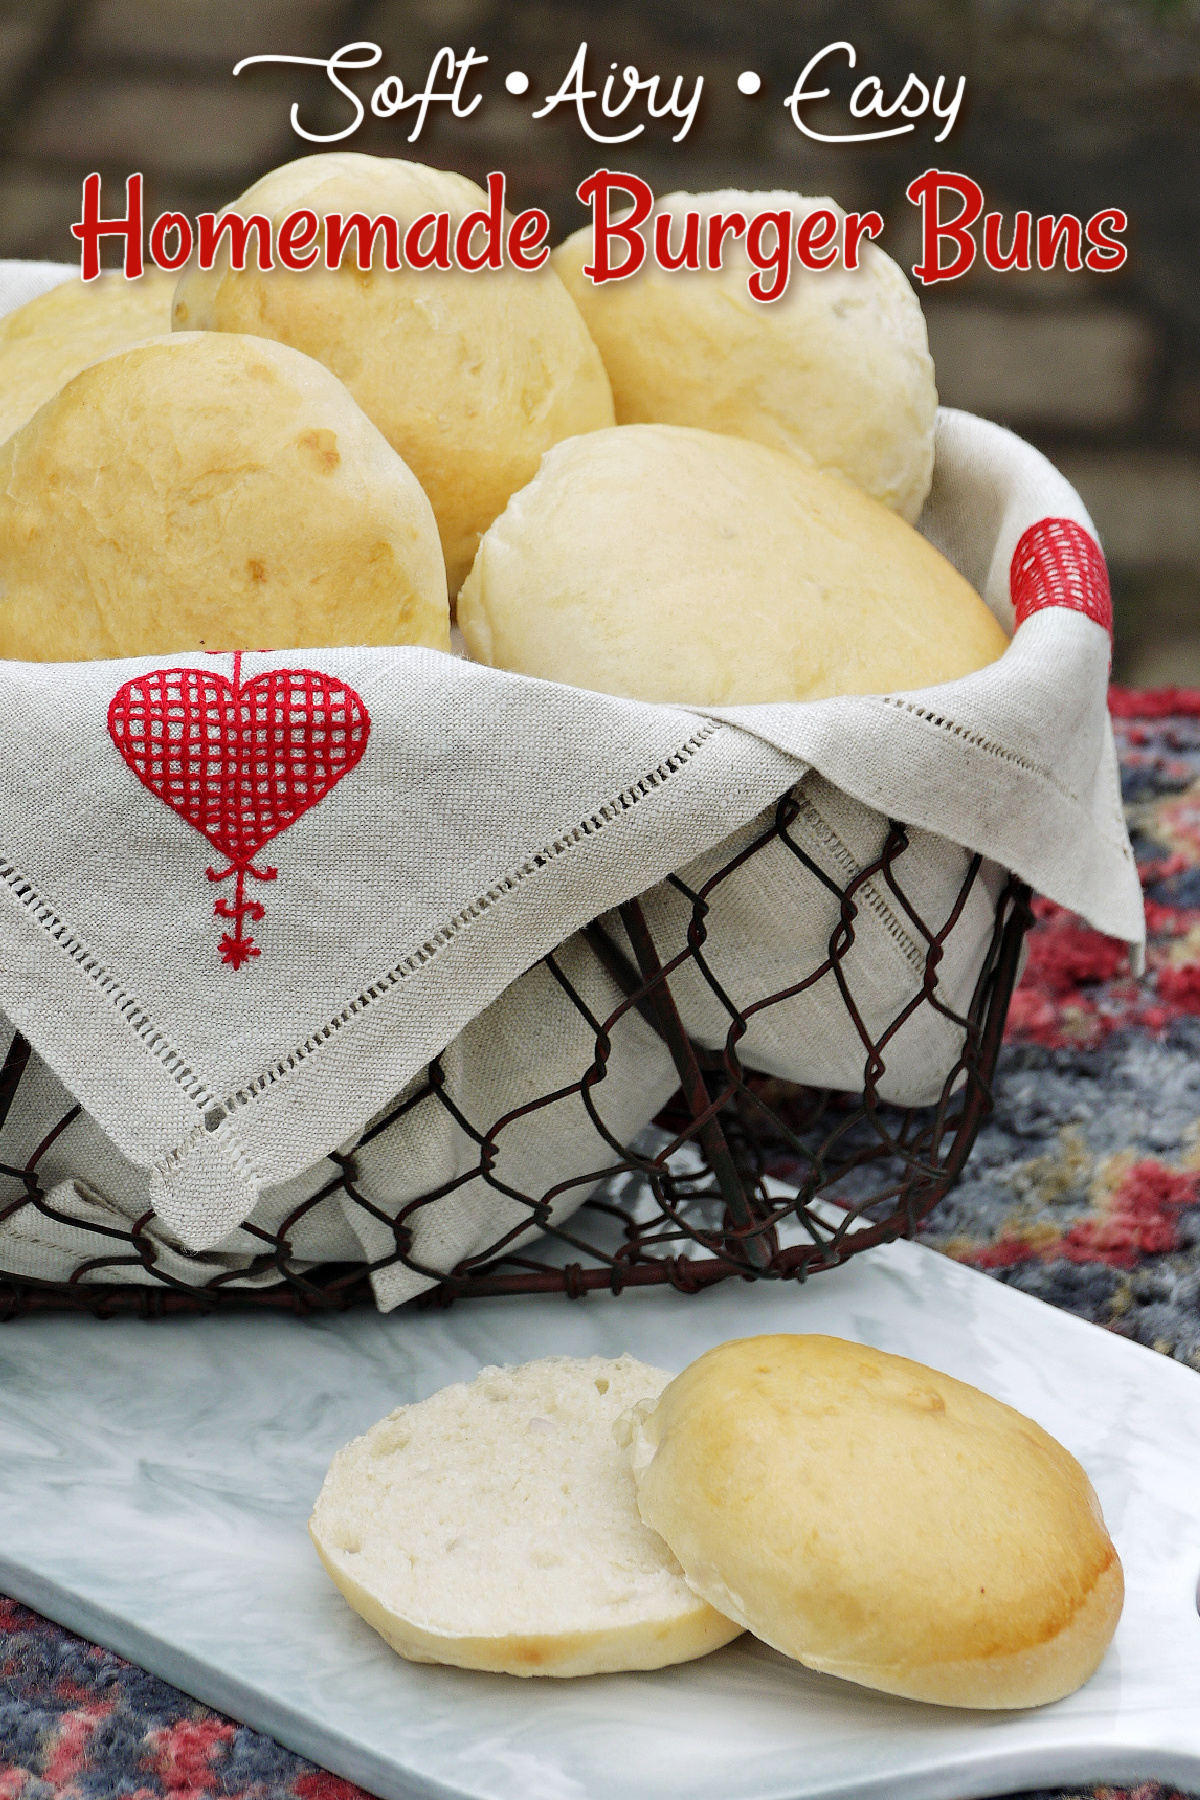
Learn how to make soft, fluffy, and golden homemade burger buns from scratch! Perfect for burgers, sliders, and sandwiches, this easy recipe works with or without a bread machine.

Jump to:
Why Homemade Hamburger Buns Are Worth It
For nearly two decades - right up until we moved to Ashland - Mr. B got together every couple of weeks with four or five of his buddies for poker night. They'd rotate houses, catch up on life, and talk fish or sports or work-or whatever happened to come up. Whoever hosted took care of the food, and that usually meant at least a solid snack, if not a full-on meal.
Over the years, I tried all kinds of "manwich" ideas - pulled pork sandwiches, Sloppy Joes, you name it - but anytime I served something sandwich-based, the first thing Mr. B said at the end of the night was always, "Baby, the guys all love your buns!"
Well… alrighty then.
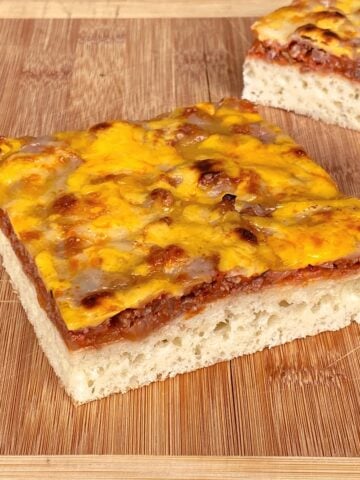
Truth is, homemade buns really do make a difference. Soft, fluffy, golden, with just the right touch of sweetness - they're the foundation of any great burger or sandwich. And the best part? You can make them any size you like, from slider bites to full-on burger buns.
Ingredients You'll Need
The burger bun recipe here are made with one of our favorite bread recipes; a basic, slightly sweet bread, made with egg and milk. That said, you can make homemade hamburger buns from scratch using almost any bread recipe. We do find that egg-based breads result in softer, fluffier buns.
For this recipe, you will need:
- Flour - Use bread flour if you have it. AP flour will also work.
- Milk
- Egg
- Sugar
- Salt
- Active Dry Yeast
How to Make Hamburger Buns (Step by Step)
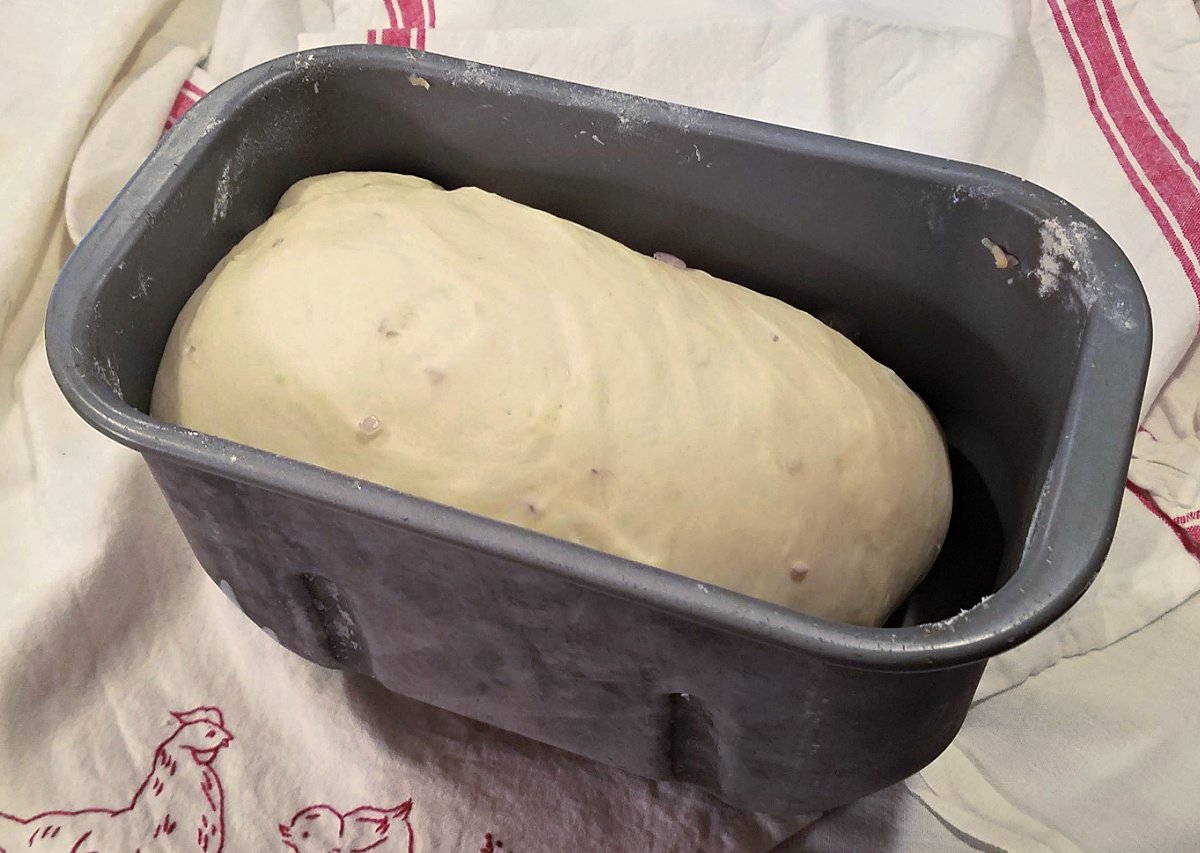
Step 1. Make the Dough
You can go bread machine or old-school - both work beautifully.
Bread Machine:
- Layer ingredients in the bread maker as listed.
- Set to the "Dough" cycle.
- Have a cup of tea and relax while the machine does the work.
Manual Kneading:
- Mix ingredients and transfer dough to a lightly floured surface.
- Knead for 6-8 minutes until soft and slightly elastic.
- Place in an oiled bowl, cover with plastic wrap, and let rise for about 1 hour, until doubled.
Tip: Don't worry if the dough feels sticky at first - flour lightly as needed.
You can find excellent general directions for making bread without a bread machine here.
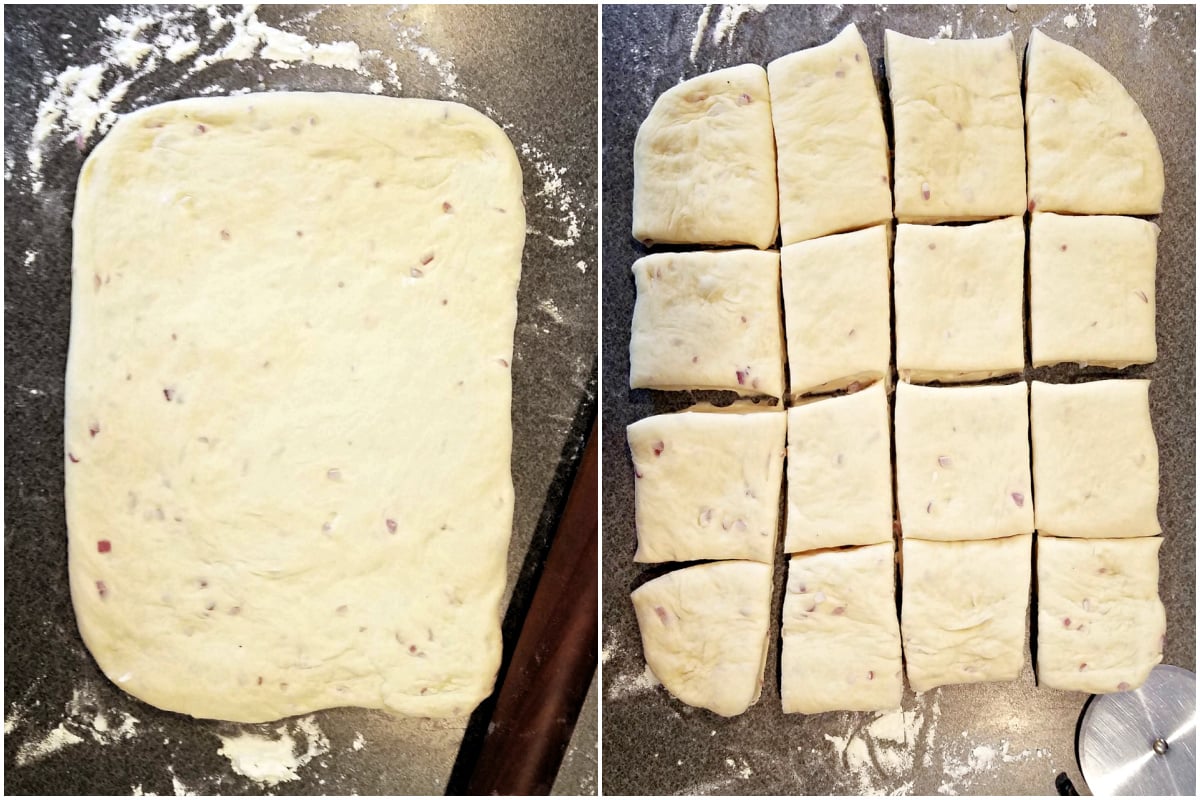
Step 2. Shape the Buns
- Turn the dough out onto a floured surface.
- Divide the dough into portions:
- Large buns: ~3 oz (85g) each
- Slider buns: ~1½ oz (42g) each
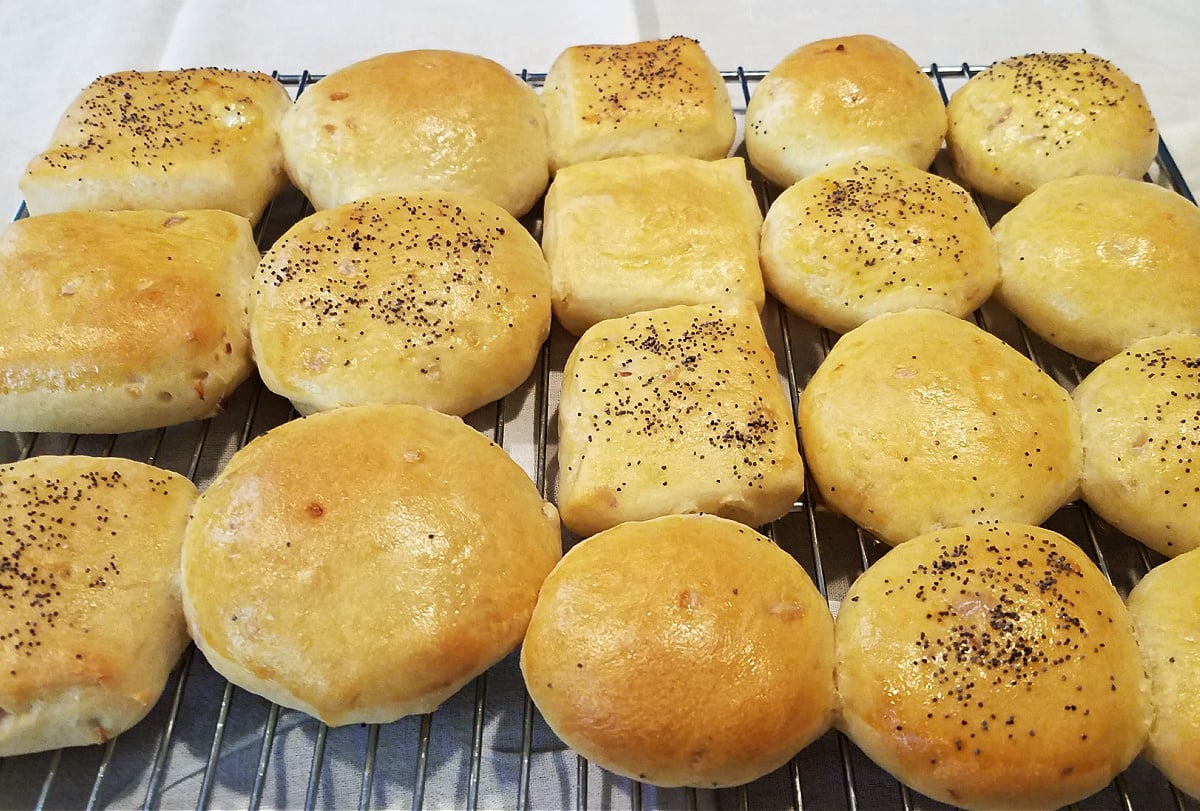
- Shape into squares or rounds:
- For round buns, pinch corners together gently, twist slightly, and place seam-side down.
- For square buns, simply keep the cut portions as squares for a fun, rustic look.
Tip: Use a kitchen scale for uniform buns. Don't stress over exact sizes - these buns are forgiving!
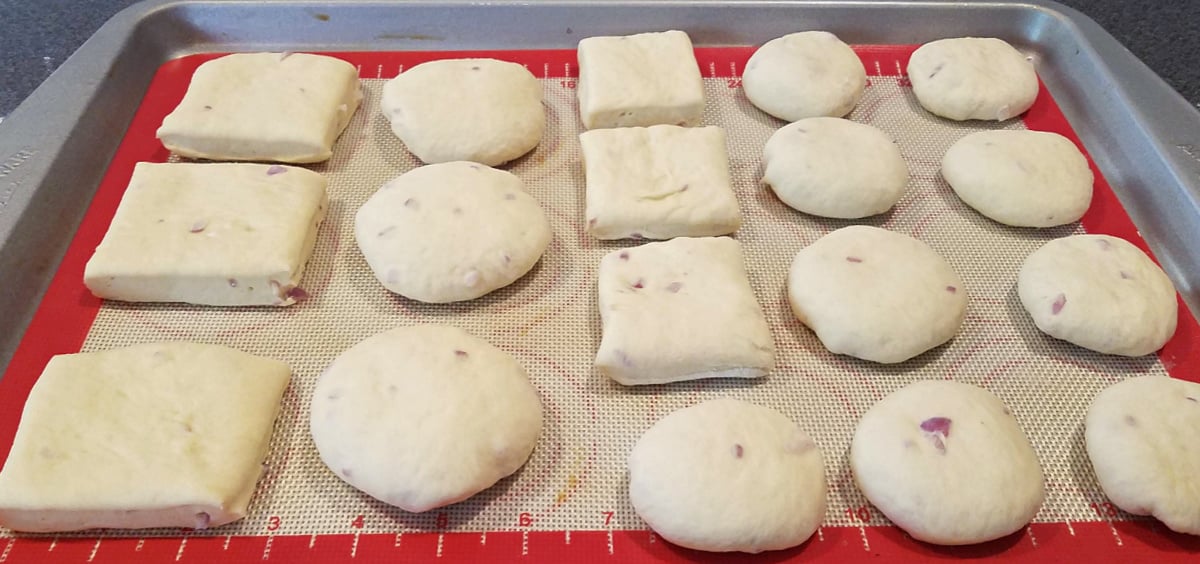
Step 3. Second Rise (Proofing)
- Place shaped buns on a parchment-lined or Silpat baking sheet, at least 1 inch apart.
- Cover with a towel and let rise about 1 hour in a warm spot.
- Optional: Brush with an egg wash (1 egg + 1 tablespoon water or milk) before baking.
- Optional toppings: sesame seeds, poppy seeds, or even a sprinkle of coarse salt.
Tip: Be gentle with the egg wash to avoid deflating the buns.
Step 4. Bake & Cool
- Preheat oven to 375°F | 180°C.
- Bake buns 15-20 minutes until lightly browned.
- Remove from oven and cover with a clean kitchen towel to keep soft.
- Cool on a wire rack for about 10 minutes before slicing and serving.
Tip: Fresh, preservative-free buns are best eaten within 1-2 days. They freeze beautifully for later use.
Now your buns are ready to slice, toast, and serve up with your favorite burger fixings.
As with all fresh, preservative-free bread, it's best to eat your homemade burger buns within a day or two. Buns may also be frozen for later.
Tips for Perfect Homemade Hamburger Buns
If you've ever had dense, flat, or dry buns, here's how to avoid it:
Start with the Right Dough Texture
Your dough should feel soft and slightly tacky - not dry or stiff. If it's too firm, your buns will be too.
Don't Rush the Rise
Good bread takes a little patience. If your kitchen runs cool, let the dough rise in a slightly warm oven (turned off, light on).
Watch for "Puffy," Not Just "Doubled"
Especially on the second rise - look for buns that feel airy and light, not just bigger.
Be Gentle When Shaping
Overworking the dough knocks out the air you just spent an hour building.
Use Egg Wash for That Bakery Finish
It's optional - but it gives you that glossy, golden top that makes homemade buns look bakery-worthy.
Cover Immediately After Baking
This is the secret to pillow-soft burger buns. Steam gets trapped under the towel and keeps the crust tender.
Boost Flavor with Small Add-Ins
Finely chopped onion, a pinch of garlic powder, or even a little honey can take these from "good" to "what did you put in these?"
Variations & Flavor Ideas
- Slider Buns: Perfect for appetizers or kids' meals.
- Hearty Buns: Substitute 1-2 cups of flour with rye or whole wheat for a heartier bun.
- Onion Buns: Mix chopped onion right into the dough
- Topped Buns: Sprinkle sesame seeds, poppy seeds, everything bagel seasoning, or a mix of seeds.
- Sweet Buns: Add a tablespoon of honey or sugar for slightly sweet sandwich buns.
Frequently Asked Questions
Yes! Freeze completely cooled buns in a zip-top bag for up to 2 months. Thaw at room temperature.
Absolutely. Prepare the dough and refrigerate overnight. Shape and bake the next day.
Cover with a towel right after baking and avoid slicing too early.
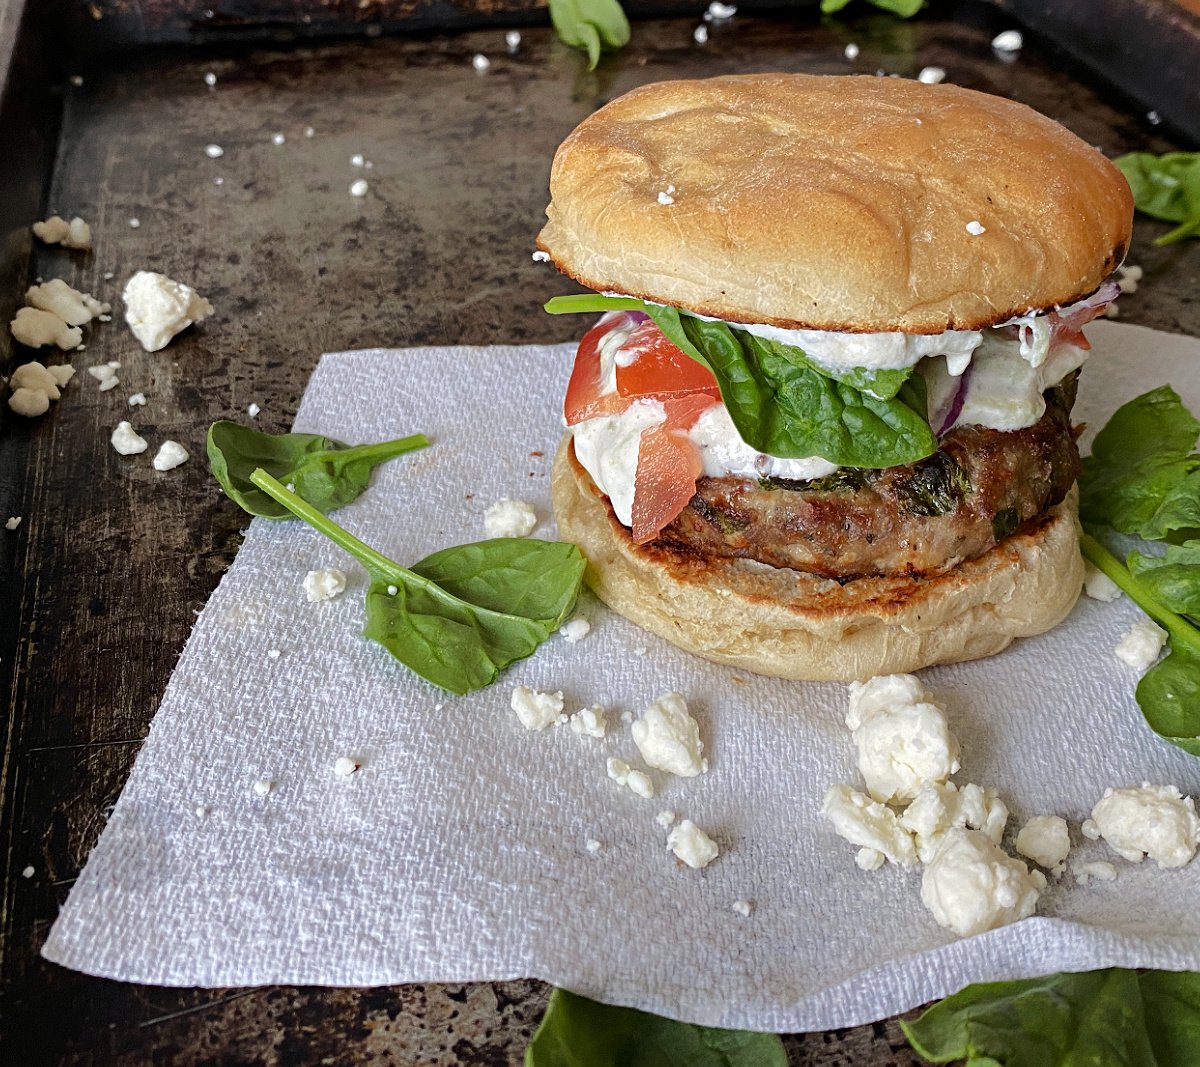
What to Serve with Homemade Buns
These buns are incredibly versatile - they're not just for burgers.
Classic Pairings:
- Juicy grilled burgers (beef, turkey, or veggie)
- BBQ pulled pork (perfect with your pulled pork recipe-link here)
- Saucy Sloppy Joes (link to your recipe)
Beyond the Basics:
- Crispy chicken sandwiches with slaw
- Breakfast sandwiches with eggs, bacon, and cheese
- Meatball sliders for game day
- Grilled portobello mushroom sandwiches
For Entertaining:
Make a mix of full-size and slider buns and let people build their own sandwiches. It's casual, flexible, and always a hit - especially for gatherings like poker night.
And if you're leaning into a comfort-food spread, these pair beautifully our soft, buttery biscuits for a full bread basket situation.
There's something deeply satisfying about setting out a tray of homemade buns - warm, golden, and made by hand. Whether it's for a backyard dinner, a casual gathering, or Mr. B's long-running poker night, they always bring a little extra something to the table.
And apparently… they're memorable, too. 😄
Homemade Hamburger Buns
Equipment
- 1 Bread Machine or knead the dough by hand
Ingredients
Instructions
Make the Dough
- In a large bowl (or bread machine pan), combine warm milk, yeast, and sugar. Let sit 5 minutes until slightly foamy. Add egg, butter, salt, and flour.Place dough in a lightly greased bowl, cover, and let rise in a warm place for about 1 hour, or until doubled in size.Bread machine: Add ingredients in manufacturer’s recommended order and run the dough cycle. By hand: Mix until a shaggy dough forms, then knead on a lightly floured surface for 6–8 minutes, until smooth and elastic.
Divide & Shape the Buns
- Turn dough out onto a lightly floured surface and gently deflate.Divide into portions:– 3 oz (85g) each for standard buns– 1½ oz (42g) each for slidersShape each piece:– For round buns, pull edges into the center, pinch, then flip seam-side down and gently round.– For square buns, simply shape lightly into even squares.Place shaped buns on a parchment-lined baking sheet, spacing at least 1 inch apart.
Second Rise (Proofing)
- Cover loosely with a clean kitchen towel and let rise in a warm place for about 45-60 minutes, until puffy and noticeably expanded.
Add Egg Wash (Optional)
- Whisk 1 egg with 1 tablespoon water or milk. Gently brush over the tops of the buns.Sprinkle with sesame seeds, poppy seeds, or leave plain.
Bake
- Preheat oven to 375°F (180°C).Bake buns for 15–20 minutes, rotating the pan halfway through, until tops are golden brown.
Cool & Store
- Remove from oven and immediately cover loosely with a clean towel to keep the crust soft.Cool for at least 10 minutes, then transfer to a wire rack to cool completely.Slice and serve. Store at room temperature for 1–2 days, or freeze for longer storage.
Notes
- Dough should feel soft and slightly tacky, not dry.
- For extra-soft buns, brush tops lightly with melted butter after baking.
Nutrition
This website provides approximate nutrition information for convenience and as a courtesy only. You are solely responsible for ensuring that any nutritional information provided is accurate, complete, and useful.
Homemade hamburger buns might sound like a project, but they're surprisingly simple - and once you try them, you may never go back to store-bought!
Did you like this recipe? Please leave a star ⭐️⭐️⭐️⭐️⭐️ rating below in the comments section! You can also stay in touch with us by following us on Pinterest, Facebook, and Instagram.
Erin @ Platings and Pairings says
I love the idea of making homemade burger buns! This for sure will just take any burger to the next level!
Waz says
Oooh, I've never made my own hamburger buns before. These look great, and the ingredients are so much better than so many store bought varieties. Definitely interested in giving it a try!
Cindy says
These look super tasty! I'm having to monitor my carb intake, so I love the idea of being able to control the size of these for hamburgers this summer!
Hillary Knudsen says
Cheese and onion burger buns sound absolutely incredible! Definitely going to make these for our burgers this summer!
Marlynn | Urban Bliss Life says
Of course the poker guys all loved your buns! 😉 LOL that was cute! I don't eat hamburger buns at home, but my family does and I can't wait to try this. Thanks for the detailed instructions and options!
Catherine @ To & Fro Fam says
I've never thought to make homemade hamburger buns, but I know I'd want to after reading the labels of store-bought, conventional ones. Yipes!
Renée ♥ says
I am to the point where I try to avoid buying processed/store breads of any kind anymore. Most have so many additives and preservatives. I find the fact that a loaf of store-bought bread can survive on the shelf for weeks at a time worrisome, to say the least.
Jackie says
This is awesome! I find it sooo hard to simply buy a good hamburger bun. This solves the issue!
Renée ♥ says
Once you make them at home, it's hard to go back to the store shelf. They just taste so much better in every way.
Katie says
These look awesome! I have never even made homemade bread before, but I'm tempted to try these today! Thank you for the yummy recipe!
Renée ♥ says
It's so easy!You should try it!
Sheila says
These look amazing! Im not sure if I could do this but Im saving this receipe for Hubs. He loves to bake!
Jennifer says
I love making things from scratch so this i have to try
Amanda says
These buns look so great. Perfect for BBQ season!
Renée ♥ says
They are! I especially like them for big get-togethers: you can make them in different sizes to fit different appetites.