
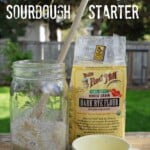
Rye Sourdough Starter is - by far - the easiest sourdough to start. All you need is rye flour and water.

Jump to:
It only takes about 5 days to establish a new Rye Sourdough Starter. Once established, Starter can easily be converted to a white or whole wheat flour starter: it all depends on what kind of flour you choose to use going forward.
What Does 100% Hydration Mean?
This Rye Sourdough Starter is a what is referred to in the sourdough world as a 100% hydration starter. A 100% hydration sourdough starter is a sourdough culture which is kept and fed with equal weights of water and flour. (For example, 2.25 ounces water to 2.25 ounces of flour.)
By contrast, a 166% hydration starter is fed with equal volumes of flour and water. For example, ½ cup of water (4 ounces) to ½ cup flour (2.25 ounces).
What You Need to Make Rye Sourdough Starter
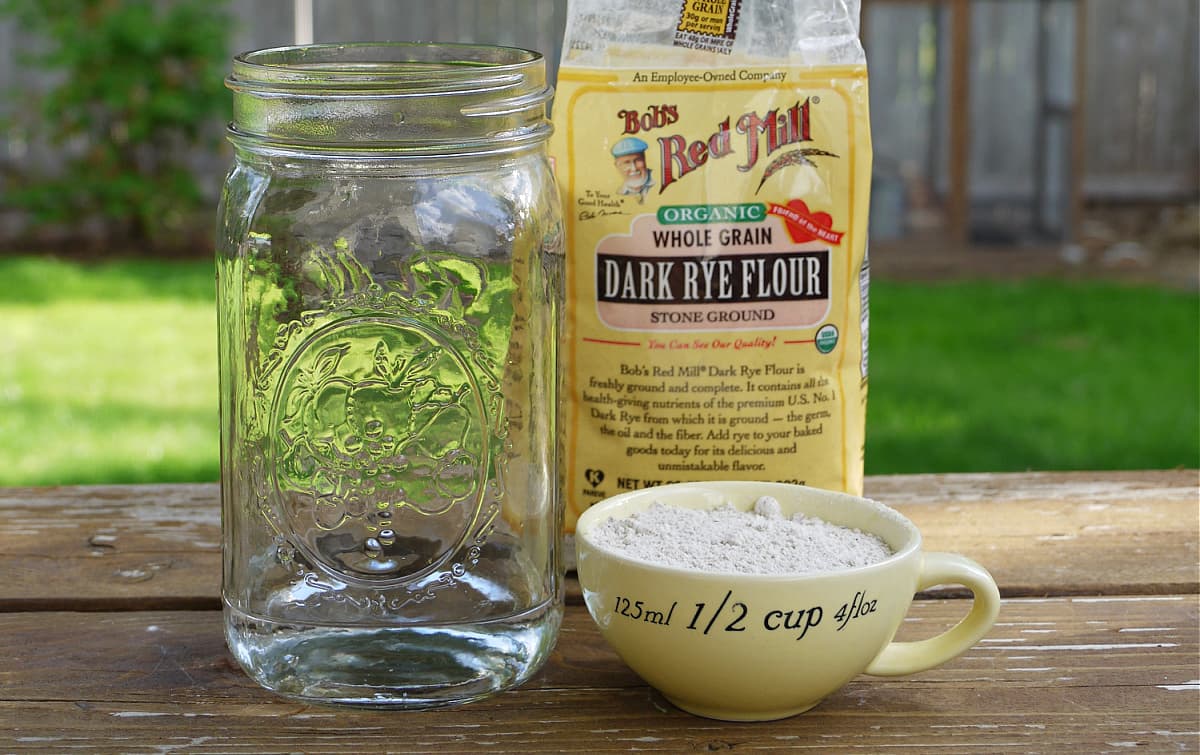
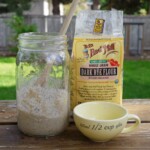
★ Flour: Use any high quality, finely ground, fresh rye flour. (We use Bob's Red Mill Organic Dark Rye Flour.)
It is important to note that whole-grain rye flour has a short shelf life (three to four months) and should be stored in an airtight container in the refrigerator. It will keep in the freezer for up to six months. Rye flour with the germ removed will keep for slightly longer than whole-grain rye flour.
★ Water: When I made this starter the first time, I used plain old tap water, and everything bubbled up just fine. Nevertheless, many sourdough professionals discourage the use of tap water in favor of distilled water, as the chlorine and other chemicals found in treated water can kill the microorganisms that need to flourish to create sourdough.
I now use distilled water for all my sourdough, but I wanted to share my experience with tap water because unless your city uses an excessive amount of chlorine in your water supply, it's not a deal-breaker. (If you would rather use tap water, but want to remove at least some of the chlorine, there are a couple of ways you can dechlorinate water at home.)
Materials & Tools
- Quart-size Mason Jar (Wide mouth is best)
- Breathable Jar Covering
- Wooden Spoon
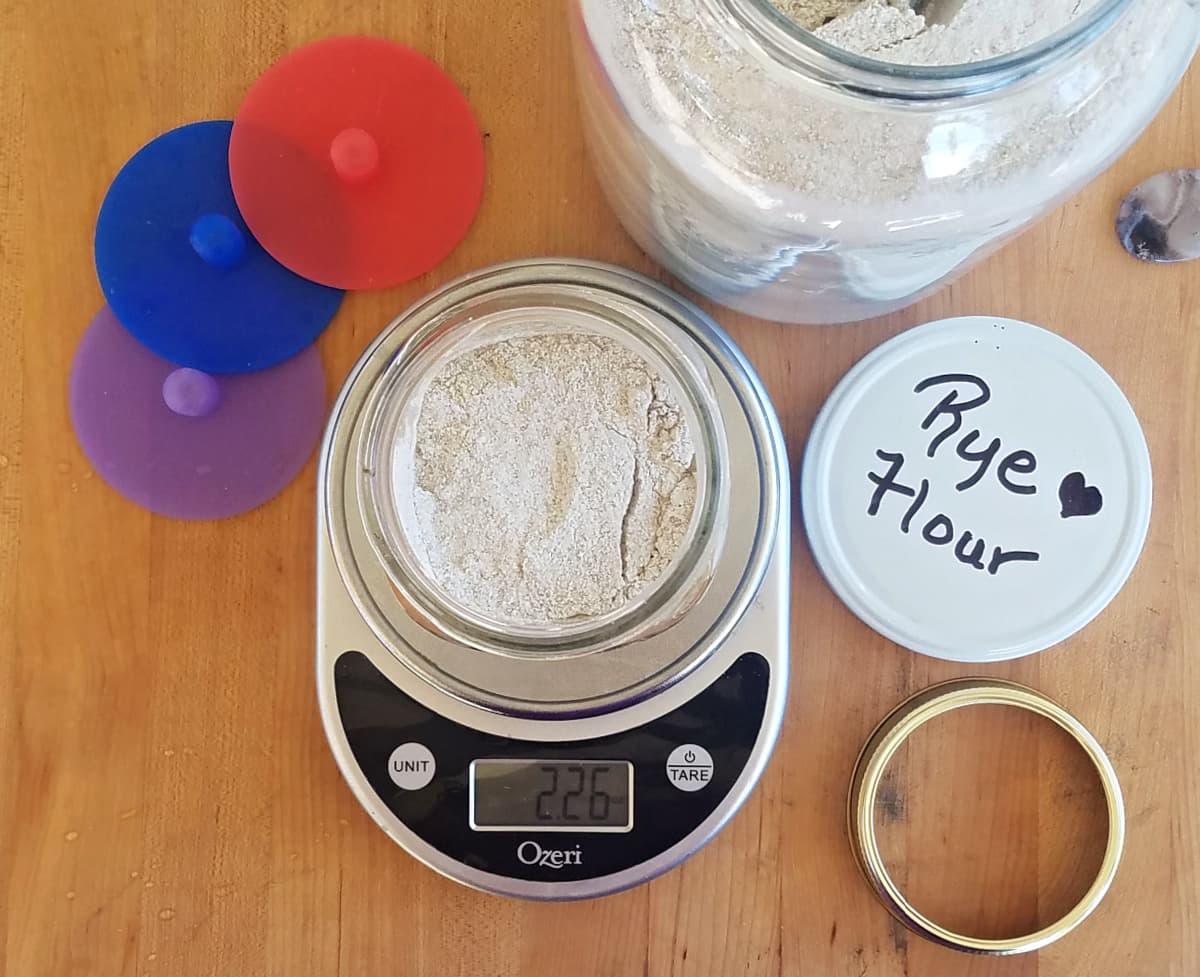
- Kitchen Scale (optional)
How to Make 100% Hydration Sourdough Starter
Points to Remember
- Never allow reactive metal to come in contact with your sourdough starter. Always use a wooden spoon to stir when you feed it. Starter should be stored in glass, plastic, or pottery containers.
- Always leave enough room in your Sourdough Jar for the Starter to triple in size. It usually only doubles, but you want to leave some wiggle room.
- Never cover your starter with an airtight lid.
Day 1
You will need: 2¼ ounces rye flour + 2¼ ounces water
Using a wooden spoon, mix the rye flour and water in a mason jar or non-reactive bowl. Cover loosely and place in a dark place at 70°F for 24 hours. (I put mine up against the counter right next to my stove.)
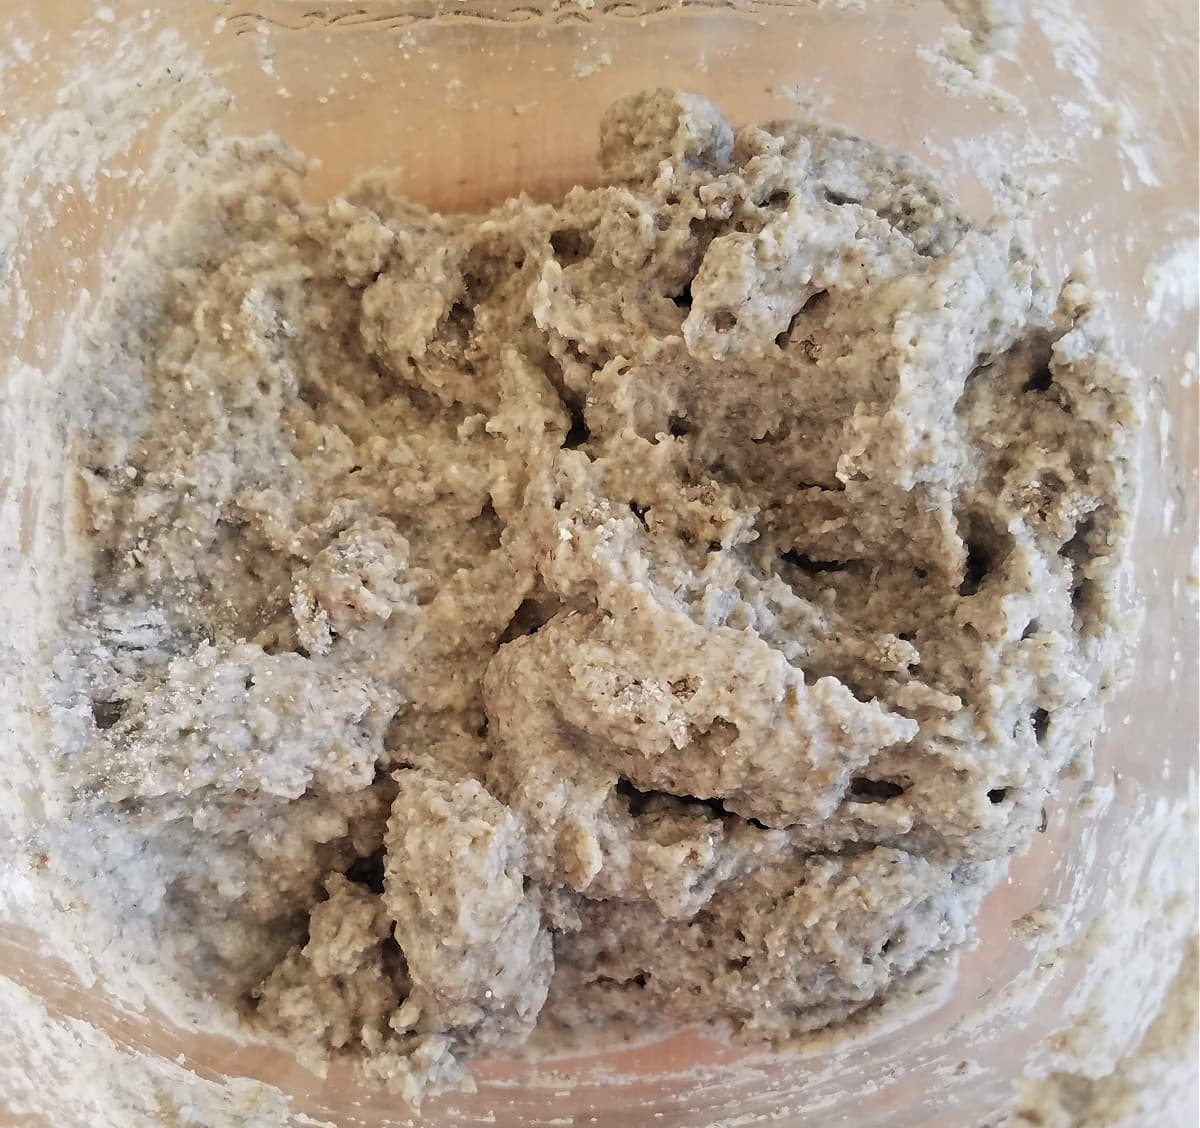
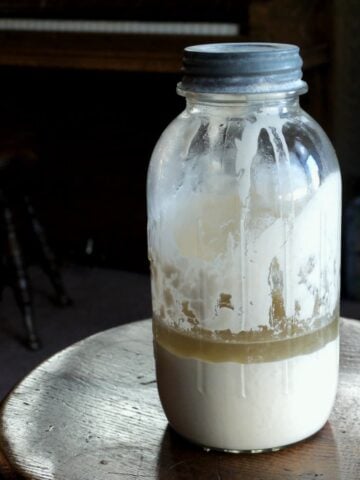
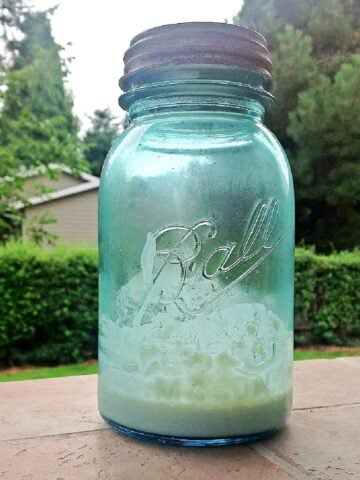
Your unfermented Starter will be the consistency of thick cook dough. It will loosen up over time.
Day 2
You will need: 2¼ ounces rye flour + 2¼ ounces water
Add the rye flour and water to the starter. Mix with a clean wooden spoon for 30 seconds until the flour has been incorporated. Cover loosely and place in a dark place at 70°F for 24 hours.
Day 3
You will need: 1⅛ ounces rye flour + 1⅛ ounces water
Add the rye flour and water to the starter. Mix with a clean wooden spoon for 30 seconds until the flour has been incorporated. Cover loosely and place in a dark place at 70°F for 24 hours.
Day 4
You will need: 1⅛ ounces rye flour + 1⅛ ounces water
If bubbles have started to form and the flour has begun to ferment, discard ⅔ of the mixture in the jar. Add the flour and water to the remaining ⅓ and mix for 30 seconds until the flour is well incorporated. (If the mixture has not started to ferment repeat step 3.)
Day 5
The starter should be mature by this point and is ready to use. Use the starter as needed. After use, see feeding instructions.
If you want to convert your starter to a white flour or whole wheat Starter, you may begin feeding it with all-purpose flour from this point on.
Safe Sourdough Starter Storage
NEVER leave sourdough starter in direct sunlight. (Seriously. Remember Gremlins?)
According to the sourdough pros, 70°-80° F [21° - 27° C] is the ideal temperature range at which to keep your sourdough starter.
If I am actively using my starter on a regular basis, I keep it on my kitchen counter near my stove. (I've also had good luck in the past keeping it on top of the fridge.) If I am taking a break from sourdough baking, I let my starter chill in the fridge.
If kept below 70°F [21°C], the natural yeast in the starter incubates very slowly; above 80°F [27°C], the starter will tend to ferment alcoholically, which is not desirable.
Troubleshooting: If you ever forget your starter in the back of the fridge and it looks scary when you take it out, be sure to check out our Lazy Caretaker's Guide to Sourdough.
NEVER cover your starter with an airtight lid!
The natural fermentation process creates gas, and that gas needs to have a place to go, so you need to cover your container with something that will allow some of that gas to escape.
We have successfully used all of the following methods:
- Rubber Band and a clean cloth. Not pretty, but it works.
- Mason jar ring and a piece of clean cloth. I usually use muslin in this case.
- Pickle Pipes (or other lid designed for fermentation)
I discovered Pickle Pipes some time ago, and I LOVE LOVE LOVE them! For the money, they are (IMHO) the best solution for the job. (Just to clarify, this is NOT a sponsored post; but that is an Amazon affiliate link.)
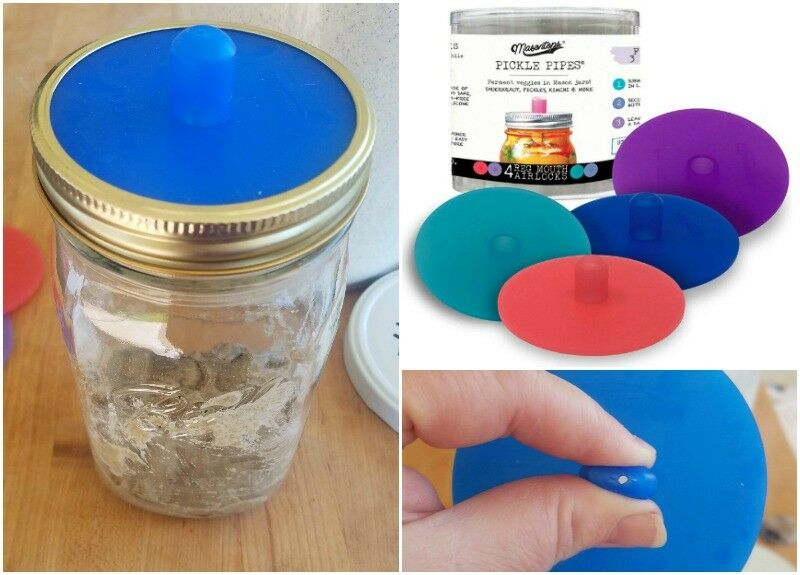
- Pickle Pipes feature one-way airlocks that vent gas automatically so they require no burping or babysitting.
- Prevent spoilage by releasing the gas that builds up during the fermentation process.
- Some people like to call them Pickle Nipples, which is fun to say. (Try it 3 times fast... and GO!)
- They prevent oxygen and airborne contaminants from getting inside.
- They are food-safe. (e.g., BPA-free, no phthalates)
- They are Dishwasher-safe.
Stages of a Healthy Sourdough Starter
♣︎ Fed Starter - Fed Starter is active, healthy starter that has been fed within about 2 hours. By hour 2, it will be producing little bubbles on the surface.
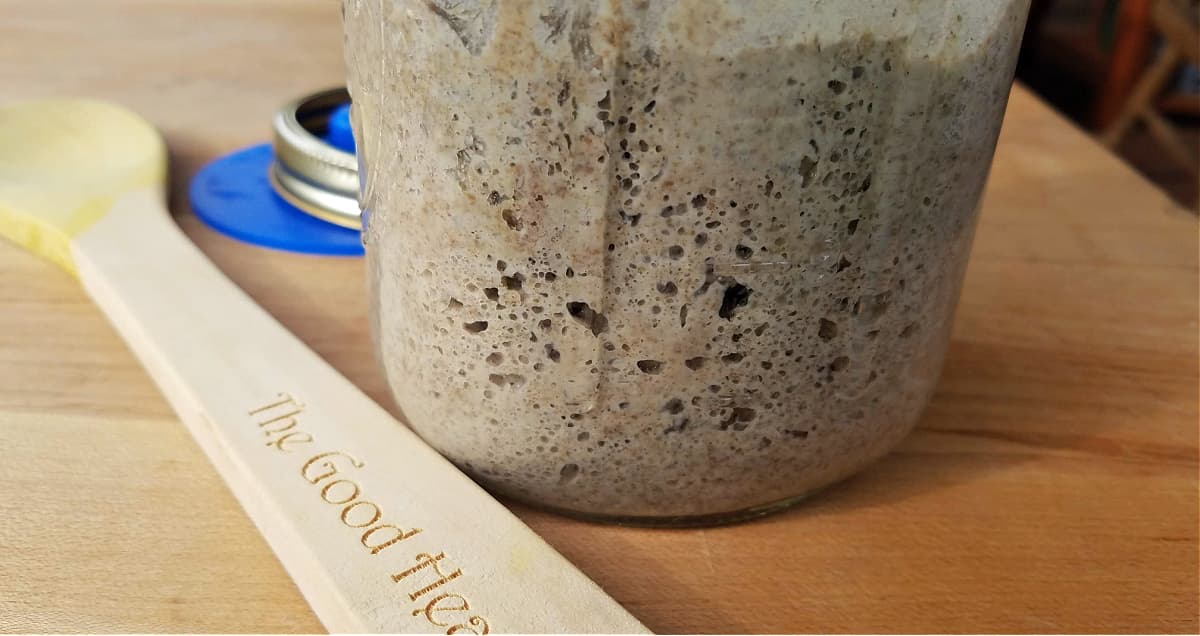
♣︎ Active Starter - Starter is Active about 5 hours after feeding. By hour 5, you should be able to watch large bubbles actively rising through the Starter and making their way to surface.
♣︎ Ripe Starter - Starter is considered Ripe about 8 hours after feeding. The volume has doubled, and the top is just beginning to show signs of sagging under its own weight.
♣︎ Unfed Starter - Unfed Starter is healthy, vigorous Starter that has not been fed for 12 hours or more. By hour 12, it collapsed after Ripening, and is ready to be fed again or put in the fridge until next time. (Note that this is NOT neglected Starter that hasn't been fed in days.)
♣︎ Discard - Sourdough discard is the portion of your sourdough starter that you get rid of when you do a feeding. It should be healthy and vigorous, with some small bubbling activity.
Many recipes, including most bread recipes, call for feeding your starter the night before and using it in the morning. When you do this, you are technically using Ripe or Unfed Starter, depending upon the vigor of your starter and how much time elapses between last feeding and usage.
FAQs & Expert Tips
The amount you feed your sourdough starter depends on how much of it you have to start with. You want to approximately double your starter each time you feed it. So, for example, if you have 8 ounces of Starter, you will feed it 4 ounces of water and 4 ounces of flour.
If you have more starter on hand than you anticipate using for baking, you can toss (or share!) a cup or more of Starter and then double what remains. You always want to have at least 8 ounces of Starter leftover after baking to keep the process going.
Read Sourdough Starter: Care & Feeding for tips and advice for the care and feeding of a sourdough starter, including how to maintain it, and how to revive a neglected starter.
Healthy Starter can be refrigerated for up to a week between feedings; however, most sourdough experts recommend feeding Sourdough Starter at least twice a week for best results. (Honestly, I often leave it FAR longer with no problems.)
Nope. Once your starter has been established, you can convert it to a white or whole wheat Starter by feeding it with your chosen flour.
Get a Kitchen Scale
If you don't already own a kitchen scale, now might be the time to get one - and this is coming from someone who usually measures everything by pinch and palm!
I honestly don't know how I ever lived without a good kitchen scale. Weighing the water and flour for your sourdough starter keeps the hydration consistent, which in turn gives you more consistent results in your cooking and baking. (I don't use any measuring cups when I make bread - I weigh everything!)
If you don't have a kitchen scale, measure out ⅔ to ¾ cup of water for every cup of flour.
Easy Sourdough Recipes

You don't need a special recipe to sourdough starter! Nearly all of your favorite yeast bread recipes can be adapted to use sourdough starter, as can many quick breads.
Want More Free Recipes?
Subscribe to our newsletter to get family-friendly recipes and cozy living ideas in your inbox each week!
Find us on Instagram, Pinterest, and Facebook, too.
Rye Sourdough Starter (100% Hydration)
Equipment
- 1 wide-mouth quart jar
- 1 breathable jar covering
- 1 Wooden Spoon
- 1 Kitchen Scale optional
Ingredients
- 7 ounces rye flour divided
- 7 ounces water divided
Instructions
Day 1
- You will need: 2¼ ounces rye flour + 2¼ ounces waterUsing a wooden spoon, mix the rye flour and water in a mason jar or non-reactive bowl. Cover loosely and place in a dark place at 70°F for 24 hours. (I put mine up against the counter right next to my stove.)Your unfermented Starter will be the consistency of thick cook dough. It will loosen up over time.
Day 2
- You will need: 2¼ ounces rye flour + 2¼ ounces waterAdd the rye flour and water to the starter. Mix with a clean wooden spoon for 30 seconds until the flour has been incorporated. Cover loosely and place in a dark place at 70°F for 24 hours.
Day 3
- You will need: 1⅛ ounces rye flour + 1⅛ ounces waterAdd the rye flour and water to the starter. Mix with a clean wooden spoon for 30 seconds until the flour has been incorporated. Cover loosely and place in a dark place at 70°F for 24 hours.
Day 4
- You will need: 1⅛ ounces rye flour + 1⅛ ounces waterIf bubbles have started to form and the flour has begun to ferment, discard ⅔ of the mixture in the jar. Add the flour and water to the remaining ⅓ and mix for 30 seconds until the flour is well incorporated. (If the mixture has not started to ferment repeat step 3.)
Day 5
- The starter should be mature by this point and is ready to use. Use the starter as needed. After use, see feeding instructions.
- If you want to convert your starter to a white flour or whole wheat Starter, you may begin feeding it with all-purpose flour from this point on.
Feeding Sourdough Starter
- The amount you feed your sourdough starter depends on how much of it you have to start with. You want to approximately double your starter each time you feed it. For example, if you have 8 ounces of Starter, you will feed it 4 ounces of water and 4 ounces of flour.
- If you have more starter on hand than you anticipate using for baking, you can toss (or share!) a cup or more of Starter and then double what remains. You always want to have at least 8 ounces of Starter leftover after baking to keep the process going.
- Healthy Starter can be refrigerated for up to a week between feedings; however, most sourdough experts recommend feeding Sourdough Starter at least twice a week for best results. (Honestly, I often leave it FAR longer with no problems.)
- Read Sourdough Starter: Care & Feeding for tips and advice for the care and feeding of a sourdough starter, including how to maintain it, and how to revive a neglected starter.
Notes
Nutrition
This website provides approximate nutrition information for convenience and as a courtesy only. You are solely responsible for ensuring that any nutritional information provided is accurate, complete, and useful.
Thank you for visiting the Good Hearted Woman. Remember to bookmark this site, and come back soon!
UPDATED: Originally published September 14, 2015
Sandra M. Troy Pennington says
Which type of rye flour has "more yeast" available when using in a sourdough starter, light, med, dark? Thanks. Light has more endosperm, dark rye flour has more bran? Does dark have more available yeast?
Renée B. says
Great question! The type of rye flour that typically has "more yeast" available for a sourdough starter is dark rye flour. Dark rye is a whole grain flour, and holds a higher concentration of natural wild yeasts and nutrients to feed your starter compared to light or medium rye. It’s a popular choice for boosting the activity of sourdough starters. Happy baking!
Melissa says
Hello,
Thanks for the easy to follow directions on everything sourdough. I'm on attempt #2 of starting a sourdough starter. I started with a different recipe, but it didn't work out so I did some more research and came across your page.
I'm struggling with the thickness of my day 2 starter, however. I did the 2.25 Oz of rye flour and 2.25 Oz of water, but it's REALLY thick. Like the flour isn't even all the way wet and I would compare the consistency to a dry biscuit dough. Could it be possible that the rye flour I bought is not a good starter? It's a bulk store dark rye flour, but I have no idea what brand.
Is it supposed to be that thick? If not how much "extra" water would you recommend me trying? There are no bubbles forming potentially because it is too thick. I really want this sourdough thing to work out. I feel like if I can get it to mature, it'll be so much easier to take care of.
I appreciate your expertise and will be happy to follow any direction you tell me should work.
Renée B. says
Hello there!
It's not uncommon to encounter variations in consistency during the initial stages. I find that the consistency is closer to cookie dough than pancake batter for the first few days, but after that, it should loosen up.
Since your starter is quite thick, you can definitely adjust the hydration. Try adding a bit more water gradually until you achieve a more pancake batter-like consistency. Start with small increments, maybe 1-2 tablespoons at a time, mix well, and assess the consistency. This can help stimulate fermentation and encourage the development of bubbles. Additionally, the type and brand of flour can definitely impact the hydration needs. If the dark rye flour you're using is particularly dense, it might absorb more water. Experimenting with the water content can help you find the sweet spot.
Remember, sourdough starters can be resilient, so don't be afraid to make adjustments. Keep an eye on the activity and look for signs of bubbles and a slightly sour aroma. If you still encounter issues or have further questions, feel free to reach out. Happy baking! 🍞
Michael Borza says
Using the same Bob's Red Mill rye flour as your picture shows and expiration is Feb 2025.
Well already on day 3 my starter was roughly double in size and with bubbles, so I applied what you said should happen in day 4: that is I discarded 2/3 of it and I fed it with 1and1/8 rye and 1and1/8 water. Next day no bubbles anymore and almost no rising. Any clue please?
Renée B. says
Is it possible the environment is a little chilly? The temperature of your kitchen can dramatically affect the speed of the sourdough process. Give it an extra day and see what happens. If that doesn't help, go back to step 3, and allow it 2 days between steps instead of one. Also, try using distilled water (if you're not already): some cities use too much chlorine in their water supply.
Starting a new sourdough starter is by no means a cut-and-dry process: type of flour, quality of water, outside temperature, and vessel all affect the outcome.
Hope this helps.
Becky says
Hi I started my Rye Starter & put it my microwave leaving the door cracked open which allows the light to stay on, & I kept the jar lid just barely cocked to the side..day 2, I checked on it & it had white fuzzy “hair” growing on top. I chucked it. What am I doing wrong? I’m getting SO discouraged...
Renée says
That definitely sounds like mold. You did the right thing: in my experience, there is no coming back from mold. The most likely culprit is either the jar you are growing the starter in or the flour you are using.
It is imperative that the vessel you grow you starter in is sterile. Not that it just "looks" clean, but that it is sterile. You should move starter to a new, sterile jar every couple times you feed it, too.
It is also important that the flour you use is fresh. Rye flour has a very short shelf life, and last only 4-6 months unrefrigerated; and then only that long if it is properly stored in an air-tight container.
Also, check the temperature of the environment you have set up: it shouldn't be much higher than 70°F | 21°C.
Hope this helps!
Lisa says
Thanks, Renee! I'm on Day 2 and so far so good. I'll let you know how it goes.
Lisa says
What about the starter having to double in size, noting the rise and fall of the starter? What about the float test to determine if your starter is ready to bake with? How do you know for sure that the starter is mature? This is seriously my tenth attempt at creating a sourdough starter and I'm praying that your recipe is the one!
Renée says
I hope so too, Lisa.
I cannot imagine what is happening that would make ten sourdough starters fail. I'm sure you've already checked these things, but just in case, here are a few troubleshooting thoughts: First, rye flour has an expiration date, after which it can go bad on the shelf quickly. Be sure that the rye flour you are using to create your starter is fresh. Also, be sure the water you are using is free of chlorine. If you live in a town that chlorinates their water, it is imperative that you allow the water to set out for a day or two so the chlorine can dissipate before you use it to feed your starter.
Those are really the only two things I can think of that could be impeding your sourdough's progress.
As for when it is ready: I know some people do float tests and watch their starter rise and fall like a baby taking its first steps, and that works for them. There is nothing wrong with any of it. However, I've always done sourdough rather intuitively, as the instructions here reflect. A starter is mature five or six days after it begins; when it is vigorous and bubbly and "smells like sourdough." Depending on the time of year, the weather, the vessel, and the temperature on your kitchen counter, it can take up to eight days for a starter to really get going, which is also fine. After the initial build-up, and with regular feeding, a healthy starter will be ready to bake with in 8-12 hours after feeding. It's really as simple as that.
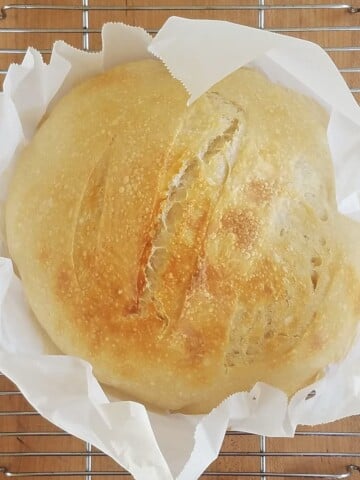
When you get that starter going, be sure to check out our Easy Sourdough Bread recipe. It's a very forgiving, total beginner step-by-step recipe: nothing fancy, but you'll end up with a delicious loaf of bread, and understand the sourdough process a bit more without a lot of frustration.
Colleen says
I am confused for weekly feeding amounts.
It says follow day 4 which is 1 1/8 each water and flour but it also says 3oz each.
Made Soft pretzels for thanksgiving they were delicious with everything bagel seasoning.
Renée ♥ says
Thanks for the question, Colleen. I've updated the recipe card: hopefully it is more clear now. Basically, on Day 4, you are still building your starter, so feed it with 1 1/8 ounces water and flour. The 3oz refers to the regular weekly feeding, after your starter has been established.
Serena Jane says
Ok thank you! It was bubbly today but still a bit thick so did add some more and will see how it is tomorrow.
It does smell really sttrong aswell which I'm guessing is normal especially since I'm milling my own flour?
Renée ♥ says
OK... you're milling your own flour: that may affect the water absorption, which would impact the density of the mix. Just a theory.
And yes, your starter should have a distinct, sourdoughy scent; however, it should not be off-putting. From what I've read, hand-milled flours can introduce undesirable wild yeasts that can ruin your sourdough (as opposed to the "desirable" wild yeast you are looking for). This isn't to say you shouldn't use it: just that doing so may take a bit more investigation into the process. Perhaps you could Search for more advice on "home-milled flour sourdough starter" and see what helps. I wish I had more advice to offer; unfortunately, while I've milled my own flour on occasion, I have no experience with it in regard to sourdough maintenance. Best of luck, Serena
Serena Jane says
Hi:) so I finally made the starter, but it looks too dry, and looks like there's not enough water for it too ferment. What did yours look look like on day 1?
Renée ♥ says
If by dry, you mean thick, then yes - on the first day, the starter mix does appear much thicker than it does once the natural yeast has a chance to start working. If I remember right, on the first day, the consistency is a lot like old-fashioned school paste. That being said, if after a day it still seems too thick, just add a little bit of extra water to get things moving.
Nicole M Olson says
When you "discard" the 2/3 - can they be used for anything?
Nicole Fisher says
My starter seems to be separating- there is a dark liquid at the top. Is this normal or should I discard?
Renée ♥ says
Don't discard it yet. Usually, the liquid in a dormant or neglected starter will start to turn gray. (Warning: If it has mold on top or smells putrid, throw it away.) Search "Reviving a dormant or neglected starter" and you will find some good advice. Good luck!
Betsy says
Thanks for this recipe, I'm so exciting to try it! Do you have a favorite Rye Sourdough Bread recipe that you use it with? Thanks!
Renée ♥ says
Thank you for reading! I'm still searching to the "ultimate" sourdough rye bread. I'll be sure to post it when I figure it out though.
Hannah Thompson says
I have a mason jar with a metal lid. Is it ok to use as long as it doesn't touch the starter? And if I just screw it on loosely will it allow enough circulation, or should I use cheesecloth and twine instead?
Renée ♥ says
I use a very old mason jar with a loose lid, and it works fine. Just be sure not to "seal" the jar with the lid.
Hannah says
Thank you! Looking forward to trying this!
Sophie says
First of all, your amazing and I appreciate the step by step! I’ve made starter twice now just to get the hang of it. I made my first load of 100% rye sourdough last week and it was awesome. But I had to use ALL of my starter because after discarding 2/3 of it, I only had 1 cup left which is what the recipe called for. Why is it important to discard 2/3 of my starter? Can I just use 2/3 instead of throwing it away? I’ve had lots of success with my starter and am very excited to experiment some more with it. Thanks for sharing your method!!
Renée ♥ says
So glad it is working for you! Honestly, as far as I know, discarding it is just a way of making sure you don't end up having it take over your fridge or countertop, so of course you can use it as apposed to throwing it out. If you keep it and don't use it, however, you do have to keep the ratio of new to old correct, so you will have to add more flour and water.
Stacey says
I have a similar question; basically, my confusion with maintaining the starter starts with the discard, does the 2/3 have to be taken out at all? Is the purpose exclusively to keep the amount of the starter manageable? I plan to make quite a few loaves at once so I'd like to build the amount of starter I have from the beginning of the process if that makes sense.
Thank you for the tips!
Renée ♥ says
Short answer:Yes, you need to discard before feeding your starter. However, you can build up your starter slowly to what amounts to double or even triple the amount, and then make loaves regularly to your heart's content
Long answer : This post, Why Discard Starter: A Mathematical View, explains why it is important to discard a portion of your starter before feeding it far better than I can. Hope this helps.
Amanda says
Does anyone have baking instructions for this bread?
Renée ♥ says
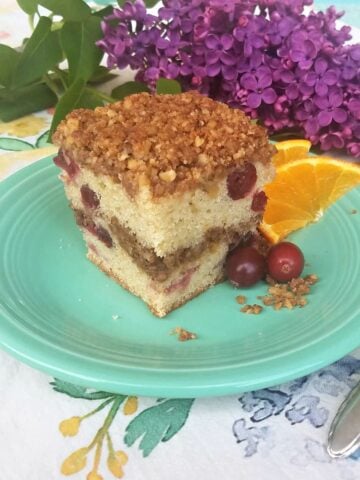
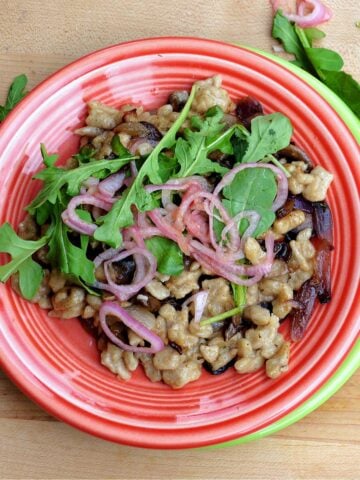
Amanda, you can use it like any other sourdough starter. I have an easy sourdough bread recipe on the blog here → Kaylen's Bread; however, I posted this recipe as a lead-in to my Rye Sourdough Spaetzle with Caramelized Cipollini & Sautéed Mushrooms, which is delicious.
Catherine says
Wow, this post is chock-full of details on making a sourdough starter. I had no idea metal could ruin a starter!
Dawne says
I agree with Cyra, this totally scares me but I love sourdough...ugh might have to face my fear...
http://www.dawnehanks.com
Kelley says
Yes! I've been not-so-patiently awaiting baking weather, and sourdough will be a perfect project. You might see vegetarian spaetzle from my kitchen soon...
Cyra says
Man, sourdough scares me. But, then, bread scared me and that's turned out to be dead easy.
Erin says
Oh! Have you made rye sourdough pancakes using this? I'm intrigued to know how that tastes!
Marlynn [UrbanBlissLife] says
Confession: I've never thought about or attempted a sourdough starter, but I am bookmarking this! I love how you lay out each step in easy to follow directions. I'm looking forward to that spaetzle recipe!
Rachel Lloyd says
I'm not much of a baker, but the science behind everything we eat is so interesting! Looking forward to see the recipe come to life!
Pech says
With the cooler temperature this week I can't believe you're holding out on some comforting Spaetzle recipe!! Can't wait to read it!