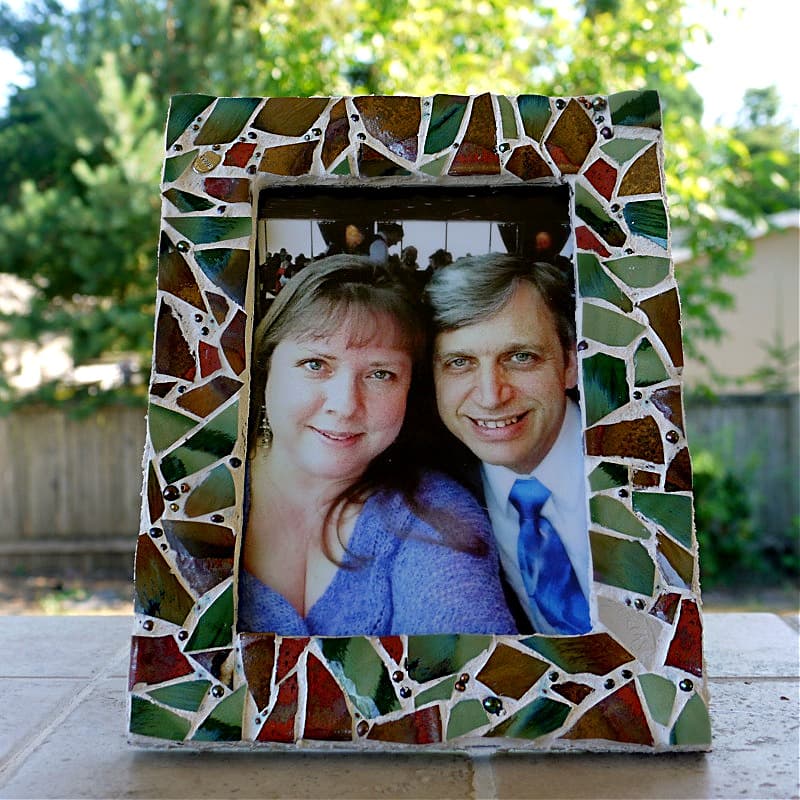
When a special piece of glass or pottery breaks, give it new life! Our step-by-step directions will show you how to upcycle broken plates, cups, bowls, and other damaged ceramics into a beautiful Mosaic Picture Frame.
Jump to:
What's the Story on this Project?
Whenever we go on vacation, Mr. B and I always try to find something really nice to take home as a memento of our adventure. We don’t buy a lot of tchotchkes (no snow globes or bumper stickers for us). Instead, we look for one small piece of art (or a musical instrument) that reminds us of the places and people we saw along the way.
A few years ago, we bought a beautiful set of pottery cups at a little place on Orcas Island up in the Puget Sound, and every time we used them, they reminded us of that lovely week we spent camping and kayaking in the San Juan Islands.
Until I knocked one of our cups off the counter and broke it.
At first, I thought I would just glue it back together, but one large chip was completely missing, so I sadly threw the pieces into our bathroom garbage can. They sat there for two days before I retrieved them to give them a second life.
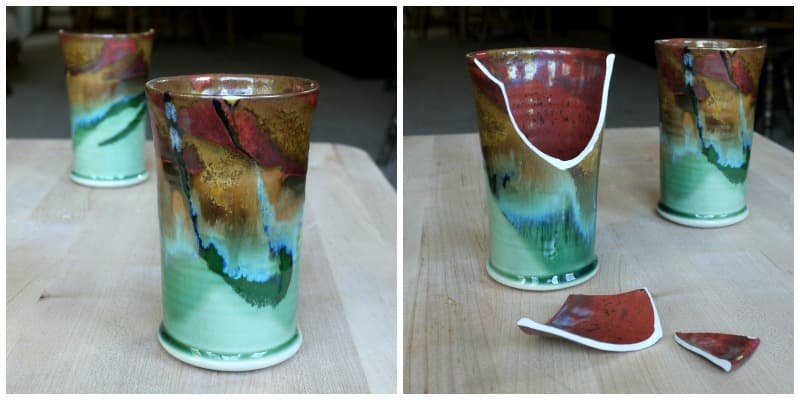
When a special piece of glass or pottery breaks, it's easy to give it new life as a tiled mosaic - on a frame, a tabletop, a serving tray, or just about anything. Our cup was just the right size to cover a 5x7 mosaic picture frame.
What You Need for this Upcycling Project
Materials
- Old, wide-rimmed picture frame (It doesn't need to be fancy, or even in good shape: I saved this one from the recycling bin.)
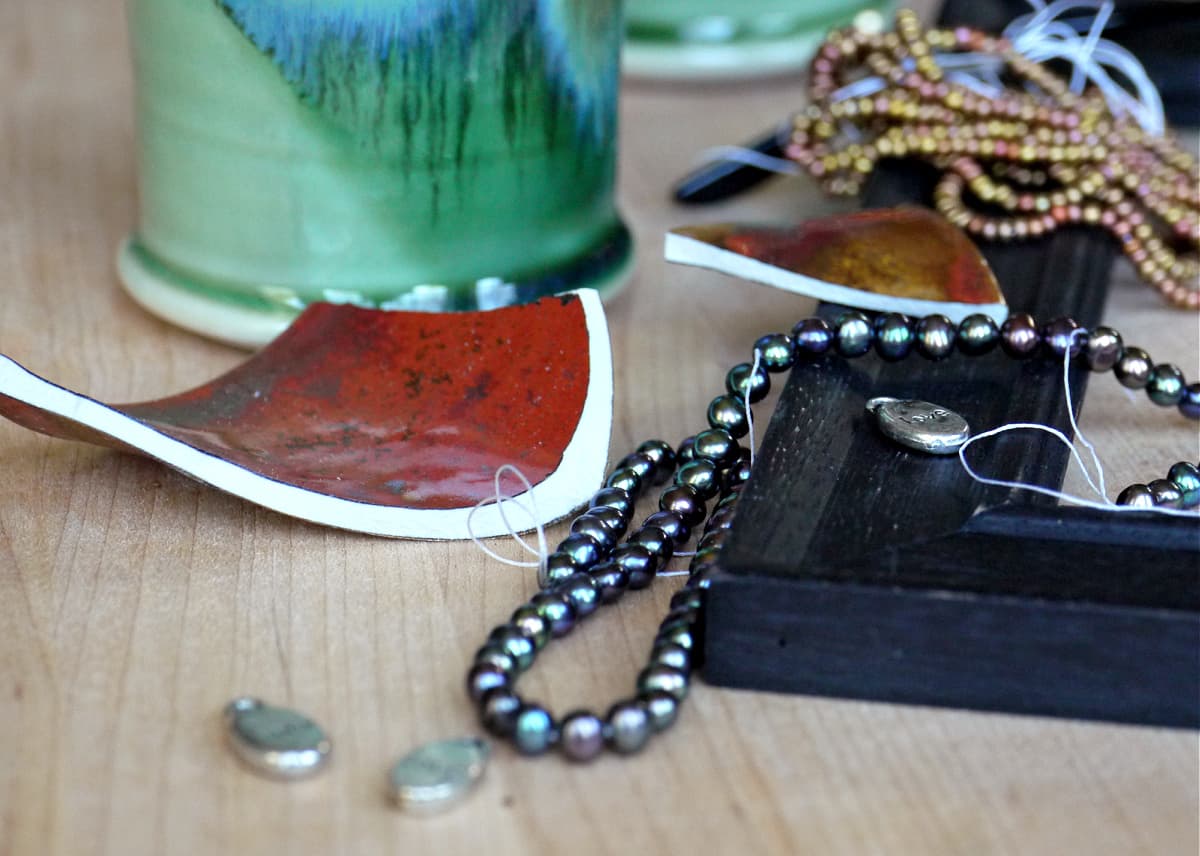
- Old plates, cup, etc (i.e., ceramics to smash)
- Tile Adhesive (Weldbond 8-50160 Multi-Purpose Adhesive Glue)
- Premixed Tile Grout (Jennifer's Mosaics Powdered Grout)
- Grout sealer (optional: use if you are mosaicking something that may get wet (i.e., serving tray, coffee tabletop, etc.).
- Buttons, beads, or assorted do-das for embellishing (Totally optional. I used some extras from my beading supplies.)
- Clean sponge
- Paper towels
- Water
- Bag in which to smash things (I like to double-up gallon size Ziploc bags for this step so that I can see what I am doing.)
- Nitrile gloves (or any latex or non-latex gloves)
- Plastic knife
Tools
- Safety goggles
- Safety gloves
- Hammer
How to Make a Mosaic Picture Frame Out of Old, Broken Ceramic Pieces
Set the Mosaic Pieces
Put on the safety goggles & gloves. Really – put them on. Now. You do not want speeding shards of glass or pottery flying into your eyes or stabbing your palms.
Put the object to be smashed into the designated Smashing Bag. Use the hammer to carefully smash the object into large pieces using one intentional blow. This should give you a number of large pieces.
At this point, I like to take the large pieces out of the bag. Then I put them back in, one at a time, and smash them into smaller pieces, removing the smaller pieces before putting another large piece in the bag.
This method yields much better results and more uniform pieces than just smashing everything at once all willy-nilly. It also helps you isolate individual pieces that you want to preserve. (For example, I was careful to preserve the little “Orcas” piece from the artist’s stamp on the bottom of the broken cup, so that I could use it in my mosaic.)
Lay the pieces all out so you can see what you have to work with.
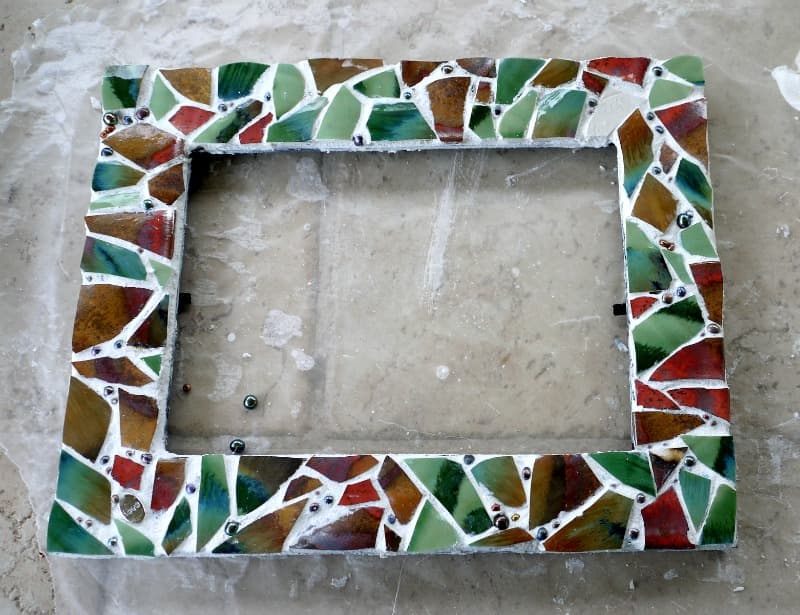
Put on the nitrile gloves. Use the plastic knife to spread a layer of the adhesive/grout onto the frame. Work in small sections so the grout doesn't dry out.
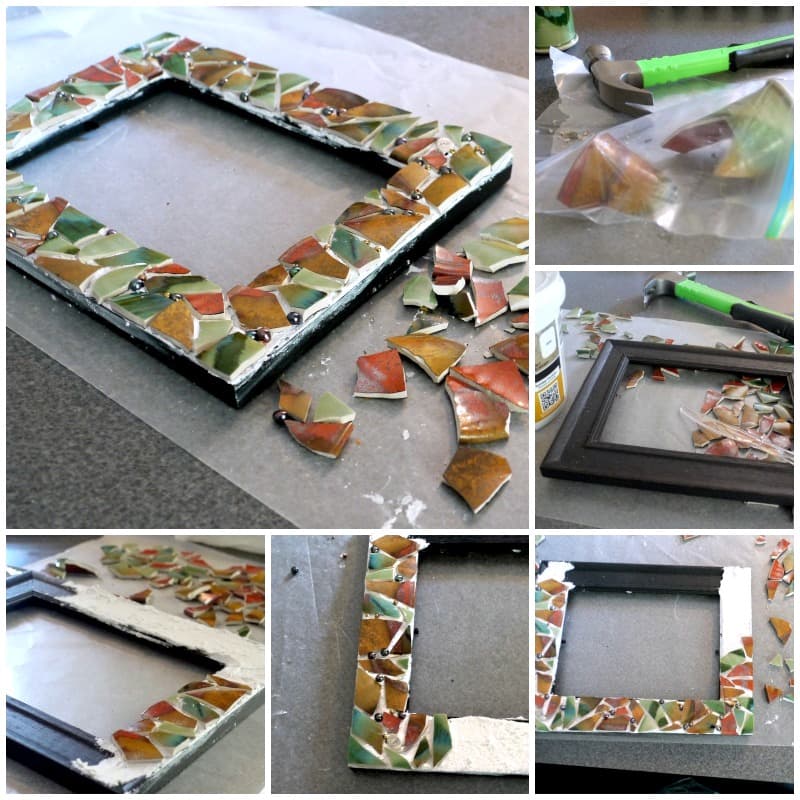
Place the broken pieces of the Smashed Object onto the grout and press them in a little. (Be careful – there are some sharp edges there!) Once you have the frame covered with larger pieces, fill in smaller areas with embellishment items if you wish.
Allow everything to set up for a few hours.
Grout the Broken Ceramic Pieces
Safety first. Put your gloves on again!
Work the prepared grout into the spaces between the pieces. (Once again, there are some really sharp edges there, so be careful!!)
Using a moist (not wet) sponge, remove all the visible grout from the faces of the smashed object pieces. There will still be a film on them, but you can get most of it this way.
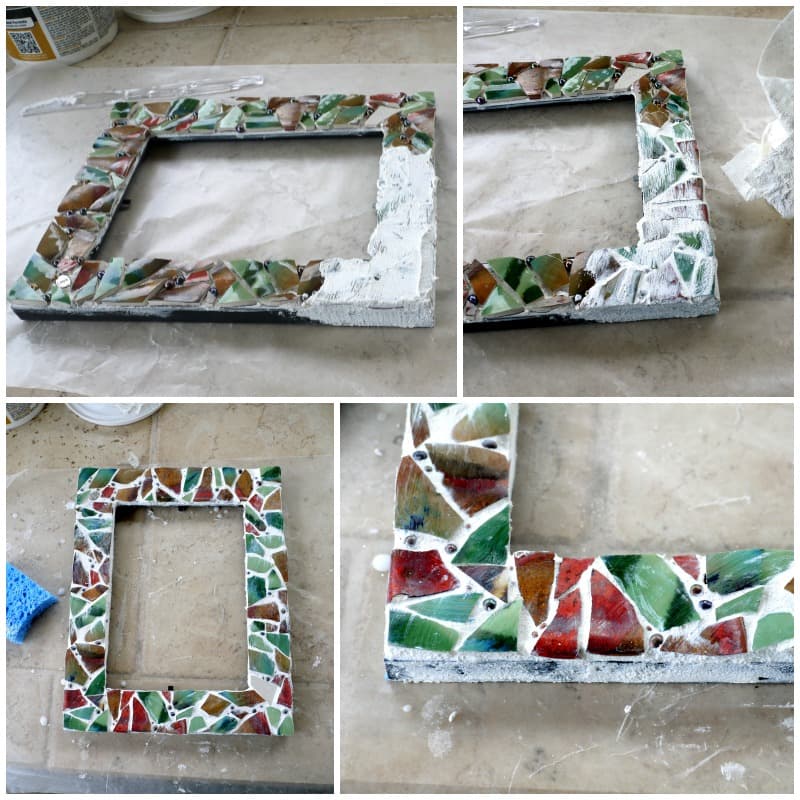
Let mosaicked frame dry for about 20 minutes.
Carefully polish each mosaic piece with a clean white cloth or paper towel – first wet, then dry. This can take a bit of time, even on a small project, but it is definitely worth the trouble. (Clean socks work well for this step.)
Seal the Grout
If you are making a mosaic on something that may get wet (e.g., serving tray, coffee tabletop), be sure to seal the final project with a grout sealer.
Let everything dry for 24 hours before using your new mosaic frame.
FAQs
Broken china and pottery can be SHARP! But you don't need to smooth every edge. Just make sure you use enough grout to thoroughly cover all sharp edges.
Once your project is dry, feel it carefully. If anything seems too sharp, file it carefully with a metal fingernail file as needed, and then apply more grout to the area to cover any remaining sharp edges.
Related Posts
Broken Ceramics Upcycle: Mosaic Frame
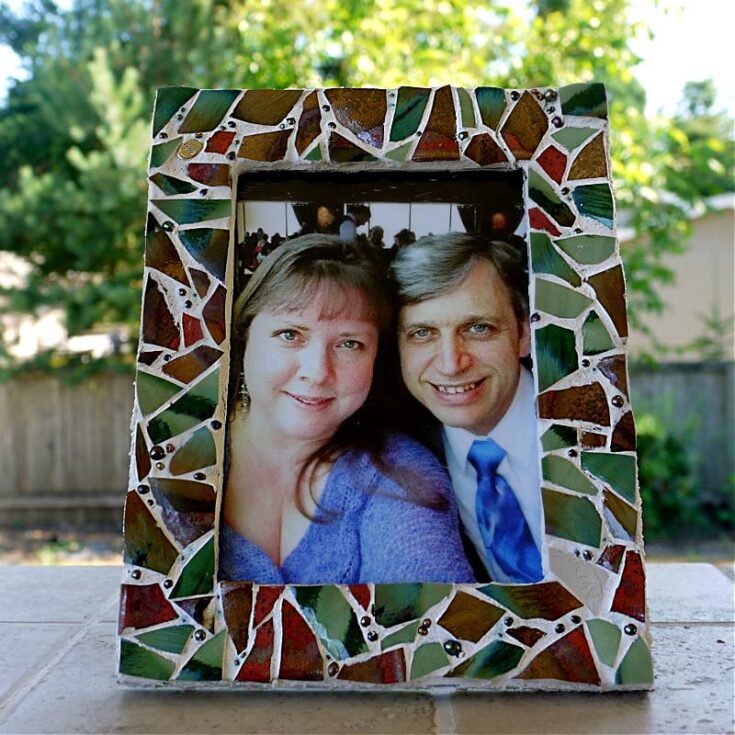
Step-by-step directions for upcycling broken plates, cups, bowls, and other broken pottery into a beautiful Mosaic Picture Frame.
Materials
- Old, wide-rimmed picture frame (It doesn't need to be fancy, or even in good shape: I saved this one from the recycling bin.)
- Old plates, cup, etc (i.e., ceramics to smash)
- Tile Adhesive (Weldbond 8-50160 Multi-Purpose Adhesive Glue)
- Premixed Tile Grout (Jennifer's Mosaics Powdered Grout)
- Buttons, beads, or assorted do-das for embellishing (Totally optional. I used some extras from my beading supplies.)
- Clean sponge
- Paper towels
- Water
- Thick, sturdy bag in which to smash things.
- Nitrile gloves (or any latex or non-latex gloves)
- Plastic knife
- Grout sealer (optional: use if you are mosaicking something that may get wet (i.e., serving tray, coffee tabletop, etc.)
Tools
- Safety goggles
- Safety Gloves
- Hammer
Instructions
Set the Mosaic Pieces
- Put on the safety goggles & safety gloves.
- Put the Object To Be Smashed into the bag.
- Using the hammer, carefully smash the OTBS into large pieces using one intentional blow. This should give you a number of large pieces.
- Take the large pieces out of the bag. Then I put them back in, one at a time, and smash them into smaller pieces, removing the smaller pieces before putting another large piece in the bag.
- Lay the pieces all out so you can see what you have to work with.
- Take off the safety gloves and put on the nitrile gloves.
- Use the plastic knife to spread a layer of the adhesive/grout onto the frame. Work in small sections so the grout doesn't dry out.
- Place the broken pieces of the Smashed Object onto the grout and press them in a little. (Be careful – there are some sharp edges there!)
- Once you have the frame covered with larger pieces, fill in smaller areas with embellishment items if you wish.
- Allow everything to set up for a few hours.
Grout the Broken Ceramic Pieces
- Safety first. Put your nitrile gloves on again!
- Work prepared grout into the spaces between the pieces. (Once again, there are some really sharp edges there, so be careful!!)
- Using a moist (not wet) sponge, remove all the visible grout from the faces of the smashed object pieces. There will still be a film on them, but you can get most of it this way.
- Let mosaicked frame dry for about 20 minutes.
- Carefully polish each mosaic piece with a clean white cloth or paper towel – first wet, then dry.
Seal the Grout
If you are mosaicking something that may get wet (e.g., serving tray, coffee tabletop), be sure to seal the final project with a grout sealer.
Let everything dry for 24 hours before using your beautiful new frame.
Notes
If you are making a mosaic on something that may get wet (e.g., serving tray, coffee tabletop), be sure to seal the final project with a grout sealer.

Want More Free Recipes?
Subscribe to our newsletter to get family-friendly recipes and cozy living ideas in your inbox each week!
Find us on Instagram, Pinterest, and Facebook, too.
Thank you for visiting the Good Hearted Woman. Remember to bookmark this site, and come back soon!
Originally posted August 28, 2014.





Pech says
What a fantastic way to give second life to an object so it is still functional and reminder of memories in a whole new way, and a fun project with a sexy risk element of danger!
Shelly says
What a great way to preserve your memories in a new form. I will have to remember to try this.
kelsey says
what fabulous re-purposing!
http://www.ladiesinnavy.com
Melinda says
Hey, this looks great! I may try it!